A MapMapMap has a GraphicsEffectsGraphicsEffectsGraphicsEffects object dedicated to map-wide graphics effects.
This article gives you an overview of the available effects and how you can use them in your application.
Light effect
The light effectlight effectlight effect controls the light that shades a map in 3D.
It drives normal-based shading and the appearance of physically based rendering (PBR) materials.
A map has exactly one active light, which you retrieve and configure through getLightgetLightgetLight.
By default a map is lit with a headlight, so that 3D content is shaded even when your application configures no light explicitly.
You configure the light by setting one of three light models through setModelsetModelsetModel:
-
Headlight (the default): a light that follows the orientation of the viewer. You can give it a fixed vertical
pitchOffset, or let it follow the camera’s pitch. -
Directional: a light with a fixed, user-specified direction.
-
Sunlight: a directional light with a direction that approximates the direction of sunlight at a given time.
Each light has an ambient color, which lights the whole scene evenly, and a diffuse color, which is the color of the directional light itself. Setting a model replaces whichever light was active before.
To turn lighting off entirely, disable the effect with setEnabledsetEnabledsetEnabled: the configured light is kept and restored when you enable the effect again.
If you don’t configure any light, the map uses the default headlight: a dark gray ambient color, a white diffuse color, and
a pitchOffset of -45 degrees.
See the LightEffectLightEffectLightEffect API reference for the details of each light.

// A map is lit with a headlight by default. Retrieve the light effect to change it.
LightEffect& light = map->getEffects().getLight();

// Use a fixed directional light: dark gray ambient, white diffuse, coming from the north-west and above.
light.setModel(DirectionalLightModel::newBuilder()
                   .ambientColor(Color{64, 64, 64}) //
                   .diffuseColor(Color::white())
                   .direction(Coordinate{-1.0, 1.0, 1.0})
                   .build());

// Or approximate the direction of the sun at the current time (milliseconds since 01 January 1970 UTC).
auto now = std::chrono::system_clock::now();
auto epochMilliseconds = std::chrono::duration_cast<std::chrono::milliseconds>(now.time_since_epoch()).count();
light.setModel(SunlightModel::newBuilder().time(epochMilliseconds).build());

// Light models are immutable: start from the active light and rebuild it to adjust its colors afterwards.
if (auto sunlight = std::dynamic_pointer_cast<SunlightModel>(light.getModel())) {
  light.setModel(sunlight->asBuilder().ambientColor(Color{80, 80, 80}).diffuseColor(Color::white()).build());
}

// Disable lighting entirely.
light.setEnabled(false);
// A map is lit with a headlight by default. Retrieve the light effect to change it.
LightEffect light = map.Effects.Light;
// Use a fixed directional light: dark gray ambient, white diffuse, coming from the north-west and above.
light.Model = DirectionalLightModel.NewBuilder()
.AmbientColor(Color.FromArgb(64, 64, 64))
.DiffuseColor(Color.White)
.Direction(new Luciad.Cartesian.Coordinate(-1.0, 1.0, 1.0))
.Build();
// Or approximate the direction of the sun at the current time (milliseconds since 01 January 1970 UTC).
long epochMilliseconds = DateTimeOffset.UtcNow.ToUnixTimeMilliseconds();
light.Model = SunlightModel.NewBuilder().Time(epochMilliseconds).Build();
// Adjust the colors of the active light afterwards by rebuilding its model.
if (light.Model is SunlightModel sunlight)
{
light.Model = sunlight.AsBuilder().AmbientColor(Color.FromArgb(80, 80, 80)).DiffuseColor(Color.White).Build();
}
// Disable lighting entirely.
light.IsEnabled = false;// A map is lit with a headlight by default. Retrieve the light effect to change it.
LightEffect light = map.getEffects().getLight();
// Use a fixed directional light: dark gray ambient, white diffuse, coming from the north-west and above.
light.setModel(DirectionalLightModel.newBuilder()
.ambientColor(Color.valueOf(Color.rgb(64, 64, 64)))
.diffuseColor(Color.valueOf(Color.WHITE))
.direction(new Coordinate(-1.0, 1.0, 1.0))
.build());
// Or approximate the direction of the sun at the current time (milliseconds since 01 January 1970 UTC).
light.setModel(SunlightModel.newBuilder().time(System.currentTimeMillis()).build());
// Adjust the colors of the active light afterwards.
light.setModel(((SunlightModel) light.getModel()).asBuilder()
.ambientColor(Color.valueOf(Color.rgb(80, 80, 80)))
.diffuseColor(Color.valueOf(Color.WHITE))
.build());
// Disable lighting entirely.
light.setEnabled(false);Some other effects build on the light: the atmospheric scattering model requires a light to be configured, and the fog’s lightColor sun-glow tint is only visible when a light is configured.
Lighting shades geometry through its surface normals and PBR materials, so you see its effect wherever there is 3D geometry to shade, such as meshes, PBR assets, and terrain with elevation. A flat, top-down 2D map has little such geometry, so lighting usually makes no visible difference there.
How an individual object turns this light into pixels is decided by its shading modelshading modelshading model, which you set on its style. See How to configure shading models for the available shading models, what physically based rendering needs from the light and the environment map, and how to tune a material.
Ambient occlusion effect
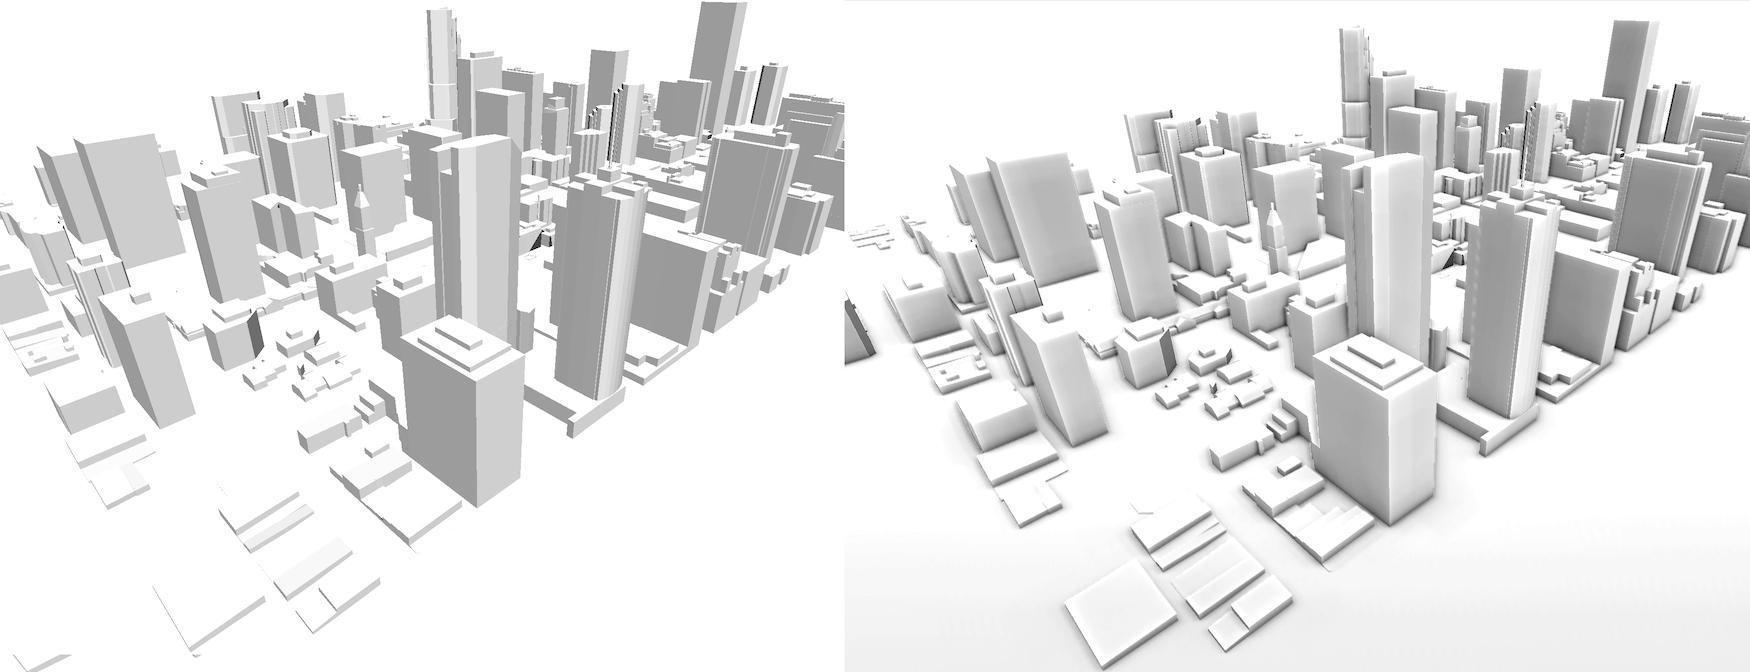
Ambient occlusionAmbient occlusionAmbient occlusion is an effect that mimics the natural phenomenon of shadows appearing on surfaces where objects are close to each other. The difference between shadows and ambient occlusion is that ambient occlusion isn’t dependent on light sources. It operates solely on the geometry of your dataset.
// get ambient occlusion effect from the map.
AmbientOcclusionEffect& ambientOcclusion = map->getEffects().getAmbientOcclusion();

// enable ambient occlusion effect.
ambientOcclusion.setEnabled(true);

// configure the ambient occlusion parameters.
ambientOcclusion.setModel(AmbientOcclusionModel::newBuilder()
                              .radius(28.0) //
                              .power(0.8)
                              .build());
// get ambient occlusion effect from the map.
AmbientOcclusionEffect ambientOcclusion = map.Effects.AmbientOcclusion;
// enable ambient occlusion effect.
ambientOcclusion.IsEnabled = true;
// configure ambient occlusion by giving it a model.
ambientOcclusion.Model = AmbientOcclusionModel.NewBuilder().Radius(28.0).Power(0.8).Build();// get ambient occlusion effect from the map.
AmbientOcclusionEffect ambientOcclusion = _map.getEffects().getAmbientOcclusion();
// enable ambient occlusion effect.
ambientOcclusion.setEnabled(true);
// configure the ambient occlusion parameters.
ambientOcclusion.setModel(AmbientOcclusionModel.newBuilder()
.radius(28.0)
.power(0.8)
.build());You can use ambient occlusion to enhance your map with a greater sense of depth. It defines objects close to the ground more clearly. It’s highly recommended for data sets that were computer-generated, such as 3D CAD and BIM models.
You can control the radius and the power of the ambient occlusion effect.
LuciadCPillar implements ambient occlusion as Screen Space Ambient Occlusion (SSAO).
Ambient occlusion is recommended for cases in which 3D datasets with simple colors are visualized. For these types of datasets, ambient occlusion can help give the dataset more depth and make it easier to understand how geometry relates to each other. It also improves the visual quality of such datasets, and gives a better impression in general.
Ambient occlusion isn’t recommended for 3D datasets that were captured using real-life photography, such as reality meshes. Ambient occlusion already occurs naturally in the imagery of those datasets.
Ambient occlusion works on 3D maps only and has no effect on transparent data.
Ambient occlusion offers a performance hint to trade visual quality against rendering performance:
-
PreferPerformance: best for devices with limited capabilities. -
PreferQuality: delivers the best visual result, but may not be suitable for all devices.
LuciadCPillar defaults to PreferPerformance. You can switch it with:
ambientOcclusion.setModel(ambientOcclusion.getModel()->asBuilder().performanceHint(PerformanceHint::PreferQuality).build());ambientOcclusion.Model = ambientOcclusion.Model.AsBuilder().PerformanceHint(PerformanceHint.PreferQuality).Build();ambientOcclusion.setModel(ambientOcclusion.getModel().asBuilder()
.performanceHint(PerformanceHint.PreferQuality)
.build());For general performance considerations, see Performance considerations at the end of this article.
Eye-dome lighting effect
Eye-dome lightingEye-dome lightingEye-dome lighting (EDL) is a non-photorealistic lighting model that accentuates the shapes of objects by shading their outlines. Eye-dome lighting is similar to ambient occlusion. It can give the dataset more depth and make it easier to understand how geometries relate to each other.
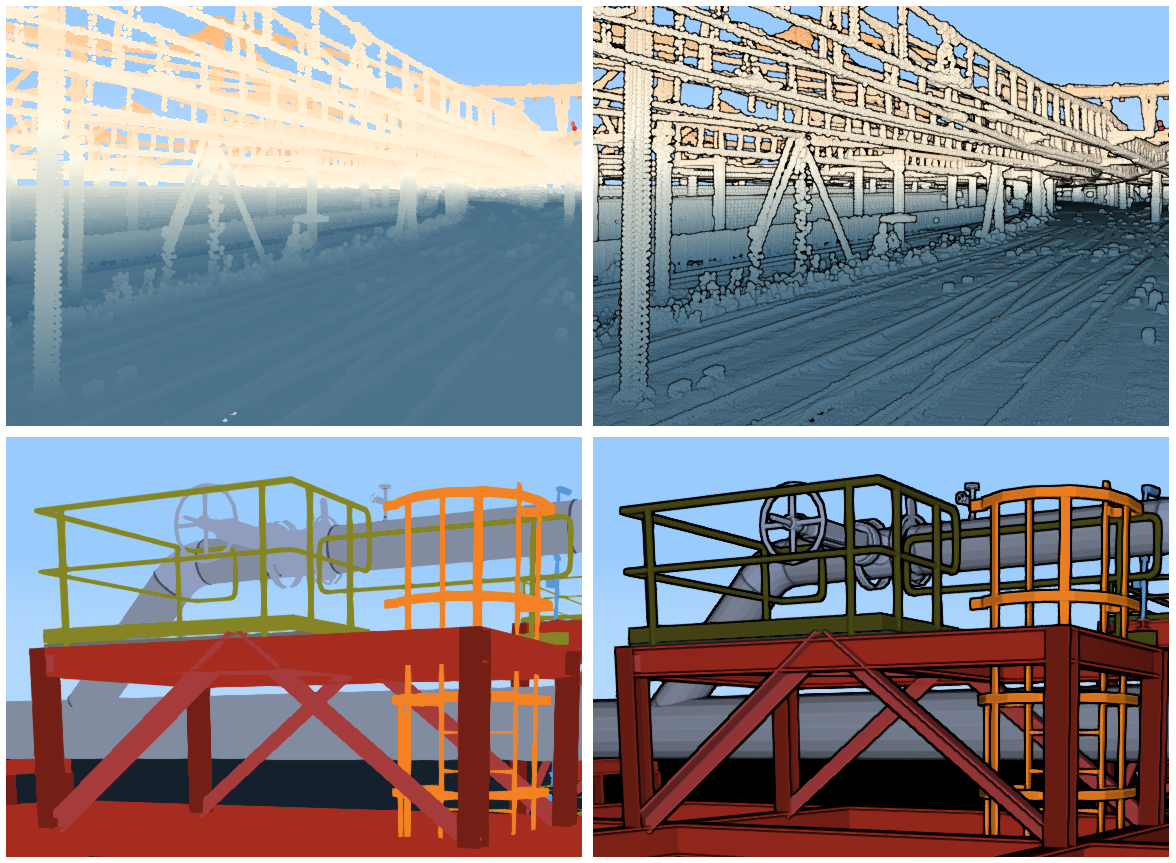
EDL can help to interpret datasets that have little or no visual variance. It’s useful for 3D datasets in particular, such as CAD and BIM models, or point clouds. Eye-dome lighting isn’t recommended for 3D datasets that were captured using real-life photography, such as reality meshes.
// get eye-dome lighting effect from the map.
EyeDomeLightingEffect& eyeDomeLighting = map->getEffects().getEyeDomeLighting();

// enable eye-dome lighting effect.
eyeDomeLighting.setEnabled(true);

// configure the eye-dome lighting parameters.
eyeDomeLighting.setModel(EyeDomeLightingModel::newBuilder()
                             .window(1) //
                             .strength(0.5)
                             .color(Color::blue())
                             .build());
// get eye-dome lighting effect from the map.
EyeDomeLightingEffect eyeDomeLighting = map.Effects.EyeDomeLighting;
// enable eye-dome lighting effect.
eyeDomeLighting.IsEnabled = true;
// configure eye-dome lighting by giving it a model.
eyeDomeLighting.Model = EyeDomeLightingModel.NewBuilder().Window(1).Strength(0.5).Color(Color.Blue).Build();// get eye-dome lighting effect from the map.
EyeDomeLightingEffect eyeDomeLighting = _map.getEffects().getEyeDomeLighting();
// enable eye-dome lighting effect.
eyeDomeLighting.setEnabled(true);
// configure the eye-dome lighting parameters.
eyeDomeLighting.setModel(EyeDomeLightingModel.newBuilder()
.window(1)
.strength(0.5)
.color(Color.valueOf(Color.BLUE))
.build());You can control the:
-
window: to increase the thickness of the applied EDL shade.
-
strength: to soften or harden the applied EDL shade.
-
color: to change the color of the applied EDL shade.
Technically, the lighting model applies a shade to each pixel, based on the depth difference between that pixel and its surrounding pixels.
Eye-dome lighting works on 3D maps only. It has no effect on 2D maps.
For general performance considerations, see Performance considerations at the end of this article.
Depth-of-field effect
Depth of fieldDepth of fieldDepth of field blurs parts of the map based on their distance to the camera. It mimics the behavior of a camera lens with a wide aperture: objects at the focus distance appear sharp, while objects closer to or farther from the camera are progressively blurred.
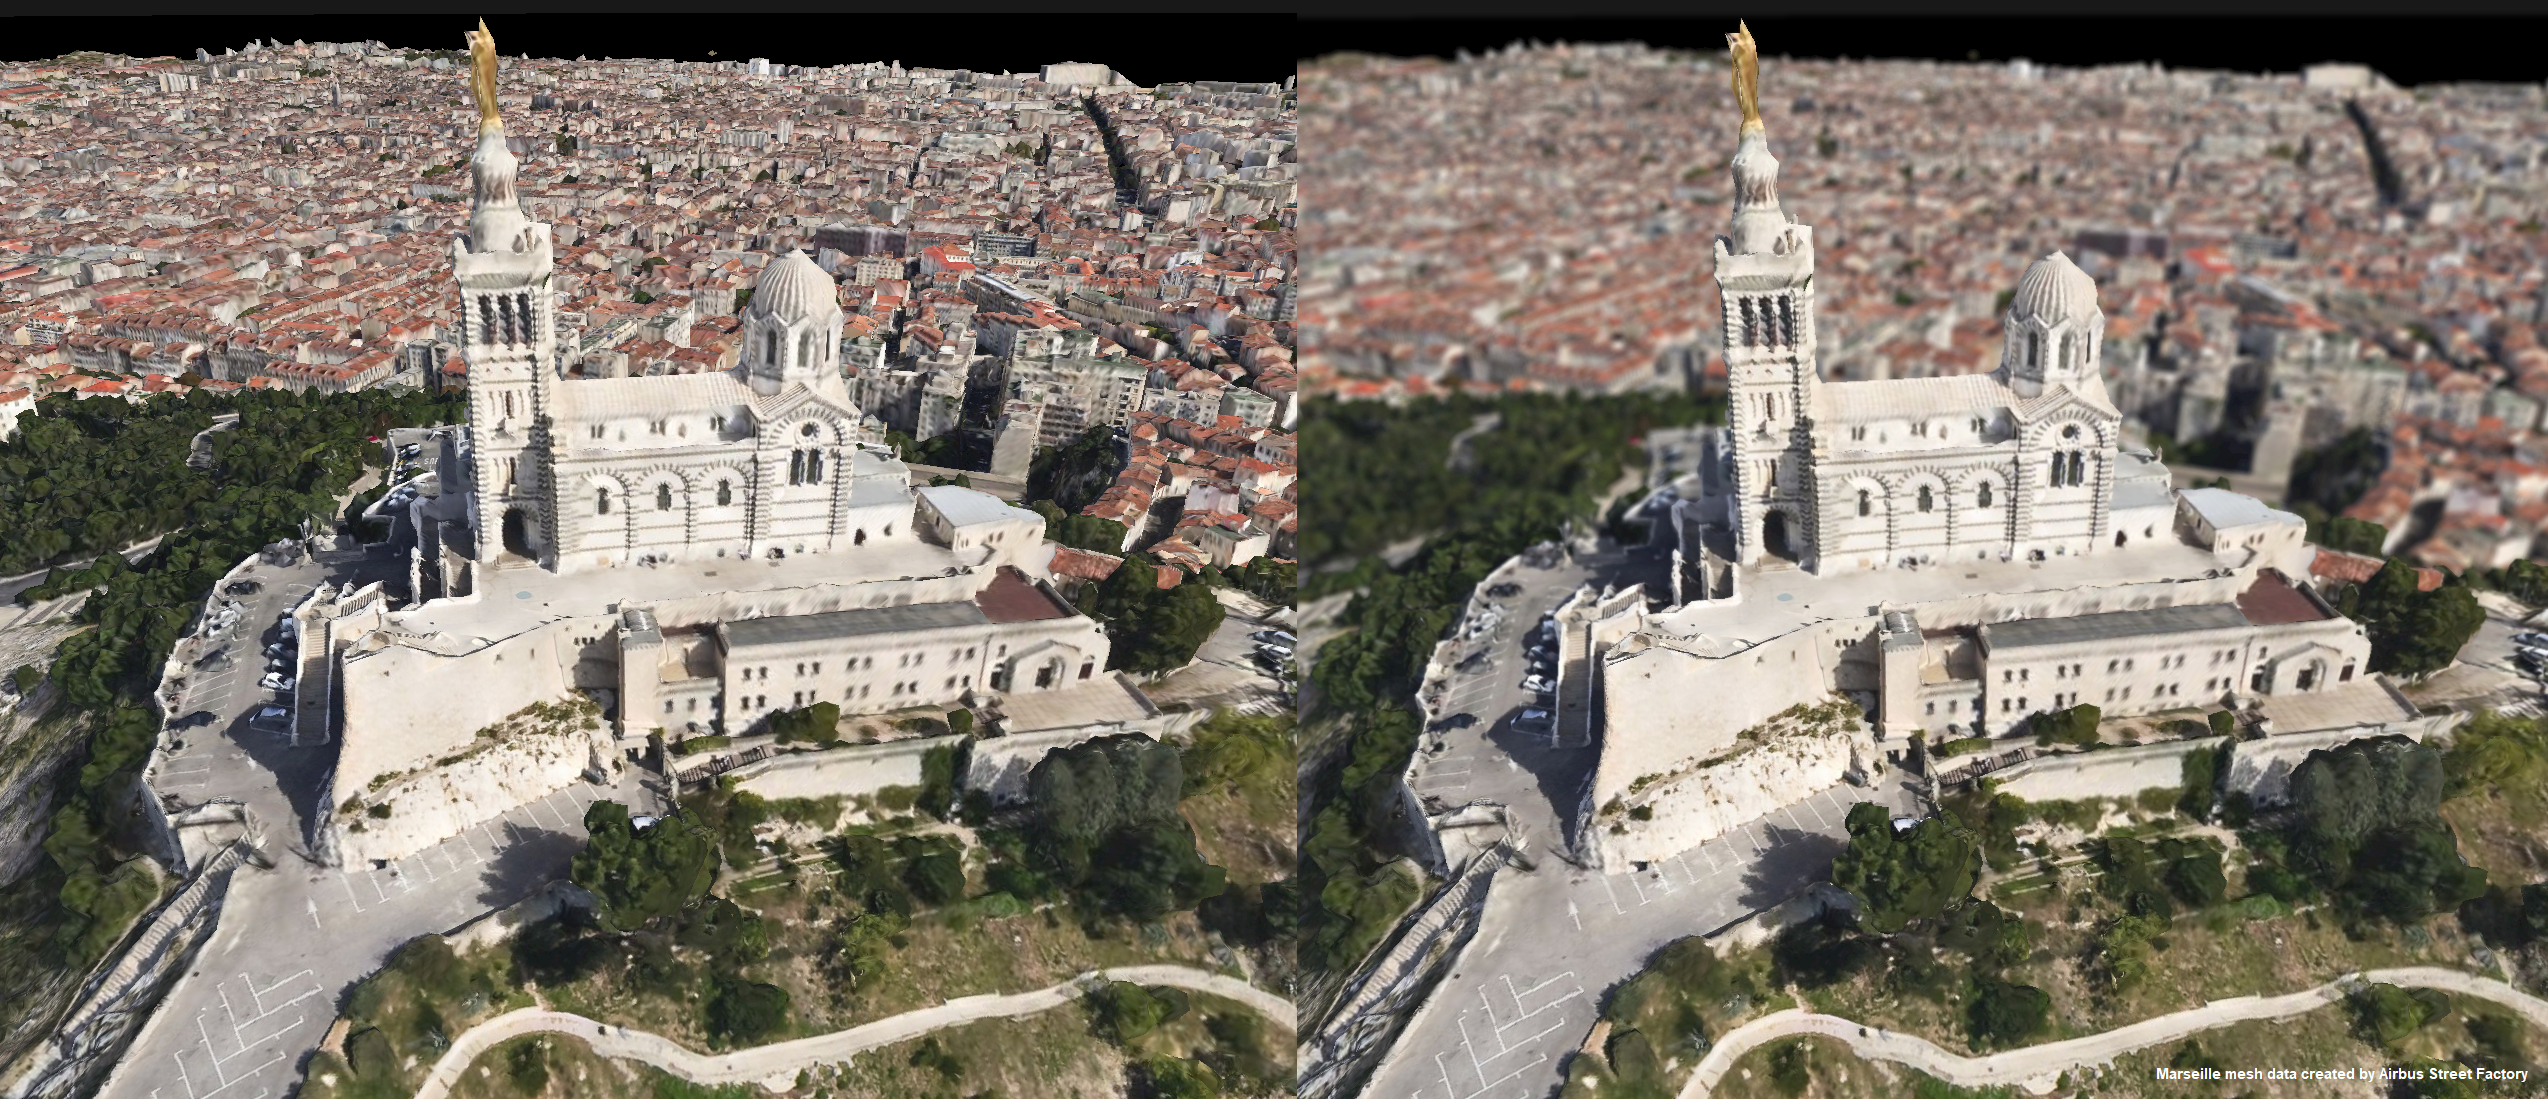
Depth of field serves two main purposes:
-
Increase the visual quality of your map.
-
Draw the user’s attention to a specific area of your map.
Some examples of the second use case are:
-
Automatically focusing the area around the mouse pointer, and blurring out the rest of the map
-
Putting emphasis on a selected object
-
Automatically focusing on the area visible at the center of the screen
// Get depth of field effect from the map.
DepthOfFieldEffect& depthOfField = map->getEffects().getDepthOfField();

// Enable depth of field effect.
depthOfField.setEnabled(true);

// Configure the depth of field parameters.
depthOfField.setModel(DepthOfFieldModel::newBuilder()
                          .blurStrength(1.0) //
                          .focusDistance(300.0)
                          .blurStartDistance(100.0)
                          .fullBlurDistance(500.0)
                          .build());
// get depth of field effect from the map.
DepthOfFieldEffect depthOfField = map.Effects.DepthOfField;
// enable depth of field effect.
depthOfField.IsEnabled = true;
// configure depth of field by giving it a model.
depthOfField.Model = DepthOfFieldModel.NewBuilder().BlurStrength(1.0).FocusDistance(300.0).BlurStartDistance(100.0).FullBlurDistance(500.0).Build();// get depth of field effect from the map.
DepthOfFieldEffect depthOfField = _map.getEffects().getDepthOfField();
// enable depth of field effect.
depthOfField.setEnabled(true);
// configure the depth of field parameters.
depthOfField.setModel(DepthOfFieldModel.newBuilder()
.blurStrength(1.0)
.focusDistance(300.0)
.blurStartDistance(100.0)
.fullBlurDistance(500.0)
.build());You can control the:
-
focusDistance: the distance in meters from the camera at which objects are perfectly in focus. This distance defines the focus plane, around which the
blurStartDistanceandfullBlurDistanceare measured. Changing it moves the entire sharp and blurred pattern nearer to or farther from the camera. -
blurStartDistance: the distance in meters from the focus plane beyond which objects start to blur. Within this distance objects stay perfectly sharp.
-
fullBlurDistance: the distance in meters from the focus plane at which the blur saturates and objects are fully blurred. Objects between the blur-start distance and the full-blur distance are blurred progressively. The full-blur distance should be larger than the blur-start distance. If it’s not, there is no gradual transition: objects are sharp within the blur-start distance and fully blurred beyond it.
-
blurStrength: a multiplier for the amount of blur applied to out-of-focus objects. This value scales the amount of blur applied to out-of-focus objects: at the default of 1, fully out-of-focus objects reach the maximum blur. Values above 1 reach the maximum over a shorter distance, and values below 1 soften the blur.
Depth of field works on 3D maps only. It has no effect on 2D maps.
For general performance considerations, see Performance considerations at the end of this article.
Atmosphere and fog effects
Atmosphere effect
You can use the atmosphere effectatmosphere effectatmosphere effect to control how the sky looks on a 3D map. It’s enabled by default and has an effect on 3D views only.
-
A
GradientAtmosphereModelGradientAtmosphereModelGradientAtmosphereModel(the default) draws a simple sky and horizon color gradient. You control it with the sky color and the horizon color. -
A
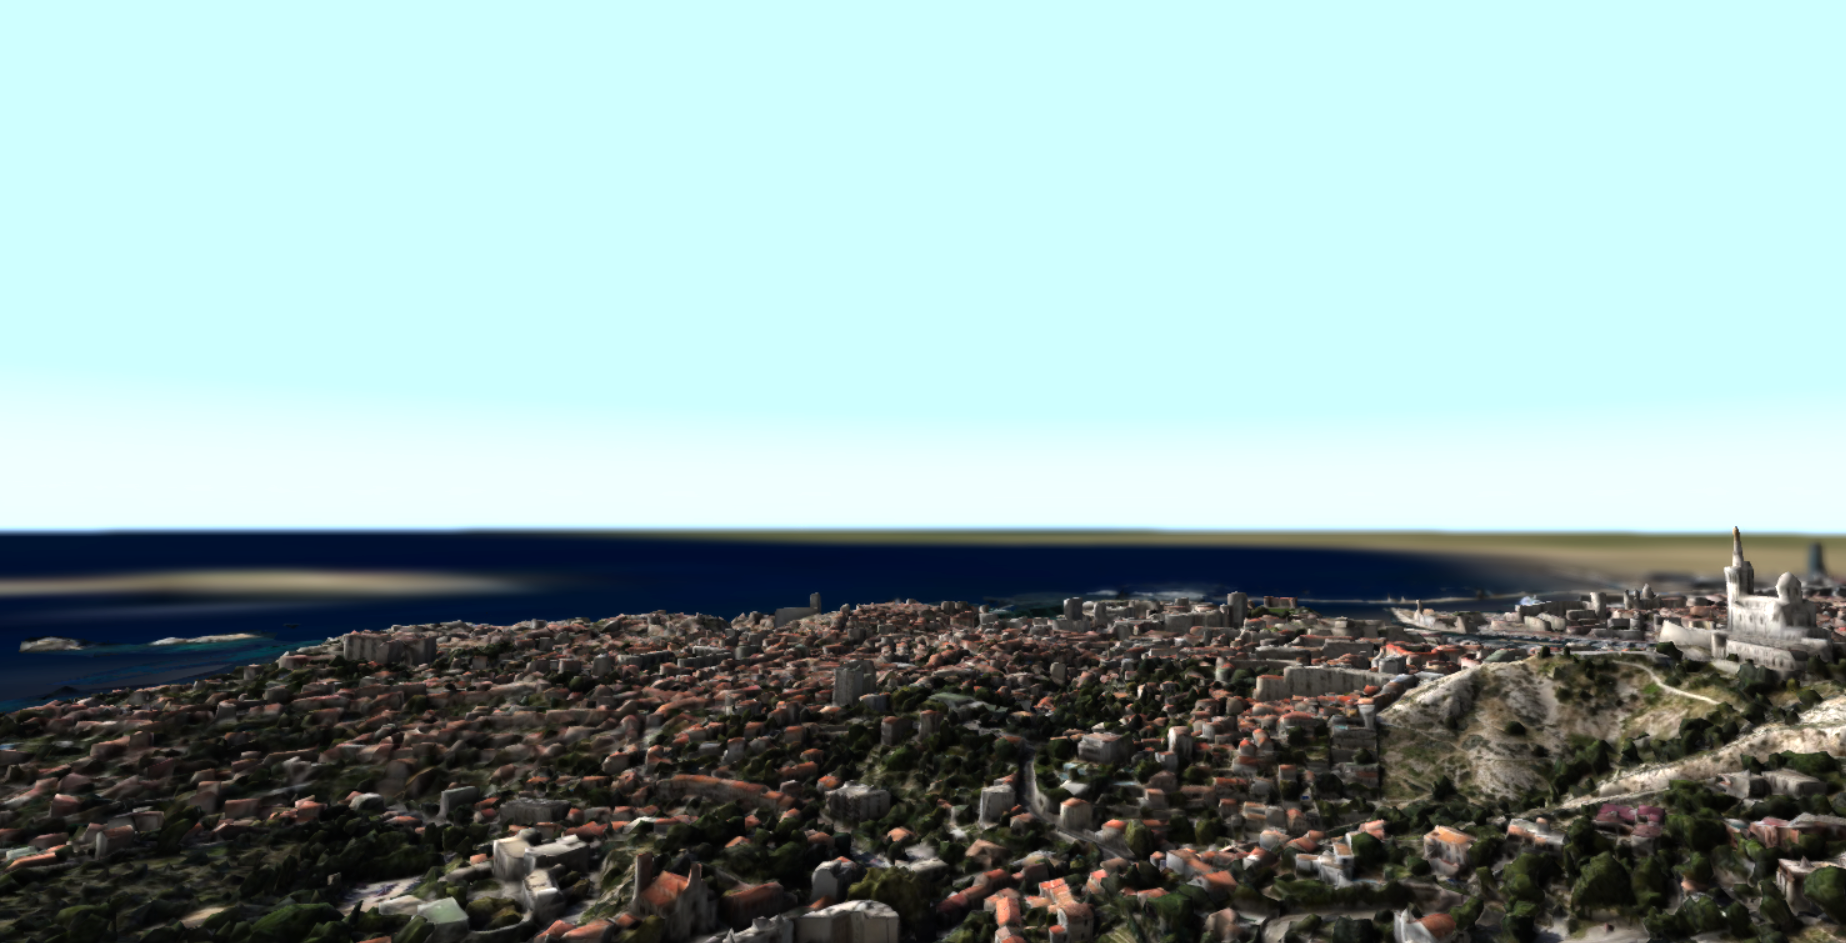
ScatteringAtmosphereModelScatteringAtmosphereModelScatteringAtmosphereModeldraws a physically based Rayleigh/Mie scattering sky. It produces a realistic blue sky, a warm glow around the sun, and, optionally, aerial perspective on distant terrain. Aerial perspective is the effect where distant terrain is tinted by the atmosphere and fades into the sky the farther away it is. It’s why distant mountains look pale and washed-out. Rendering it has a minor additional performance cost compared to the gradient model.
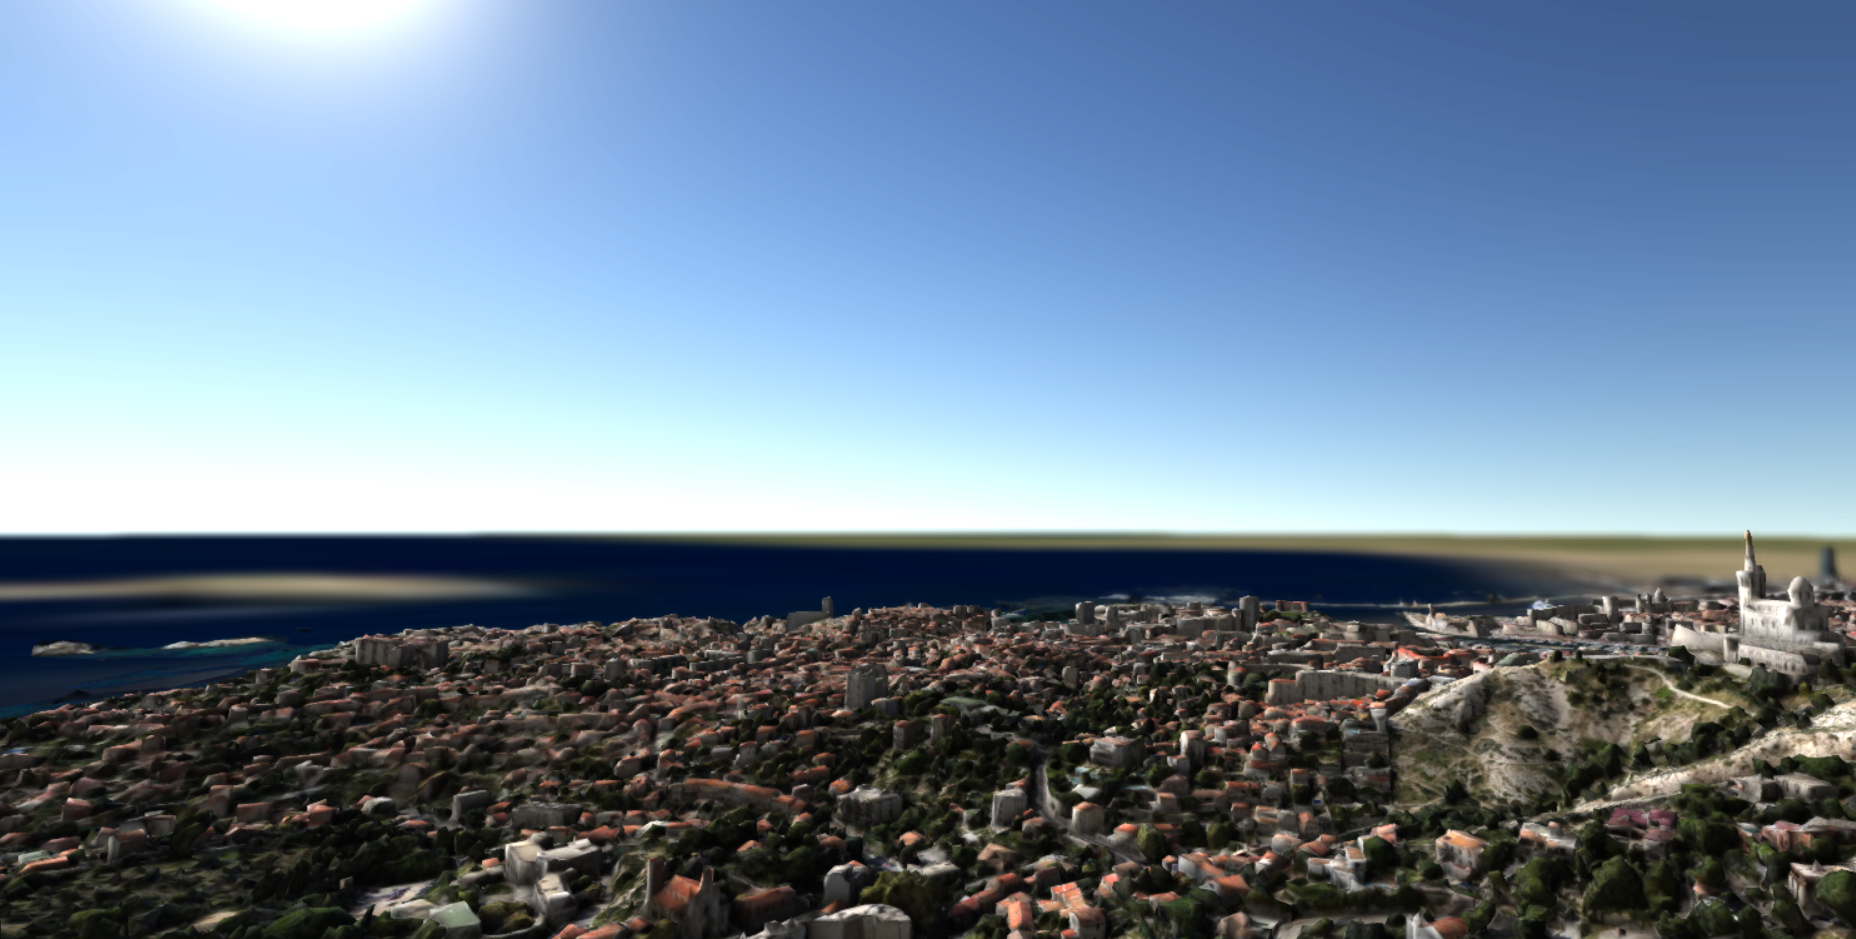
// Get the atmosphere effect from the map.
AtmosphereEffect& atmosphere = map->getEffects().getAtmosphere();

// Switch from the gradient sky to physically-based scattering, tune it, and also apply aerial perspective
// to the terrain surface with aerialPerspective.
// Note: scattering also requires a geocentric view and a light configured on the map.
atmosphere.setModel(ScatteringAtmosphereModel::newBuilder()
                        .brightness(2.0) //
                        .rayleighFactor(1.0)
                        .mieFactor(1.0)
                        .mieAnisotropy(0.95)
                        .aerialPerspective(true)
                        .build());
// get atmosphere effect from the map.
AtmosphereEffect atmosphere = map.Effects.Atmosphere;
// switch from the gradient sky to physically-based scattering, tuning it and applying aerial perspective to the terrain surface.
// note: scattering also requires a geocentric view and a light configured on the map.
atmosphere.Model = ScatteringAtmosphereModel.NewBuilder()
.Brightness(2.0)
.RayleighFactor(1.0)
.MieFactor(1.0)
.MieAnisotropy(0.95)
.AerialPerspective(true)
.Build();// get atmosphere effect from the map.
AtmosphereEffect atmosphere = map.getEffects().getAtmosphere();
// switch from the gradient sky to physically-based scattering, tuning it and applying aerial
// perspective to the terrain surface.
// note: scattering also requires a geocentric view and a light configured on the map.
atmosphere.setModel(ScatteringAtmosphereModel.newBuilder()
.brightness(2.0)
.rayleighFactor(1.0)
.mieFactor(1.0)
.mieAnisotropy(0.95)
.aerialPerspective(true)
.build());For the scattering model you can control the:
-
brightness: an exposure multiplier on the scattered light.
-
rayleighFactor: the strength of Rayleigh scattering, which drives the blue of the sky.
-
mieFactor: the strength of Mie scattering, the amount of aerosol haze and the sun glow.
-
mieAnisotropy: how tightly the Mie haze clusters around the sun, in the range [0, 1). A value of 0 spreads the haze evenly across the whole sky, while higher values pull it into a tighter, brighter glow close to the sun. Typical values are between 0.75 and 1 (the default is 0.95).
-
aerialPerspective: whether aerial perspective is enabled, so distant terrain is tinted by the atmosphere in addition to the sky.
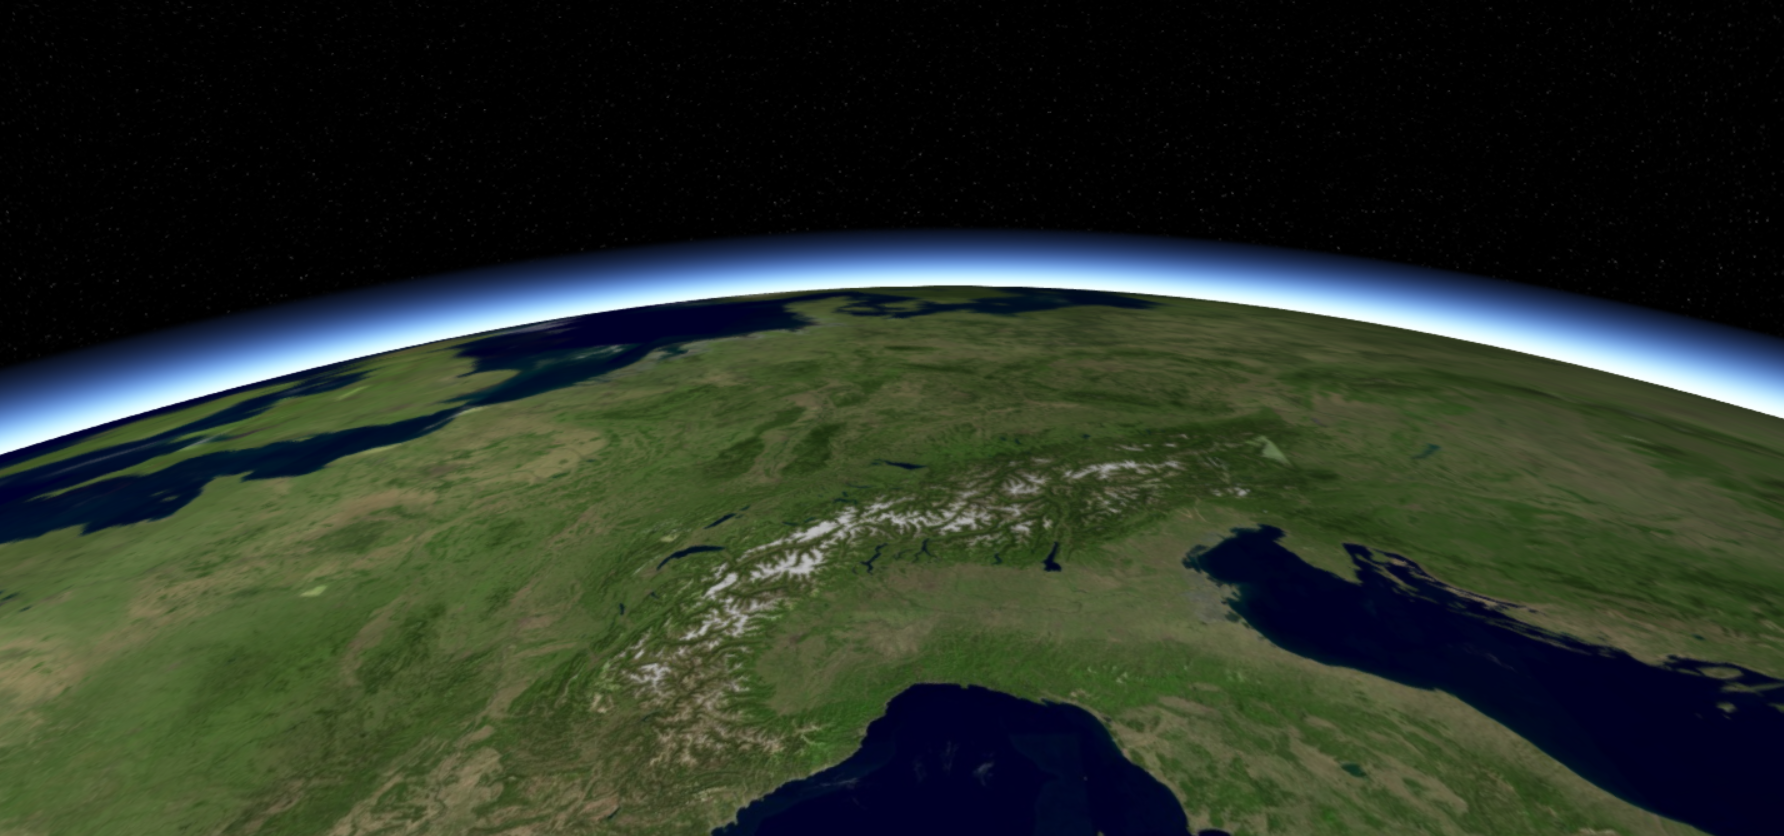
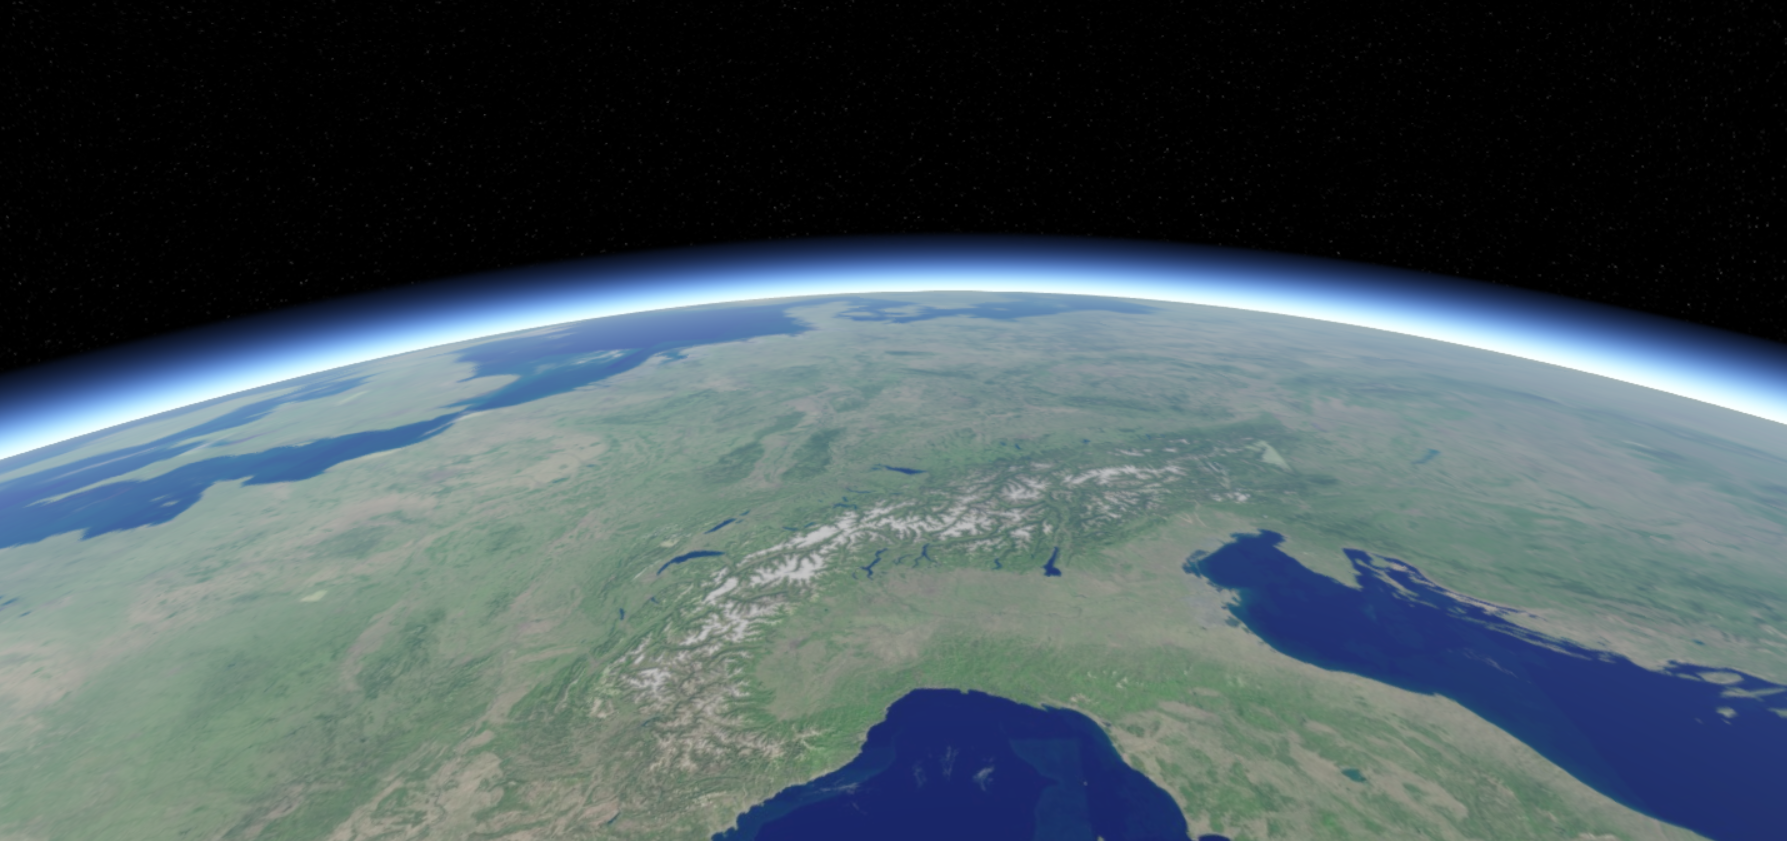
|
The scattering model requires a geocentric 3D view and a light configured through the
|
Fog effect
FogFogFog fades geometry into a fog color as it gets farther from the camera, and optionally as it gets closer to the ground. It greatly improves the perception of depth and scale in large 3D scenes.
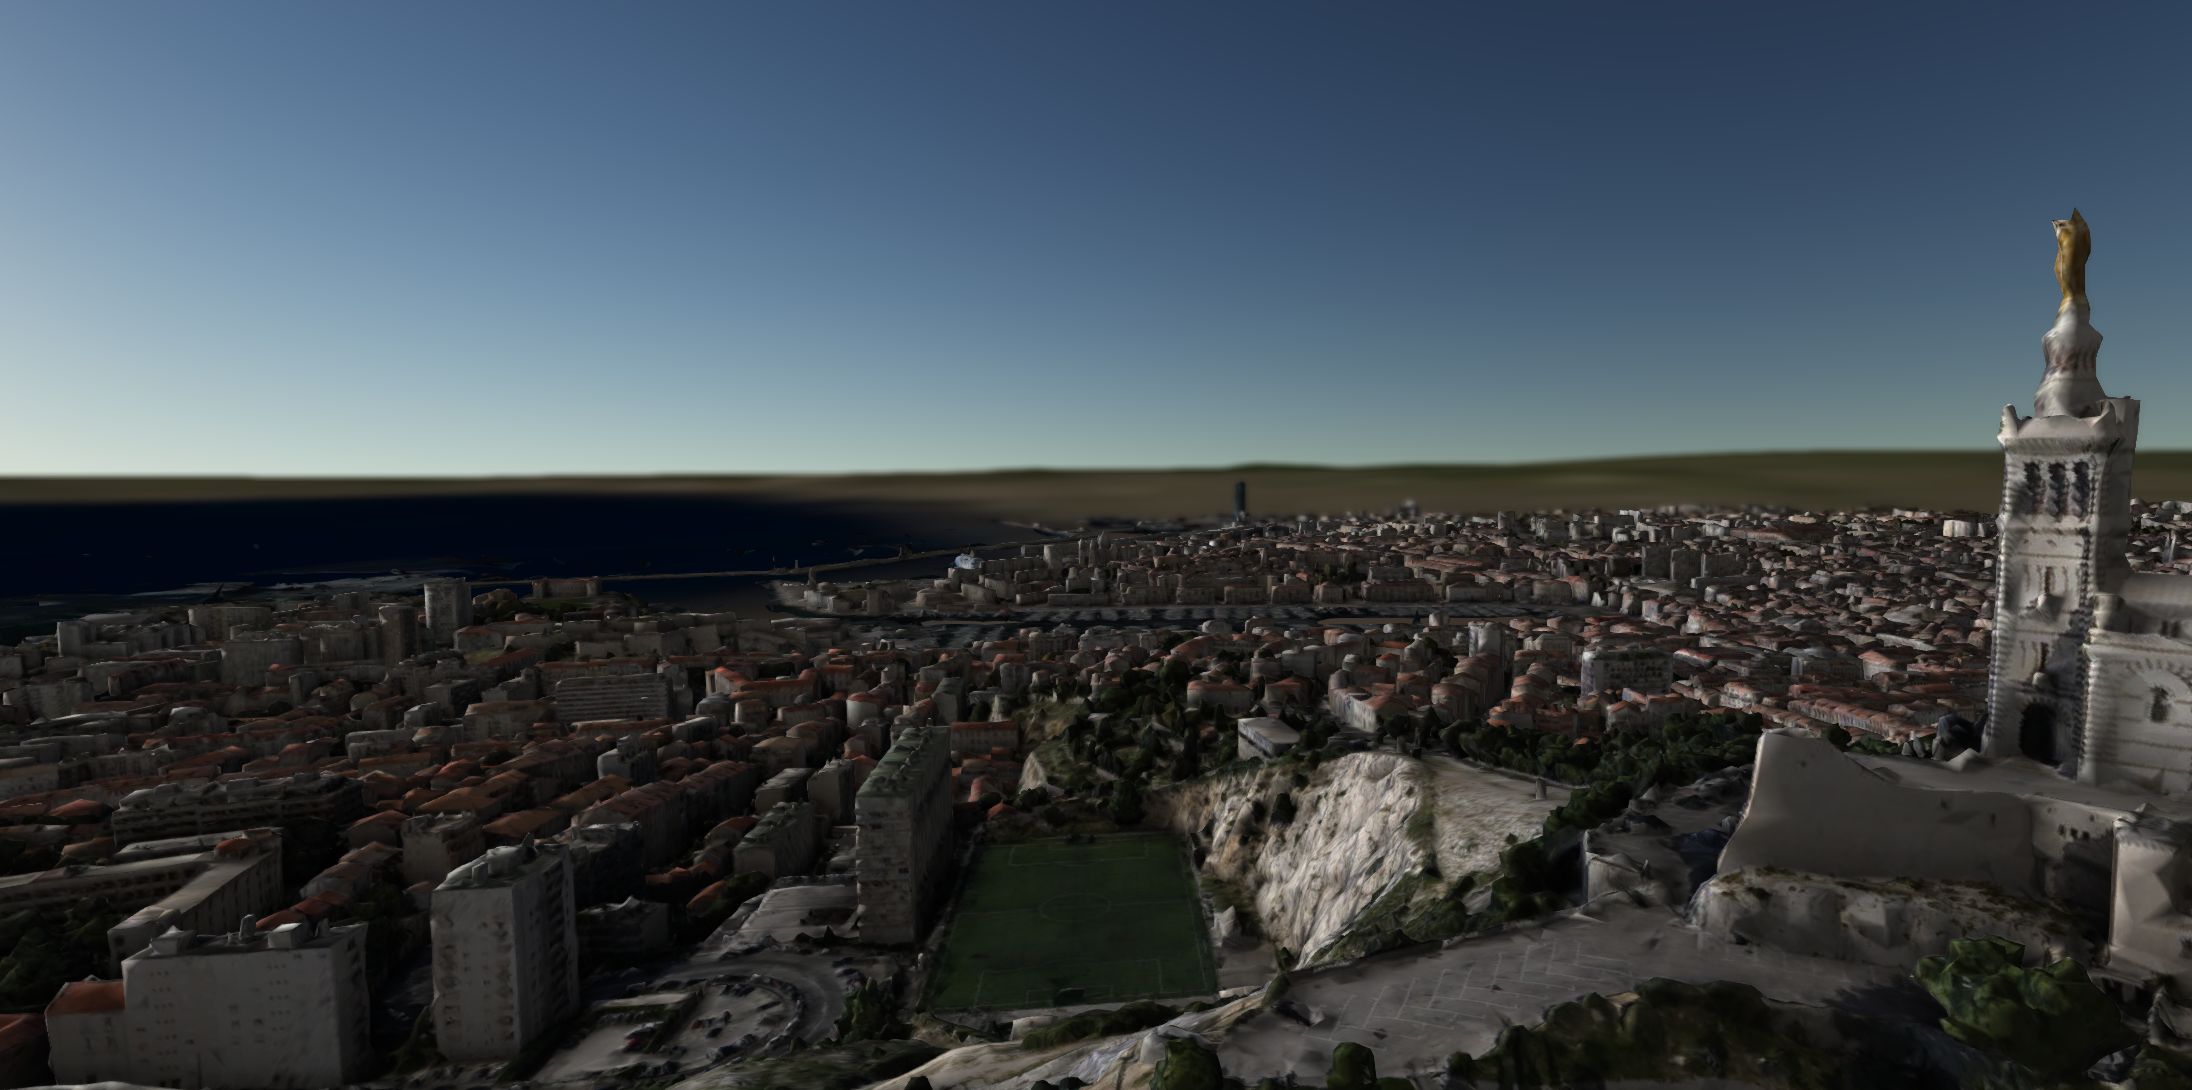
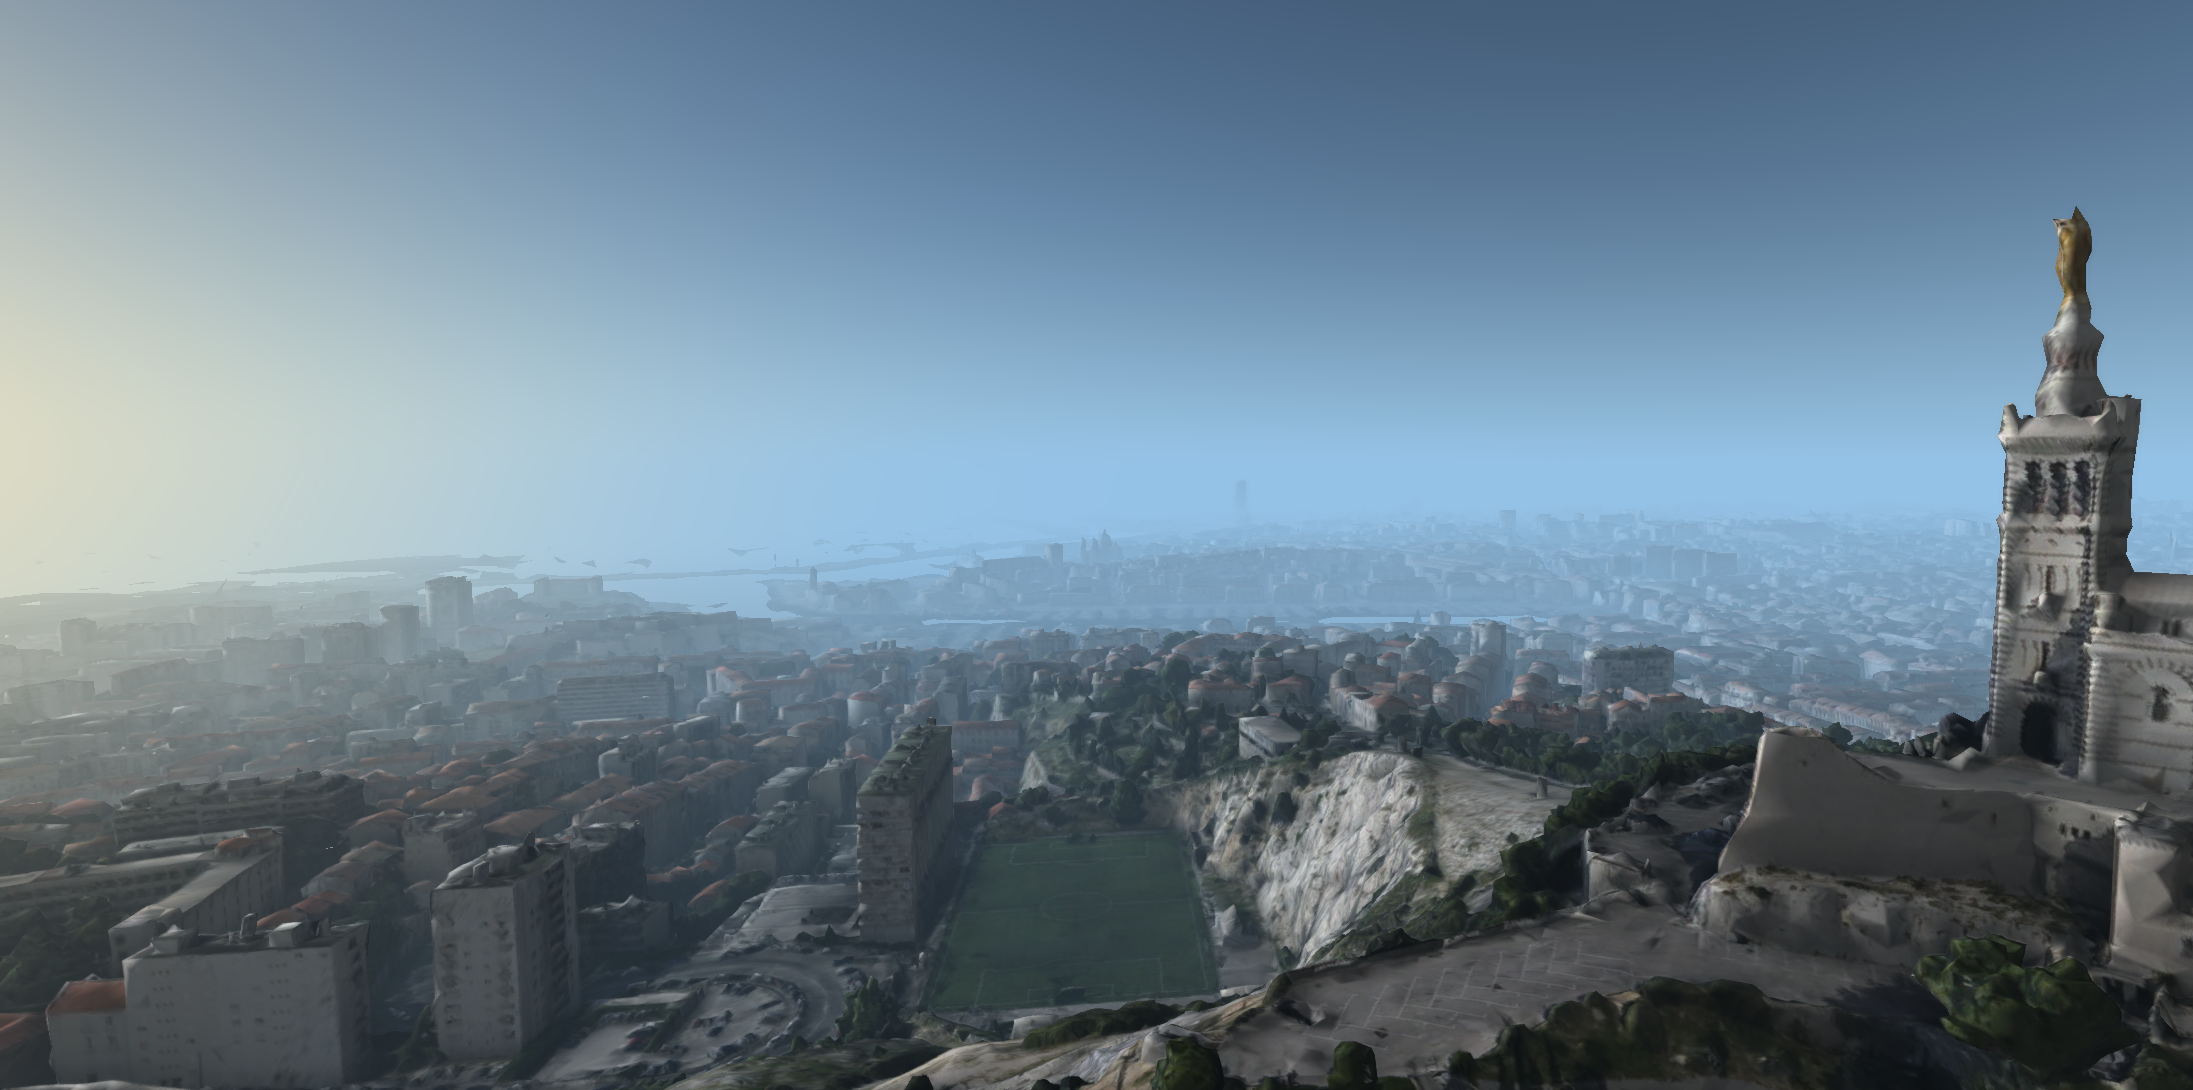
// Get the fog effect from the map.
FogEffect& fog = map->getEffects().getFog();

// Enable the fog effect.
fog.setEnabled(true);

// Configure the fog parameters.
fog.setModel(FogModel::newBuilder()
                 .fogColor(Color(148, 194, 231)) //
                 .lightColor(Color(255, 230, 179))
                 .visibility(50000.0)   // the scene is fully obscured at 50 km
                 .halvingHeight(4000.0) // the fog thins by half every 4 km of altitude
                 .maximumAltitude(20000.0)
                 .build());
// get fog effect from the map.
FogEffect fog = map.Effects.Fog;
// enable fog effect.
fog.IsEnabled = true;
// configure fog by giving it a model.
fog.Model = FogModel.NewBuilder()
.FogColor(Color.FromArgb(148, 194, 231))
.Visibility(50000.0) // the scene is fully obscured at 50 km
.HalvingHeight(4000.0) // the fog thins by half every 4 km of altitude
.MaximumAltitude(20000.0)
.Build();// get fog effect from the map.
FogEffect fog = map.getEffects().getFog();
// enable fog effect.
fog.setEnabled(true);
// configure the fog parameters.
fog.setModel(FogModel.newBuilder()
.fogColor(Color.valueOf(Color.rgb(148, 194, 231)))
.lightColor(Color.valueOf(Color.rgb(255, 230, 179)))
.visibility(50000.0) // the scene is fully obscured at 50 km
.halvingHeight(4000.0) // the fog thins by half every 4 km of altitude
.maximumAltitude(20000.0)
.build());Fog is controlled with distances in meters, so the settings map directly to what you see:
-
visibility: the distance at which the fog fully obscures the scene near the ground. Smaller values produce thicker fog. When a
halvingHeightis set, the fog thins with altitude, so this visibility applies near the ground and you can see farther higher up. -
halvingHeight: the altitude over which the fog thins by half, in other words how tall the fog layer is. Leave it unset for fog that’s uniform with altitude.
-
maximumAltitude: the camera altitude above which the fog fades out completely.
-
fogColor and lightColor: the base fog color, and the tint the fog takes on when you look toward the scene light (a sun glow). The
lightColoris only visible when a light is configured through thelight effectlight effectlight effect. Leave it unset to derive the tint from the scene light’s own color, so the glow follows the light instead of a fixed color.
Unlike atmospheric scattering, fog doesn’t need a light, and you steer it directly with distances in meters instead of physical scattering strengths. That makes it a good choice when you want simple, predictable control over how far you can see.
Fog works on 3D maps only. It has no effect on 2D maps.
For general performance considerations, see Performance considerations at the end of this article.
Choosing between fog and atmospheric scattering
Fog and the atmosphere scattering model can look similar, since both fade distant geometry toward an "air" color, but they solve different problems.
| Fog | Atmospheric scattering | |
|---|---|---|
|
Purpose |
Artist-controlled haze for depth and mood |
Physically based planetary sky and aerial perspective |
|
Requires a light |
No, except for the optional sun-glow tint |
Yes |
|
What you tune |
Distances in meters (visibility, halving height) |
Physical strengths (brightness, Rayleigh and Mie) |
|
Typical use |
Simple, controllable haze and depth perception |
Realistic sky and haze that react to the sun |
Use fog when you want direct control over how far you can see, or a specific mood, without having to configure a light. Use atmospheric scattering when you want a realistic sky and haze on the globe that reacts to the position of the sun.
You can enable both at the same time.
On a globe with aerialPerspective enabled, fog and scattering both tint distant terrain, so their effects add up.
If the result is too strong, reduce the fog or use only one of the two.
Bloom effect
The limited intensity range of a computer monitor often makes it difficult to convey brightness to the viewer. Bloom makes bright objects glow by bleeding light into their darker surroundings, creating the illusion of intense brightness. This effect adds to the perceived realism of a scene, and you can also use it to draw focus to certain shapes.
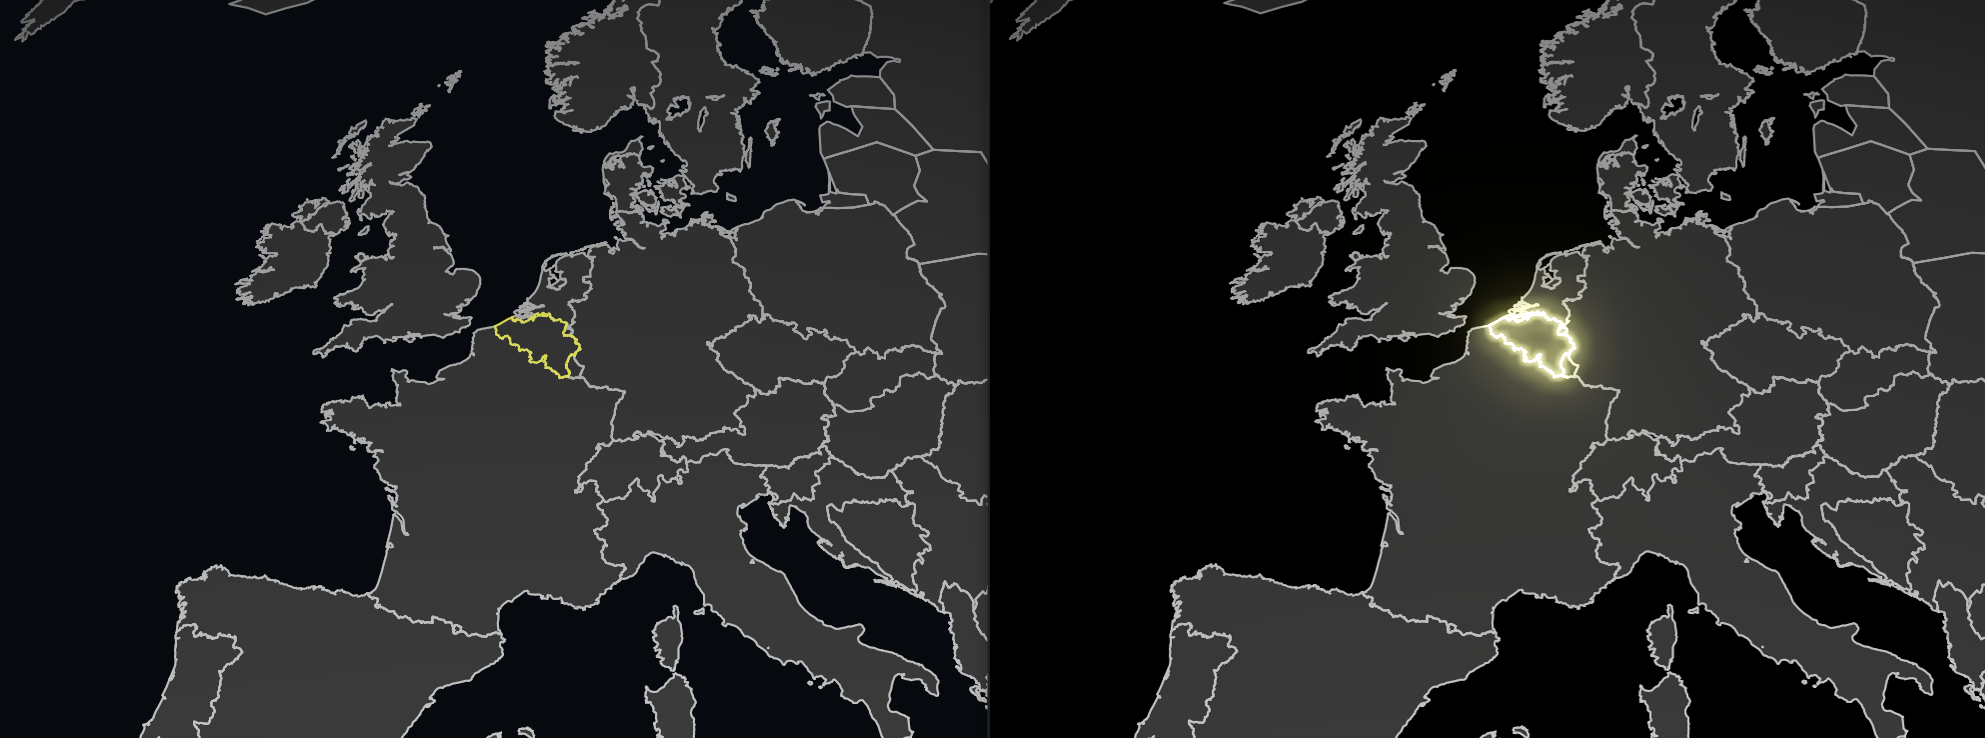
In LuciadCPillar, you add bloom to shapes by styling them with a BloomStyleBloomStyleBloomStyle. For each shape, you can configure:
-
intensity: a multiplier of how bright the shape should become. Brighter shapes produce more bloom.
-
threshold: the luminance a pixel must exceed in order to be bloomed. This can be used on 3D icons with physically based materialsphysically based materialsphysically based materials, for example, to bloom only the brightest specular highlights of the mesh.
|
The luminance of a pixel is determined by the weighted sum of its RGB components multiplied by the style’s intensity. Green receives the most weight and blue the least, following how the human eye perceives brightness. |
// In an IFeaturePainter
void paint(const Feature& feature, const FeaturePainterContext& context, FeatureCanvas& canvas) const override {
  auto geometry = feature.findGeometry();
  if (!geometry) {
    return;
  }

  // Style a geometry with bloom on both its stroke and fill.
  auto stroke = LineStyle::newBuilder()
                    .color(Color(0, 200, 255))
                    .width(3.0)
                    .bloom(BloomStyle::newBuilder().intensity(2.0).build())
                    .build();
  auto fill = FillStyle::newBuilder()
                  .color(Color(0, 200, 255, 80))
                  .bloom(BloomStyle::newBuilder().intensity(1.5).build())
                  .build();
  canvas.drawGeometry().geometry(geometry).stroke(stroke).fill(fill).submit();

  // Add bloom to a 3D icon, using a threshold of 0.95 so only the brightest specular highlights glow.
  auto center = geometry->getBounds().getCenter();
  auto position = GeometryFactory::createPoint(geometry->getReference(), center.x, center.y, center.z);
  canvas.drawIcon3D()
      .source("aircraft.glb")
      .position(position)
      .bloom(BloomStyle::newBuilder().intensity(1.0).threshold(0.95).build())
      .submit();
}
// In an IFeaturePainter
public void Paint(Feature feature, FeaturePainterContext context, FeatureCanvas canvas)
{
var geometry = feature.FindGeometry();
if (geometry == null)
{
return;
}
// Style a geometry with bloom on both its stroke and fill.
var stroke = LineStyle.NewBuilder()
.Color(Color.FromArgb(0, 200, 255))
.Width(3.0)
.Bloom(BloomStyle.NewBuilder().Intensity(2.0).Build())
.Build();
var fill = FillStyle.NewBuilder()
.Color(Color.FromArgb(80, 0, 200, 255))
.Bloom(BloomStyle.NewBuilder().Intensity(1.5).Build())
.Build();
canvas.DrawGeometry().Geometry(geometry).Stroke(stroke).Fill(fill).Submit();
// Add bloom to a 3D icon, using a threshold of 0.95 so only the brightest specular highlights glow.
var center = geometry.Bounds.Center;
var position = GeometryFactory.CreatePoint(geometry.Reference, center.X, center.Y, center.Z);
canvas.DrawIcon3D()
.Source("aircraft.glb")
.Position(position)
.Bloom(BloomStyle.NewBuilder().Intensity(1.0).Threshold(0.95).Build())
.Submit();
}// In an IFeaturePainter
@Override
public void paint(Feature feature, FeaturePainterContext context, FeatureCanvas canvas) {
Geometry geometry = feature.findGeometry();
if (geometry == null) {
return;
}
// Style a geometry with bloom on both its stroke and fill.
LineStyle stroke = LineStyle.newBuilder()
.color(Color.valueOf(Color.rgb(0, 200, 255)))
.width(3.0)
.bloom(BloomStyle.newBuilder().intensity(2.0).build())
.build();
FillStyle fill = FillStyle.newBuilder()
.color(Color.valueOf(Color.argb(80, 0, 200, 255)))
.bloom(BloomStyle.newBuilder().intensity(1.5).build())
.build();
canvas.drawGeometry().geometry(geometry).stroke(stroke).fill(fill).submit();
// Add bloom to a 3D icon, using a threshold of 0.95 so only the brightest specular highlights glow.
Coordinate center = geometry.getBounds().getCenter();
Point position = GeometryFactory.createPoint(geometry.getReference(), center.getX(), center.getY(), center.getZ());
canvas.drawIcon3D()
.source("aircraft.glb")
.position(position)
.bloom(BloomStyle.newBuilder().intensity(1.0).threshold(0.95).build())
.submit();
}BloomStyleBloomStyleBloomStyle works together with the BloomEffectBloomEffectBloomEffect on
the map’s graphics effectsthe map’s graphics effectsthe map’s graphics effects.
The bloom effect must be enabled to apply bloom to shapes that have a BloomStyleBloomStyleBloomStyle, so it’s enabled by default for convenience.
You can use the bloom effect to modify the overall properties of the bloom across the entire map, namely:
-
strength: the overall strength of the bloom. A higher strength means a brighter, more prominent bloom.
-
softness: how far the bloom spreads. Lower values produce a concentrated glow close to the brightness source. Higher values spread it further across the image.
// Configure the map-wide bloom effect.
BloomEffect& bloom = map->getEffects().getBloom();
bloom.setEnabled(true);
bloom.setModel(BloomModel::newBuilder()
                   .strength(1.5) //
                   .softness(0.7)
                   .build());
// Configure the map-wide bloom effect.
BloomEffect bloom = map.Effects.Bloom;
bloom.IsEnabled = true;
bloom.Model = BloomModel.NewBuilder()
.Strength(1.5)
.Softness(0.7)
.Build();// Configure the map-wide bloom effect.
BloomEffect bloom = map.getEffects().getBloom();
bloom.setEnabled(true);
bloom.setModel(BloomModel.newBuilder()
.strength(1.5)
.softness(0.7)
.build());Bloom works on 2D and 3D maps.
Environment map effect
The environment map effectenvironment map effectenvironment map effect wraps a 3D scene in environment imagery, in two independent roles: a skybox that’s drawn as the background in all directions, and a reflection map that PBR objects, such as 3D icons and OGC 3D Tiles, reflect and are lit by.
You supply the imagery as an EnvironmentMapEnvironmentMapEnvironmentMap, built with an
EnvironmentMap::EquirectangularBuilderEnvironmentMap::EquirectangularBuilderEnvironmentMap::EquirectangularBuilder from a single
equirectangular image, or an EnvironmentMap::CubeMapBuilderEnvironmentMap::CubeMapBuilderEnvironmentMap::CubeMapBuilder from six
cube-map faces.
Give each its own EnvironmentMapEnvironmentMapEnvironmentMap: a high-resolution image for the skybox (8-bit jpeg/png is fine), and for the
reflection map an image that can be lower resolution but is ideally HDR.
Skybox
The skybox controls how the environment around the camera looks. You enrich the scene by providing detailed background imagery, seen directly in all directions: a landscape, a city skyline, or even the interior of a room. High-resolution imagery is recommended, because the skybox fills the entire background.
When set, the skybox takes priority over the atmosphere effectatmosphere effectatmosphere effect. Remove it to let the atmosphere provide the background again.
Reflection map
The reflection map is the environment reflected by objects that support reflections, and the source of their image-based lighting. You don’t see this imagery around the scene, only in the reflections on PBR objects.
By default the map installs a neutral gray reflection map, so PBR content is lit by image-based lighting out of the box.
Set your own reflection map to replace it, or build the model with a null reflection map to remove it and get the raw, direct-only look.
Give the reflection map its own image rather than reusing the skybox. It can be lower resolution than the skybox, which keeps memory use down since reflections hide the lack of resolution, but HDR data matters for a good-looking result.
You can also set a reflection map only, and use the atmosphere effectatmosphere effectatmosphere effect as the visible background instead of a skybox.
Setting the environment map
The skybox and reflection map are held by an immutable EnvironmentMapModelEnvironmentMapModelEnvironmentMapModel.
Build one and apply it with setModelsetModelsetModel, the same way as the other effects.
// A high-resolution map for the skybox, oriented 30 degrees clockwise from north, and a separate, lower-resolution HDR map for the reflections.
auto skyboxMap = EnvironmentMap::newEquirectangularBuilder().image(skyboxImage).orientation(30.0).build();
auto reflectionMap = EnvironmentMap::newEquirectangularBuilder().image(reflectionImage).build();

// Get the environment map effect from the map.
EnvironmentMapEffect& environment = map->getEffects().getEnvironmentMap();

// Build a model holding both maps and apply it to the effect.
environment.setModel(EnvironmentMapModel::newBuilder().skybox(skyboxMap).reflectionMap(reflectionMap).build());
// A high-resolution map for the skybox, oriented 30 degrees clockwise from north, and a separate, lower-resolution HDR map for the reflections.
EnvironmentMap skyboxMap =
EnvironmentMap.NewEquirectangularBuilder().Image(skyboxImage).Orientation(new Luciad.Cartesian.Azimuth(30.0)).Build();
EnvironmentMap reflectionMap =
EnvironmentMap.NewEquirectangularBuilder().Image(reflectionImage).Build();
// Get the environment map effect from the map.
EnvironmentMapEffect environment = map.Effects.EnvironmentMap;
// Build a model holding both maps and apply it to the effect.
environment.Model = EnvironmentMapModel.NewBuilder().Skybox(skyboxMap).ReflectionMap(reflectionMap).Build();// A high-resolution map for the skybox, oriented 30 degrees clockwise from north, and a separate, lower-resolution HDR map for the reflections.
EnvironmentMap skyboxMap = EnvironmentMap.newEquirectangularBuilder().image(skyboxImage).orientation(new Azimuth(30.0)).build();
EnvironmentMap reflectionMap = EnvironmentMap.newEquirectangularBuilder().image(reflectionImage).build();
// Get the environment map effect from the map.
EnvironmentMapEffect environment = map.getEffects().getEnvironmentMap();
// Build a model holding both maps and apply it to the effect.
environment.setModel(EnvironmentMapModel.newBuilder().skybox(skyboxMap).reflectionMap(reflectionMap).build());You can rotate the environment with an orientation, and adjust its brightness with an intensity.
See the EnvironmentMap::EquirectangularBuilderEnvironmentMap::EquirectangularBuilderEnvironmentMap::EquirectangularBuilder and
EnvironmentMap::CubeMapBuilderEnvironmentMap::CubeMapBuilderEnvironmentMap::CubeMapBuilder API reference for the details of
equirectangular and cubemap imagery, orientation, and intensity.
Example
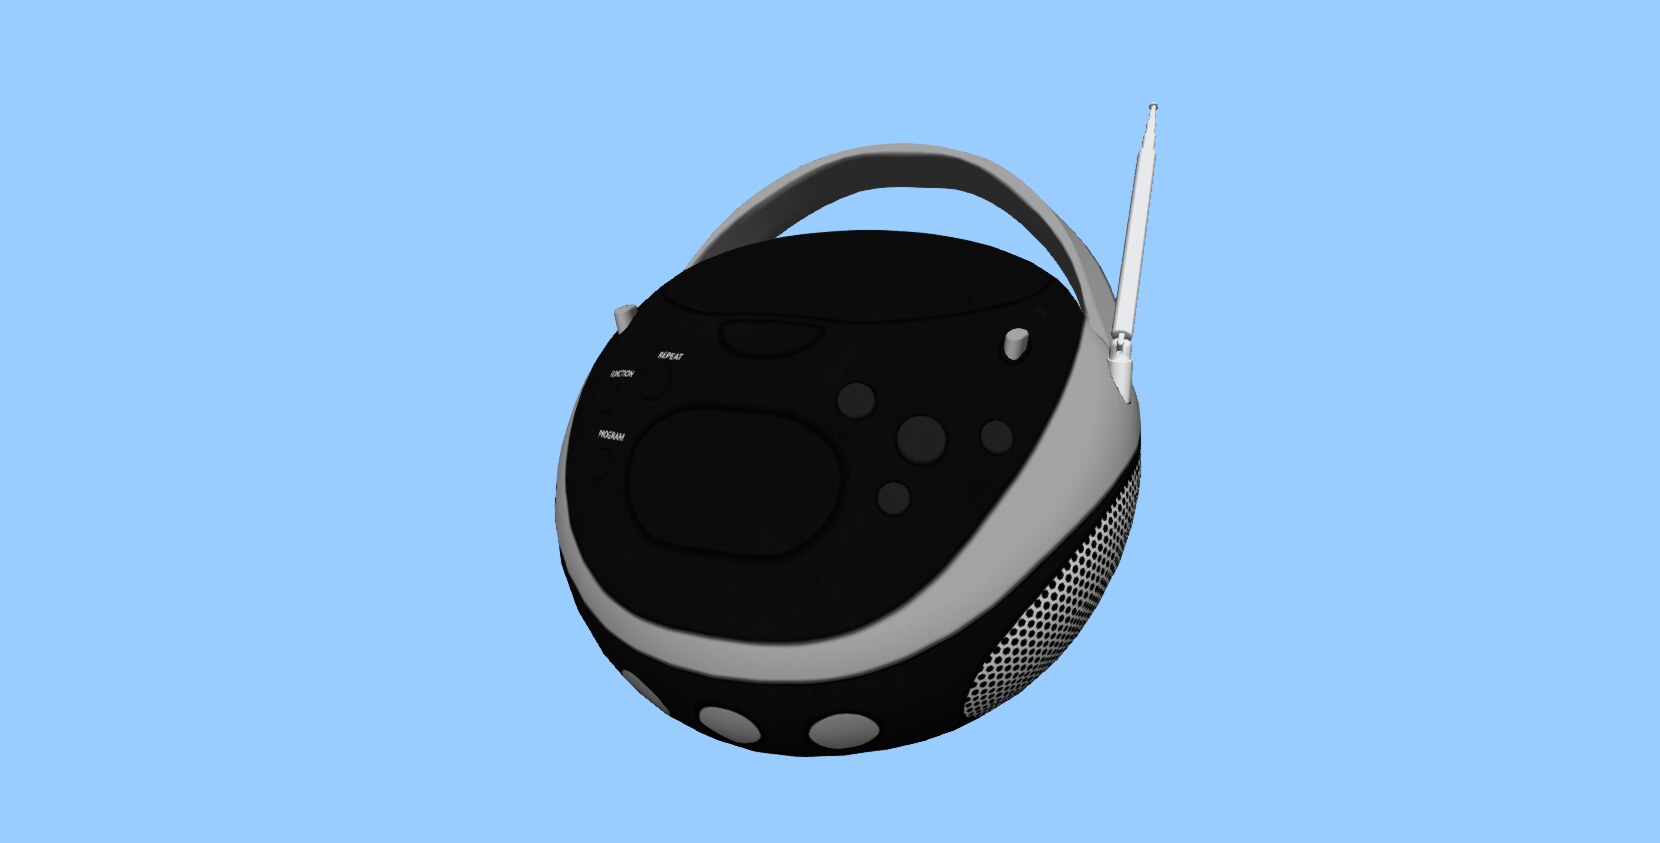
Start with a 3D model and some default lighting.
Next, place the model in an environment by adding a skybox.
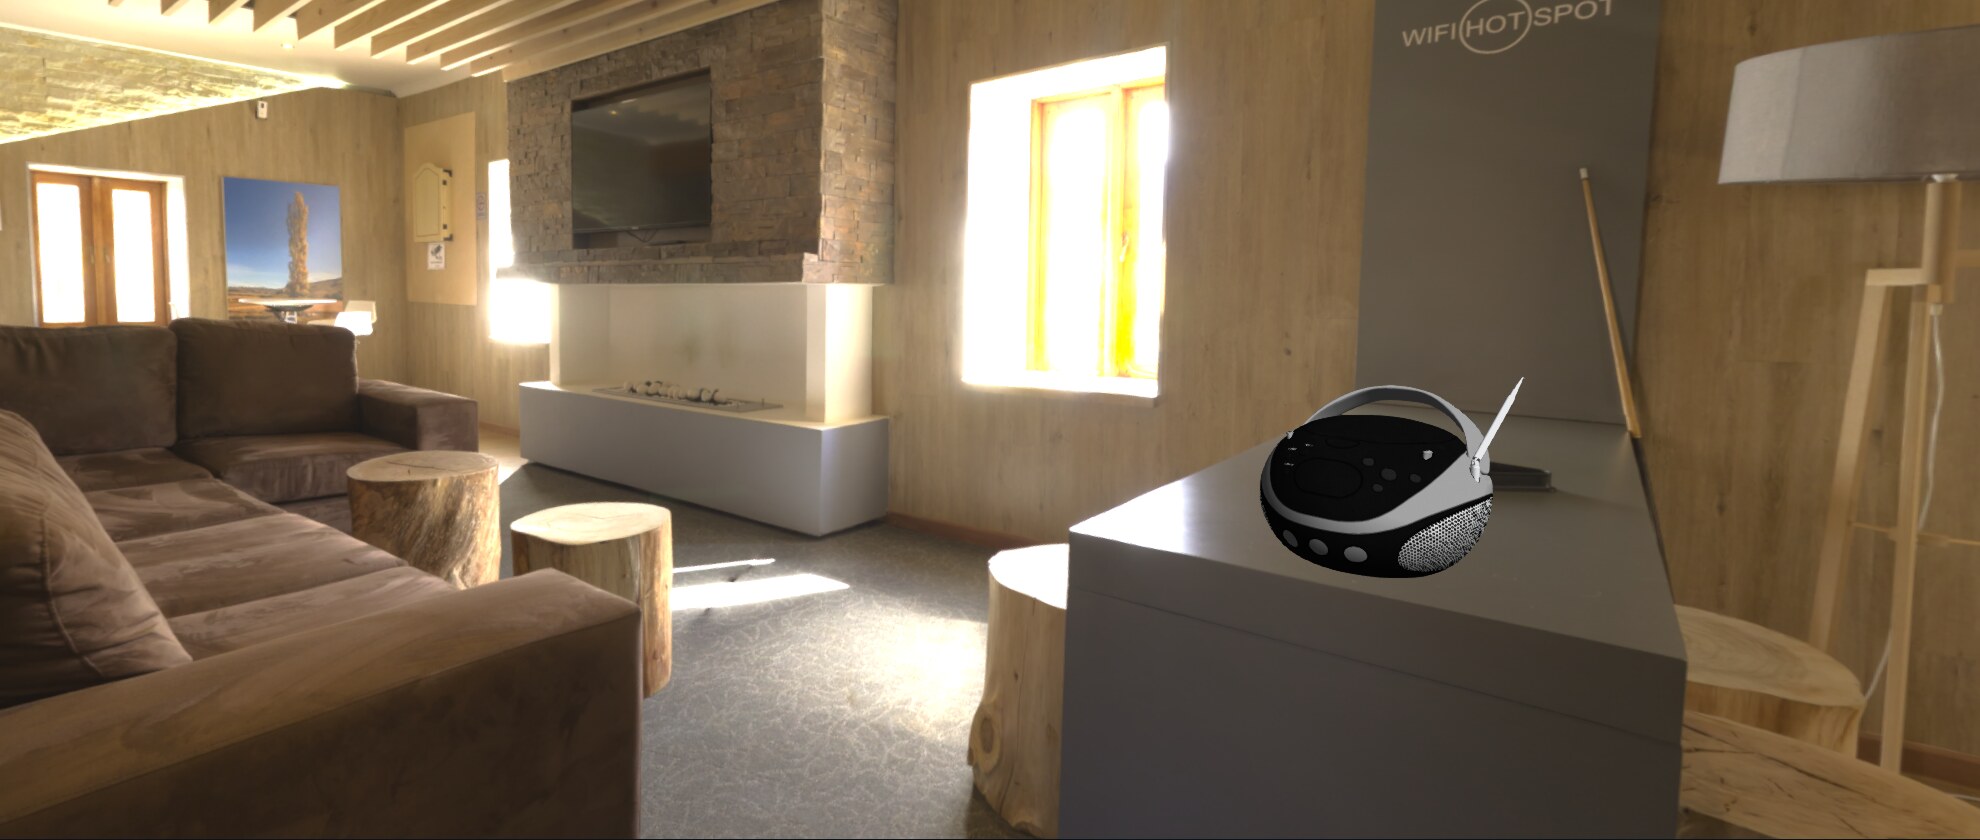
This lounge environment already makes the scene look more natural, but the lighting on the model makes it seem out of place. To remedy this, style the model with physically based materials, and add a reflection map.
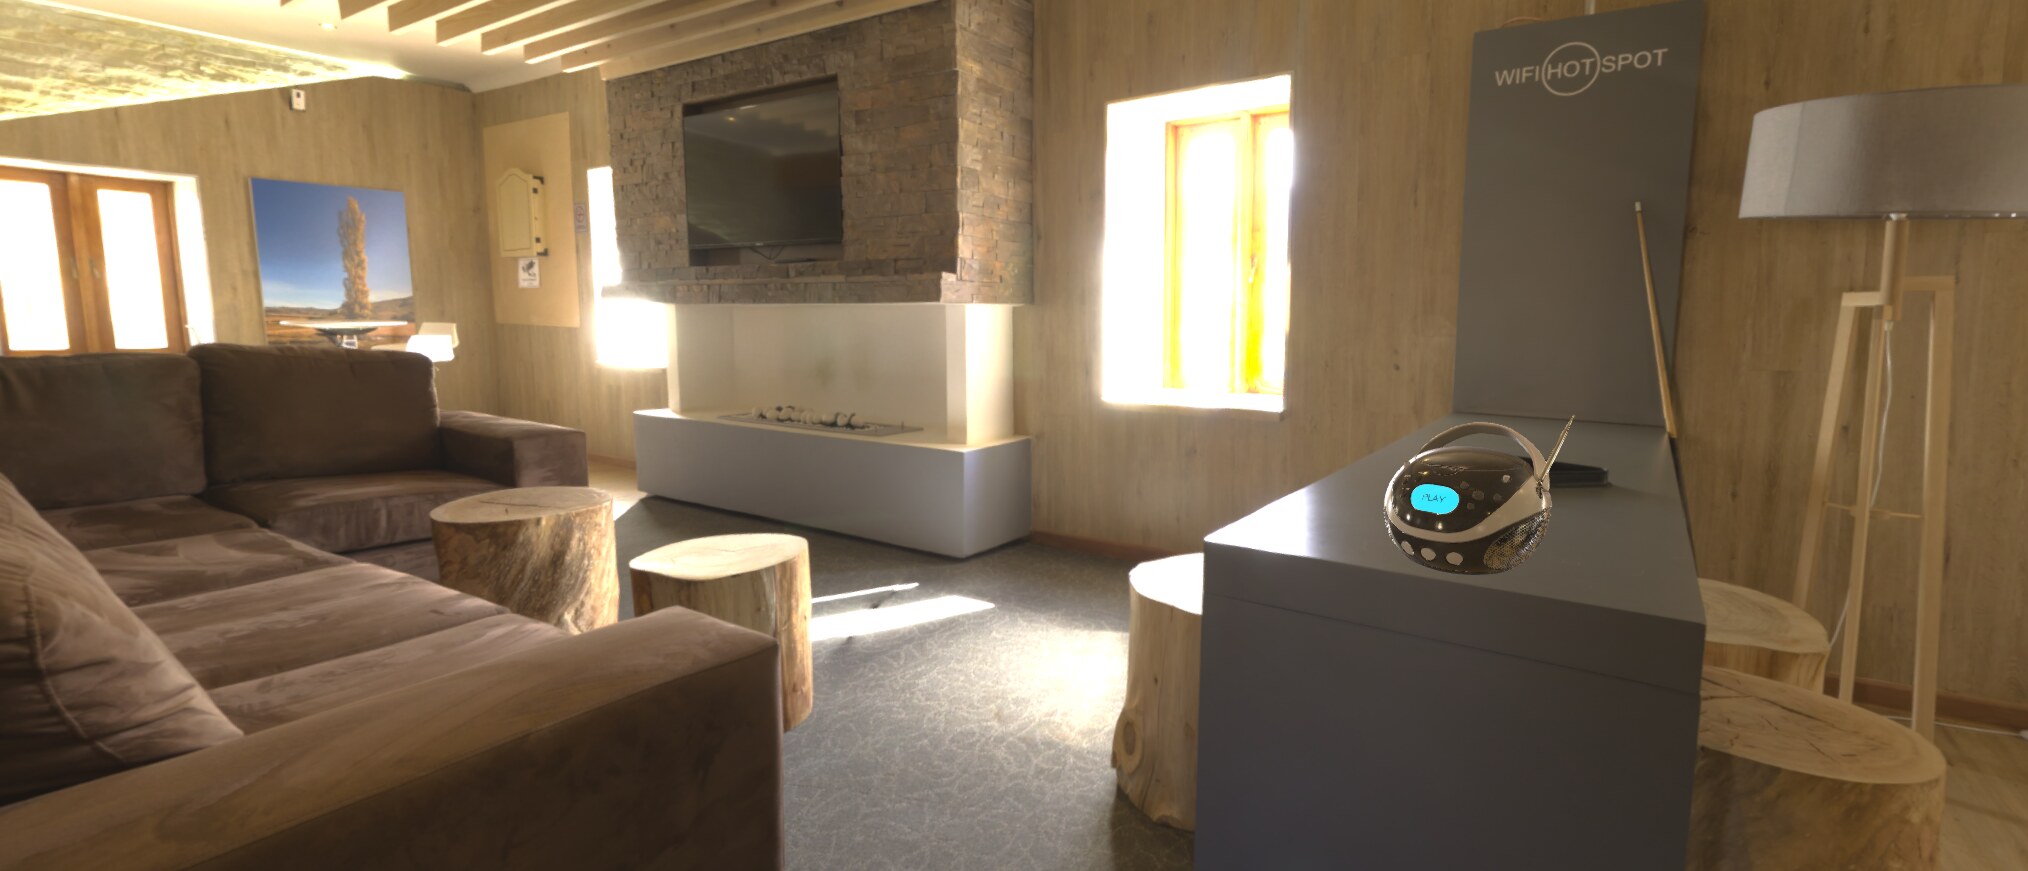
Now the model looks more grounded in the scene. It’s also more detailed than before, because with PBR styling more of the model’s material data is used.
The model contains material information that LuciadCPillar can use to visualize it realistically in any environment. For example, the Figure 15, “Model in urban environment” figure shows how the model looks in an urban environment.
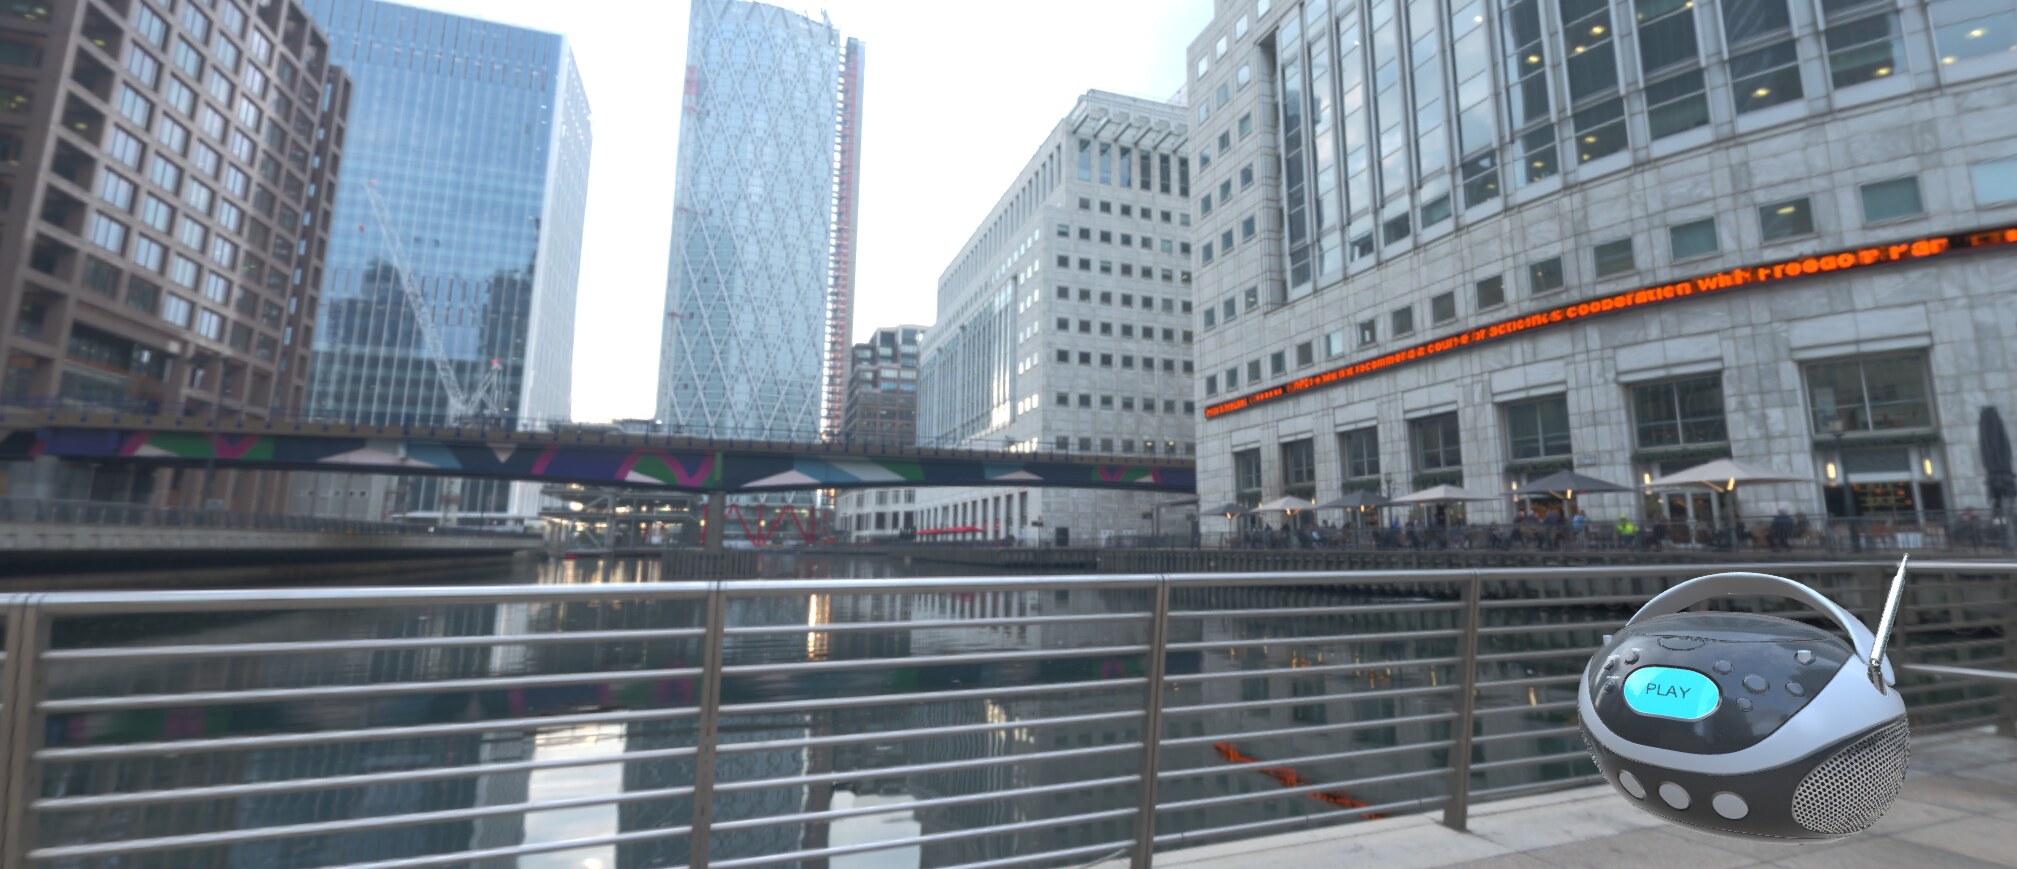
The environment map effect works on 3D maps only. It has no effect on 2D maps.
Performance considerations
Ambient occlusion, eye-dome lighting, depth of field, and fog broadly share the same performance characteristics:
-
They add a fixed overhead that depends on the pixel resolution of the map and on the client’s GPU.
-
The size and complexity of your dataset don’t affect their cost.
-
You can toggle them on and off, and change their parameters, at any time without extra overhead.