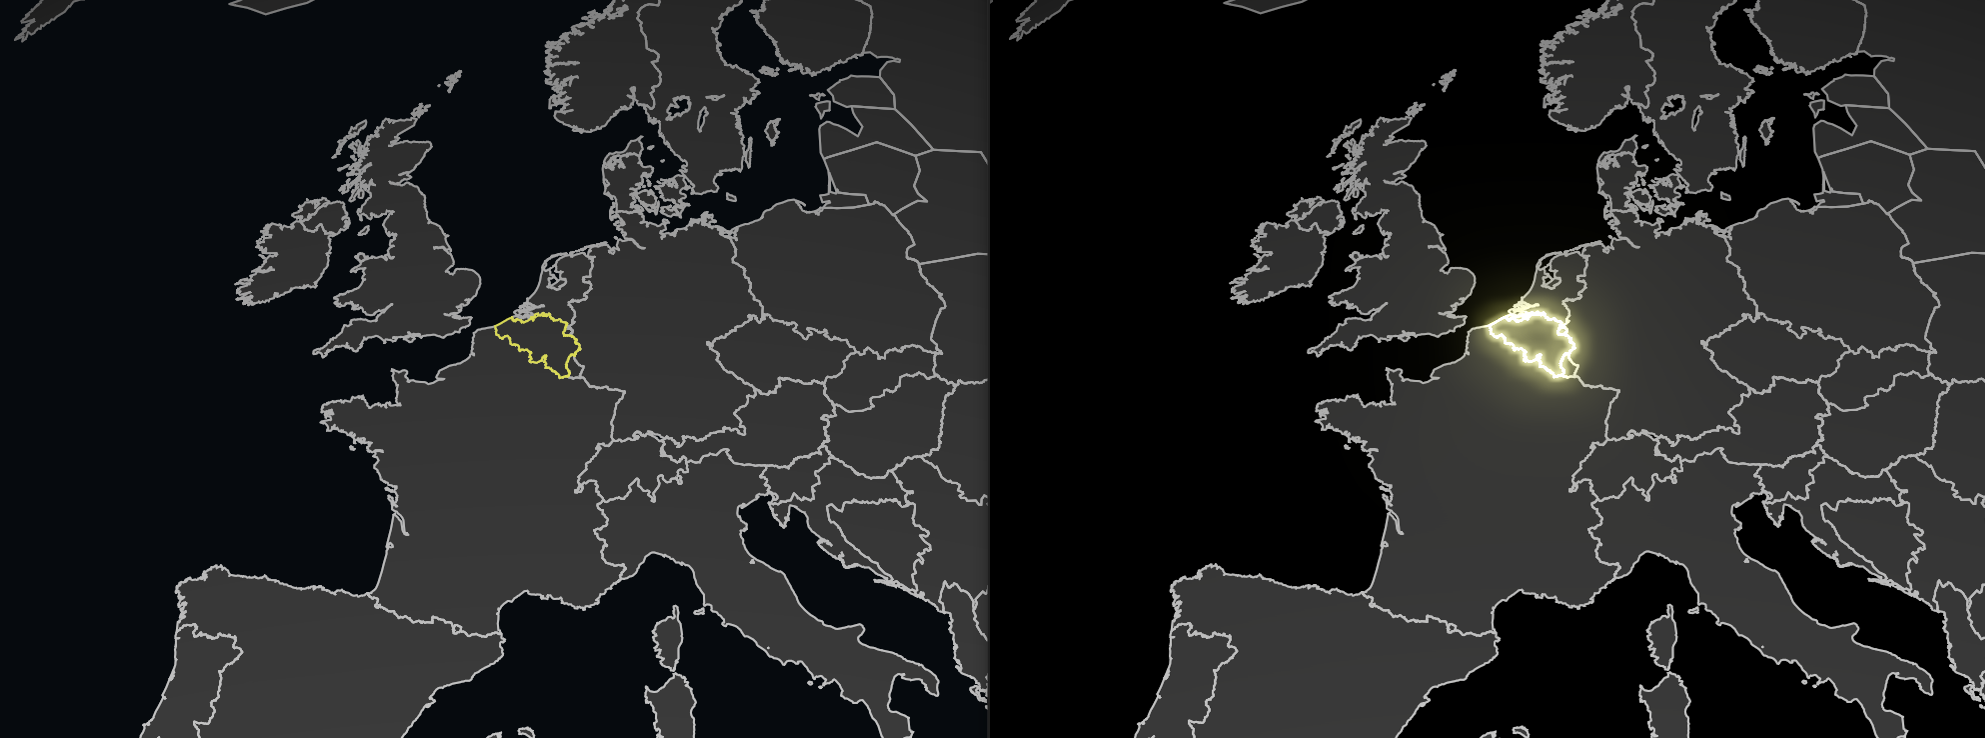
A WebGLMap has an object dedicated for map-wide effects.
This article gives you an overview of all available effects and how you can use them in your application.
Lighting Effects
Lighting adds important visual cues about the size and shape of 3D objects to a view. Without it, objects are always drawn at full brightness. When you enable the lighting effect, the object sides facing the light are brighter, whereas the sides facing away from the light become darker.
You can control lighting using the effects.light property of a WebGLMap.
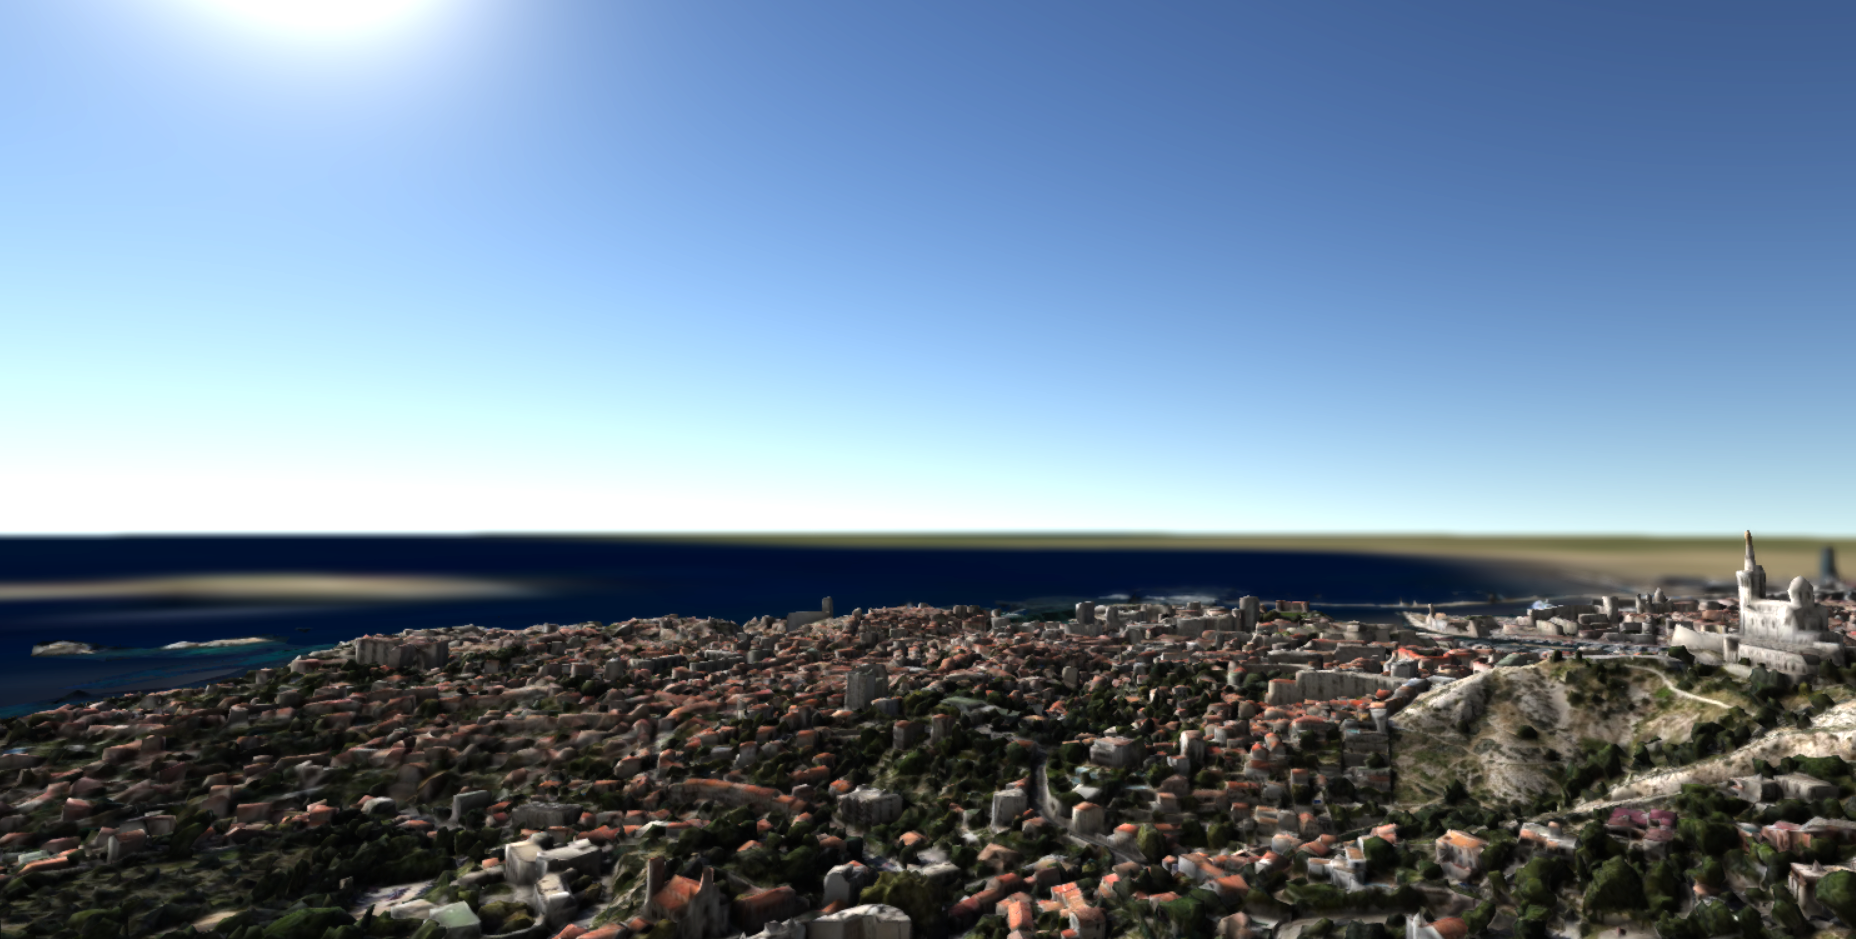
Program: Assigning a "sun light" demonstrates how to assign a light.
You have three options, demonstrated in Program: Assigning a "sun light":
-
Head light: created by the
createHeadLightfunction from theLightEffectmodule.The head light direction is linked to the orientation of the camera in 3D. That’s a useful feature in applications where lighting can improve a user’s perception of shape. In this case, you don’t use lighting to represent the time of day. The user doesn’t need the whole of Earth to have a bright side and a dark side.
The lighting affects the terrain — based on elevation data — , draped shapes, and non-draped shapes such as extruded shapes and mesh icons.
This type of light is the default for a 3D map. It has no effect on a 2D map.
-
Sun light: created by the
createSunLightfunction from theLightEffectmodule.This light simulates the presence of the sun as a light source at the given time.
The lighting affects the same map aspects as a head light.
With a sun light, you can also turn on shadows. This affects 3D maps only.
The night side of the earth is also desaturated, in 2D and 3D.
-
No light: assign
null. The application shows objects at full brightness.
//Use the createSunLight function from the LightEffect module
const sunLight = createSunLight({
  time: new Date()
});
//Install it on the map
map.effects.light = sunLight;
Depth of field effect
You can use the depth of field effect for blurring parts of a map based on distance to the viewer. It mimics the behavior of a typical camera focus. This effect serves two main purposes:
-
Increase the visual quality of your map.
-
Focus the attention of the user on a specific area of your map.
Some examples of the latter use case are:
-
Automatically focus the area around your mouse, and blur out the rest of your map
-
Put emphasis on a selected object
-
Automatically focus on the area that’s visible at the center of your screen at the moment
map.effects.depthOfField = {
  focalDepth: 200,
  focusRange: 300
};
LuciadRIA offers several parameters to tweak the depth, range, and the amount of blur of the depth of field effect. All parameters are optional. You can change them on-the-fly at any time.
The depth of field effect has a fixed performance overhead that depends on two factors:
-
The pixel resolution of your map
-
The GPU of the client
The size of your dataset doesn’t affect performance.
Depth of field works on 3D maps only. It has no effect on 2D maps.
Ambient occlusion effect
Ambient occlusion is an effect that mimics the natural phenomenon of shadows appearing on surfaces where objects are close to each other. The difference between shadows and ambient occlusion is that ambient occlusion isn’t dependent on light sources. It operates solely on the geometry of your dataset.
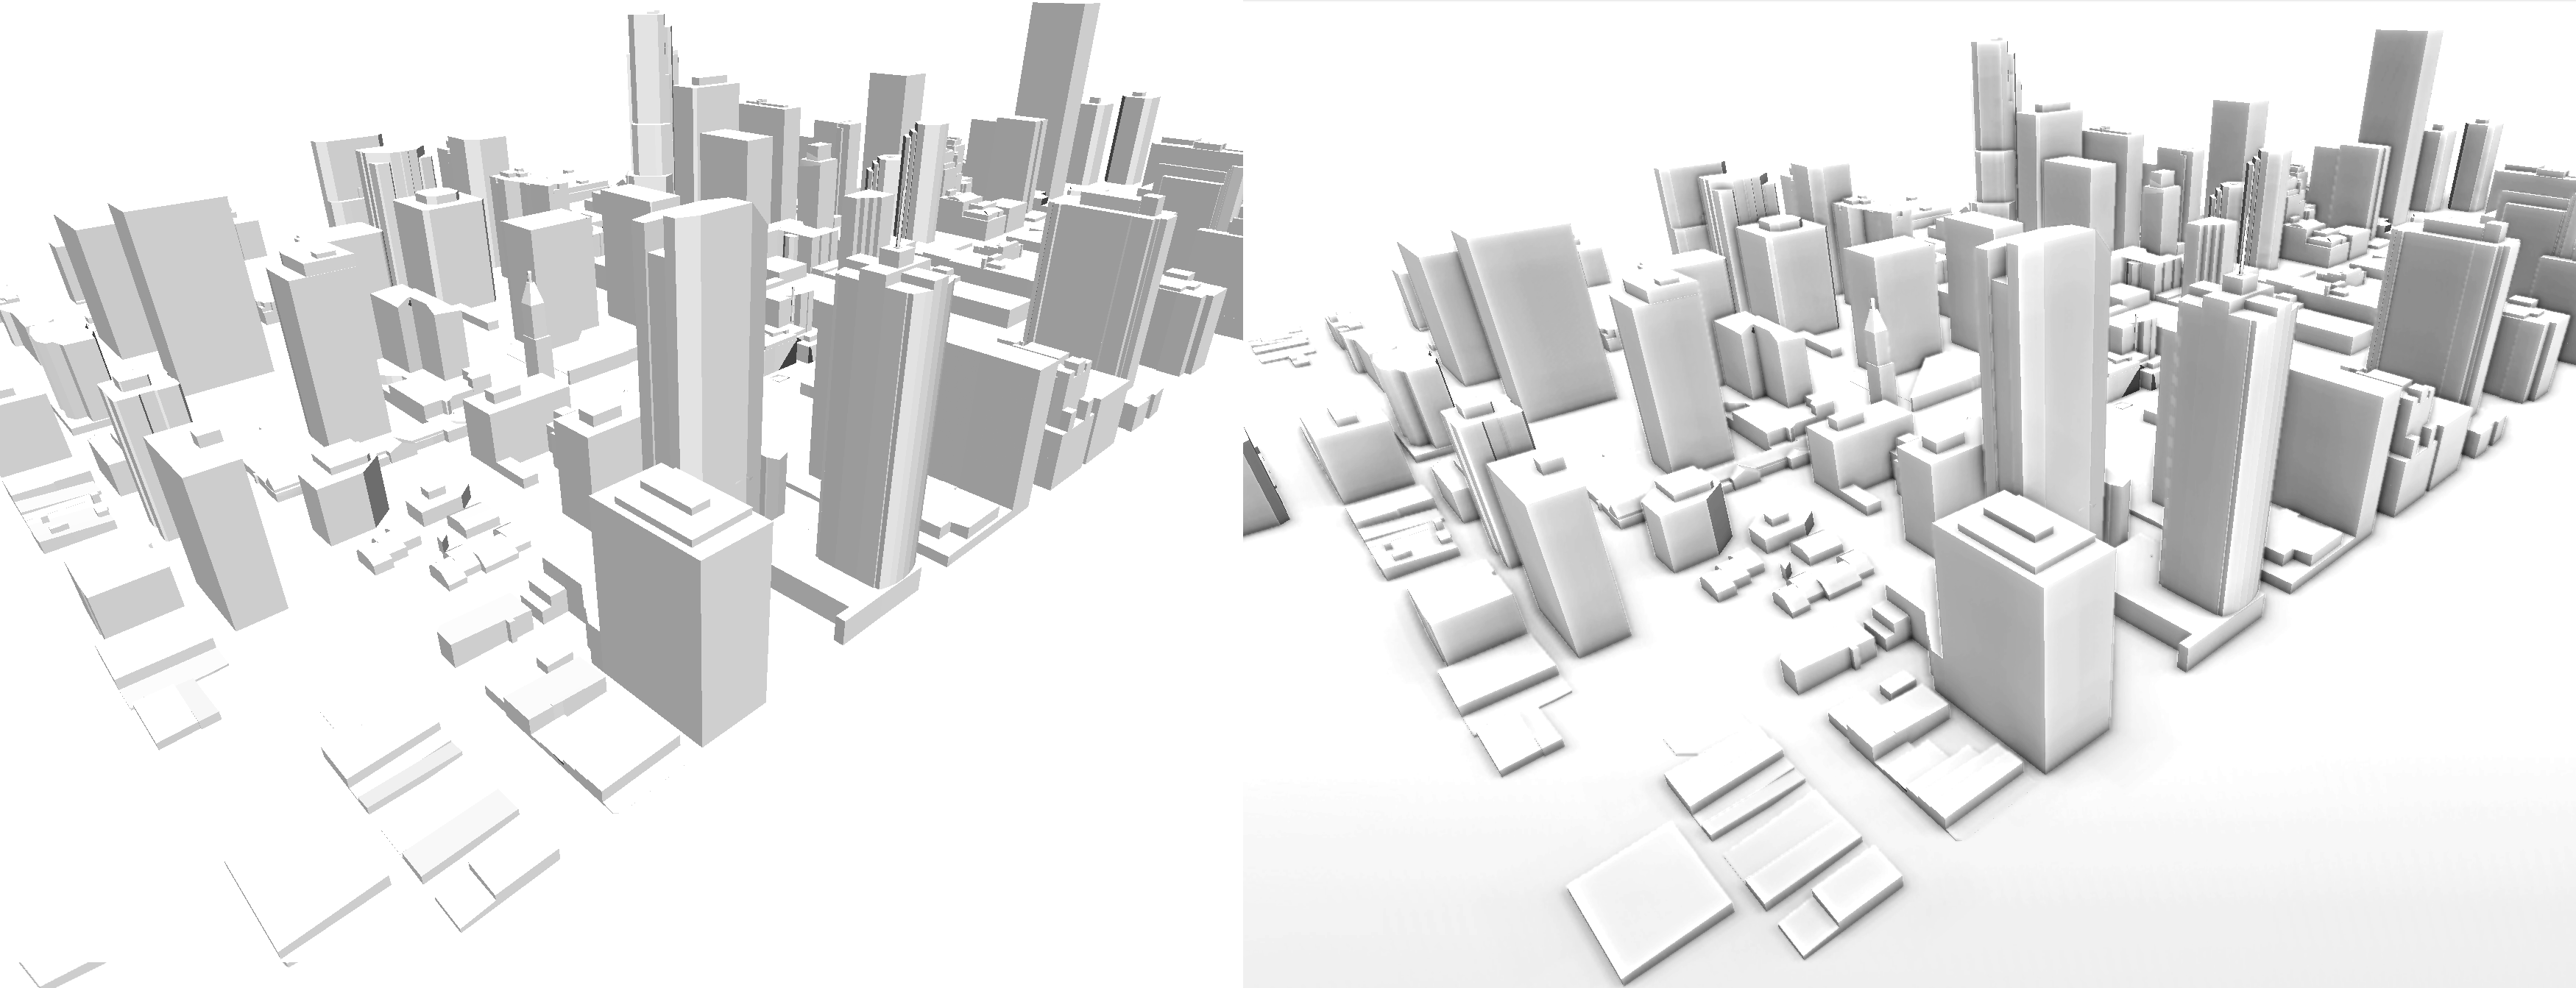
You can use ambient occlusion to enhance your map with a greater sense of depth. It defines objects close to the ground more clearly. It’s highly recommended for data sets that were computer-generated, such as 3D CAD and BIM models.
map.effects.ambientOcclusion = {
  radius: 25,
  power: 1
}
You can control the radius and the power of the ambient occlusion effect.
LuciadRIA supports the version of ambient occlusion called Screen Space Ambient Occlusion (SSAO). This implementation uses the GPU to calculate the effects of ambient occlusion on-the-fly based on what’s visible in your view. You can toggle it on and off at any time without extra overhead.
Ambient occlusion is recommended for cases in which 3D datasets with simple colors are visualized. For these types of datasets, ambient occlusion can help give the dataset more depth and make it easier to understand how the geometry relates to each other. It also improves the visual quality of such datasets, and gives a better impression in general.
Ambient occlusion isn’t recommended for 3D datasets that were captured using real-life photography, such as reality meshes. Ambient occlusion already occurs naturally in the imagery of those datasets.
Ambient occlusion has a fixed performance overhead that depends on two factors:
-
The pixel resolution of your map
-
The GPU of the client
The size of your dataset doesn’t affect performance.
Ambient occlusion works on 3D maps only. It has no effect on 2D maps. It has no effect on transparent data.
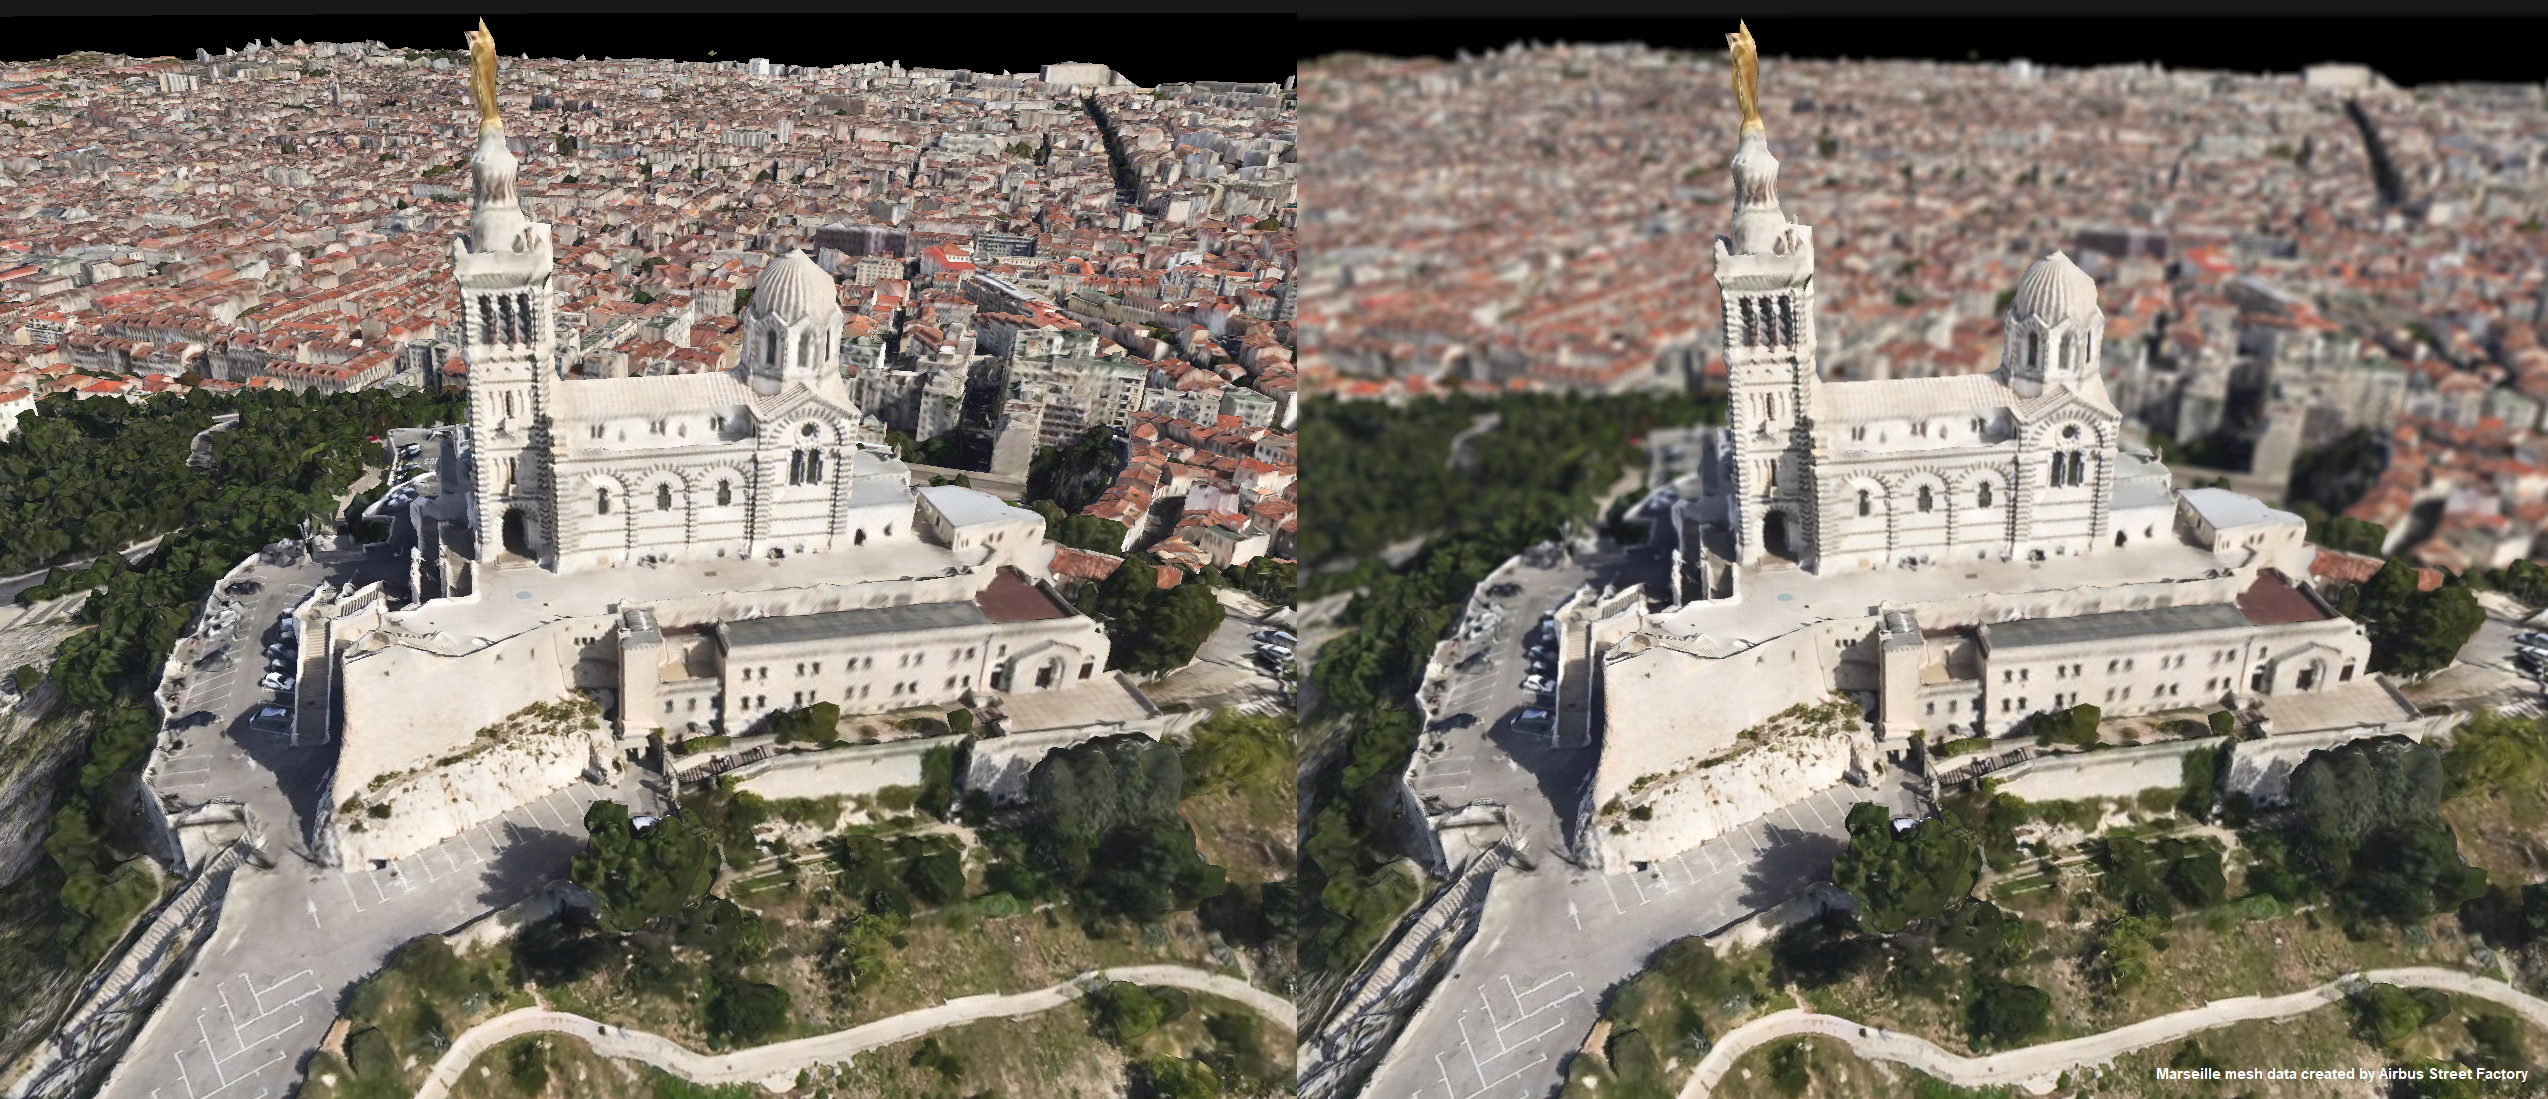
Eye-dome lighting effect
Eye-dome lighting (EDL) is a non-photorealistic lighting model that accentuates the shapes of objects by shading their outlines. Eye-dome lighting is similar to ambient occlusion. It can give the dataset more depth and make it easier to understand how geometries relate to each other.
EDL can help to interpret datasets that have little or no visual variance. It’s useful for 3D datasets in particular, such as CAD and BIM models, or point clouds. Eye-dome lighting isn’t recommended for 3D datasets that were captured using real-life photography, such as reality meshes.
map.effects.eyeDomeLighting = {
  window: 1,
  strength: 0.5
};
You can control the:
-
window: to increase the thickness of the applied EDL shade -
strength: to soften or harden the applied EDL shade -
color: to change the color of the applied EDL shade
Technically, the lighting model applies a shade to each pixel, based on the depth difference between that pixel and its surrounding pixels. This implementation uses the GPU to calculate the effects on-the-fly based on what’s visible in your view. You can toggle it on and off at any time without extra overhead.
Eye-dome lighting has a fixed performance overhead that depends on two factors:
-
The pixel resolution of your map
-
The GPU of the client
The size of your dataset doesn’t affect performance.
Eye-dome lighting works on 3D maps only. It has no effect on 2D maps. It has no effect on transparent data.
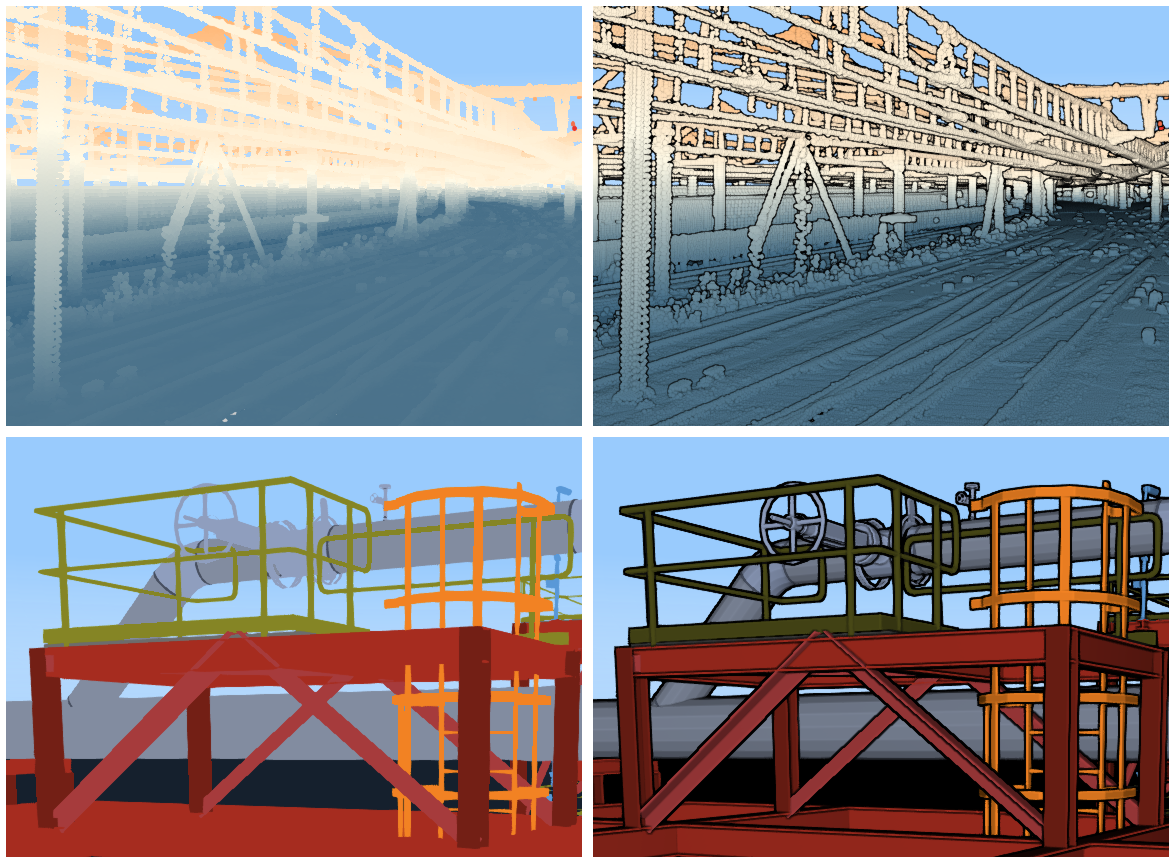
Anti-aliasing effect
The anti-aliasing post-processing effect smooths hard edges of data that shows staircase pixels.
It’s useful for 3D datasets in particular, such as CAD and BIM models with sharp edges and high-contrast colors.
map.effects.antiAliasing = true;LuciadRIA applies the FXAA algorithm for anti-aliasing.
Anti-aliasing has a fixed performance overhead that depends on two factors:
-
The pixel resolution of your map
-
The GPU of the client
The size of your dataset doesn’t affect performance.
Anti-aliasing works on 3D maps only. It has no effect on 2D maps. In 2D views, most content is typically already anti-aliased: imagery can be smoothed up-front, lines are smoothed while they’re painted, and icons can be smoothed upon creation.
Bloom effect
The limited intensity range of a computer monitor often makes it difficult to convey brightness to the viewer. One way of conveying brightness is making bright objects glow. The light then bleeds into the darker surroundings of those bright areas. This creates the illusion that they’re intensely bright. This bloom effect adds to the perceived realism of a scene. You can also use it to draw focus to certain shapes, for example.
In LuciadRIA, you add bloom to shapes by styling them with a BloomStyle. You can configure bloom intensity for each shape.
BloomStyle works together with the BloomEffect graphical effect on the WebGL map. The bloom effect is active by default. You can configure it to your liking. Its settings
apply to all map areas with bloom, which includes bloom shapes and certain pixels. See the threshold property for more information about making pixels bloom.
map.effects.bloom = {
  strength: 3,
  radius: 0
};
You can control the:
-
strength: to increase or decrease the amount of bloom -
radius: to concentrate or dilute the bloom -
threshold: to increase or decrease the threshold at which pixels produce bloom.
By default, only shapes styled with aBloomStylebloom. If you set the threshold property ofBloomEffect, LuciadRIA applies a bloom effect to all pixels brighter than that threshold too. In practice, threshold values are usually somewhere around 1.
|
The brightness of a pixel is determined by the weighted sum of the RGB components of a pixel, with green receiving the most weight and blue the least. With such a weighting, LuciadRIA comes as close as possible to how the human eye perceives brightness. |
Bloom works on 2D and 3D maps.
Fog effect
The fog effect provides an approximation of fog in the atmosphere, and can greatly increase the user’s perception of depth and scale in a 3D view.
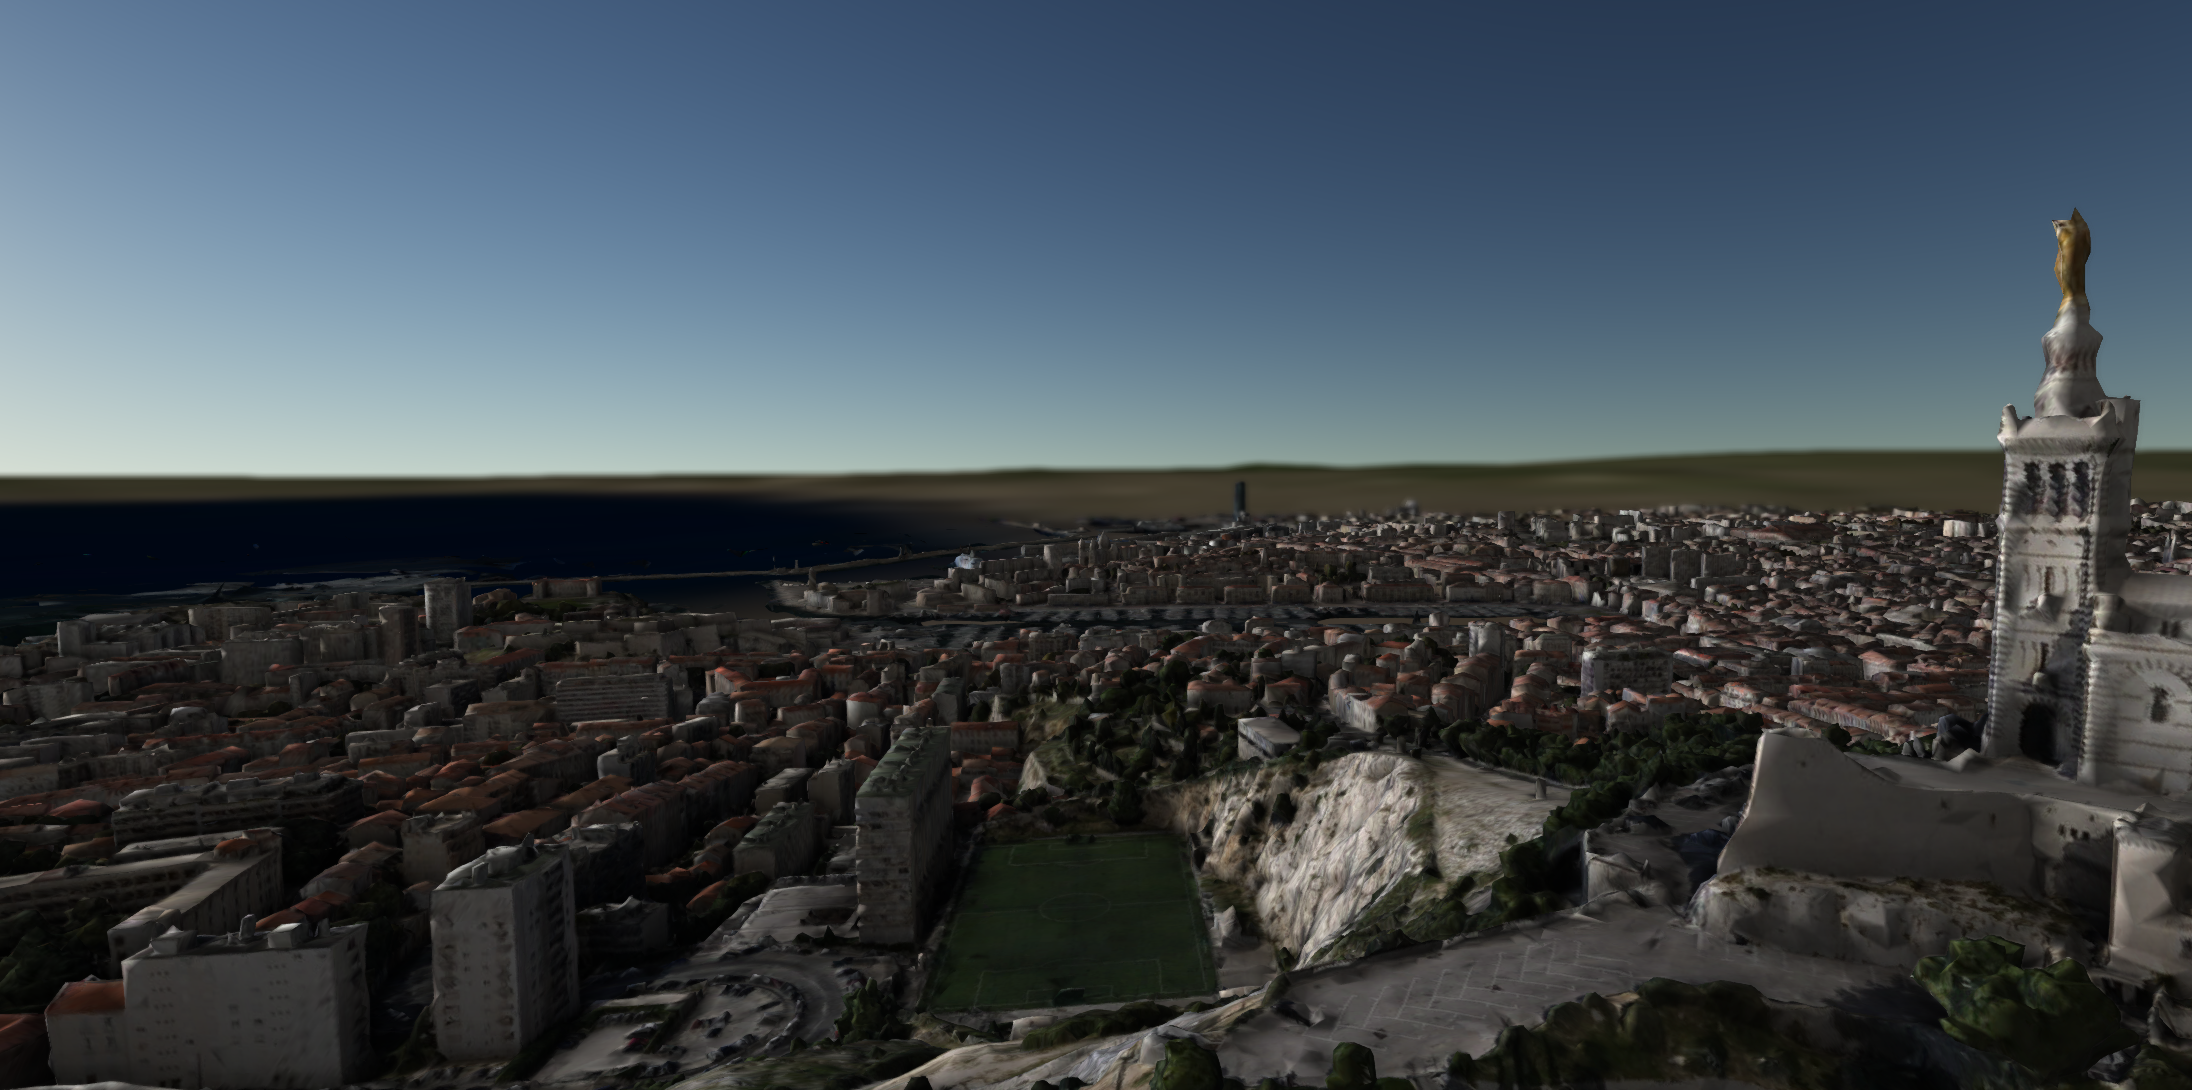
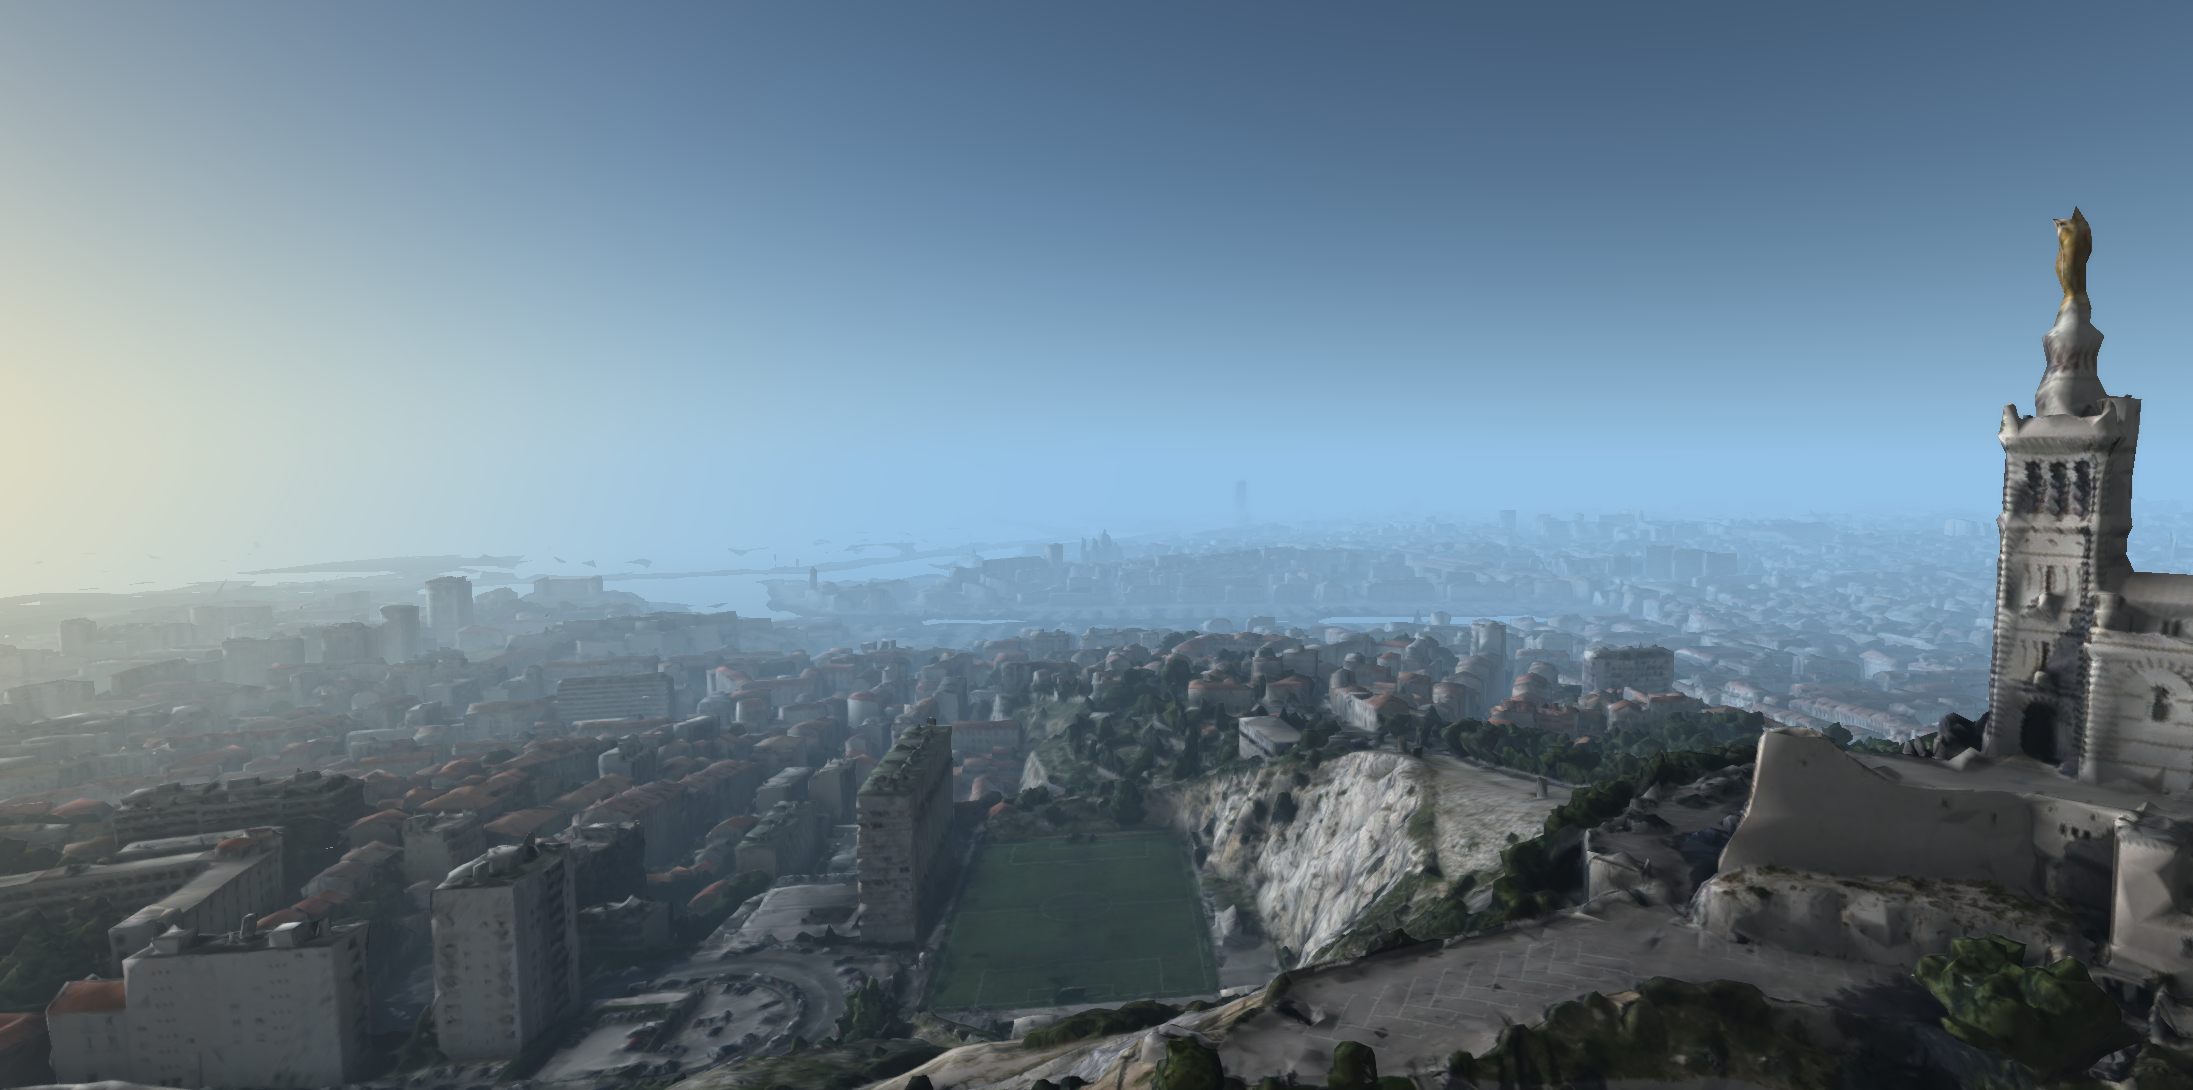
map.effects.fog = {
  fogColor: "rgb(147, 183, 222)",
  maximumAltitude: 50_000
};
You can control the:
-
fogColor: to change the color of the fog -
lightColor: to change the color of the sun light seen through the fog, if you configured any sun light on the map. -
density: to change the density or thickness of the fog -
heightFalloff: to make the fog less dense higher above the earth. This makes it possible to simulate a relatively dense fog that is limited to lower altitudes, for example. -
maximumAltitude: to turn off the fog effect automatically as the camera gets farther away from the earth and exits the atmosphere. This isn’t the same asheightFalloffbecausemaximumAltitudeis tied to the camera position. TheheightFalloffsetting limits dense fog to lower altitudes, whereasmaximumAltitudecauses all fog to disappear when the camera reaches a certain height no matter what your height falloff setting is.
Fog works on 3D maps only. It has no effect on 2D maps.
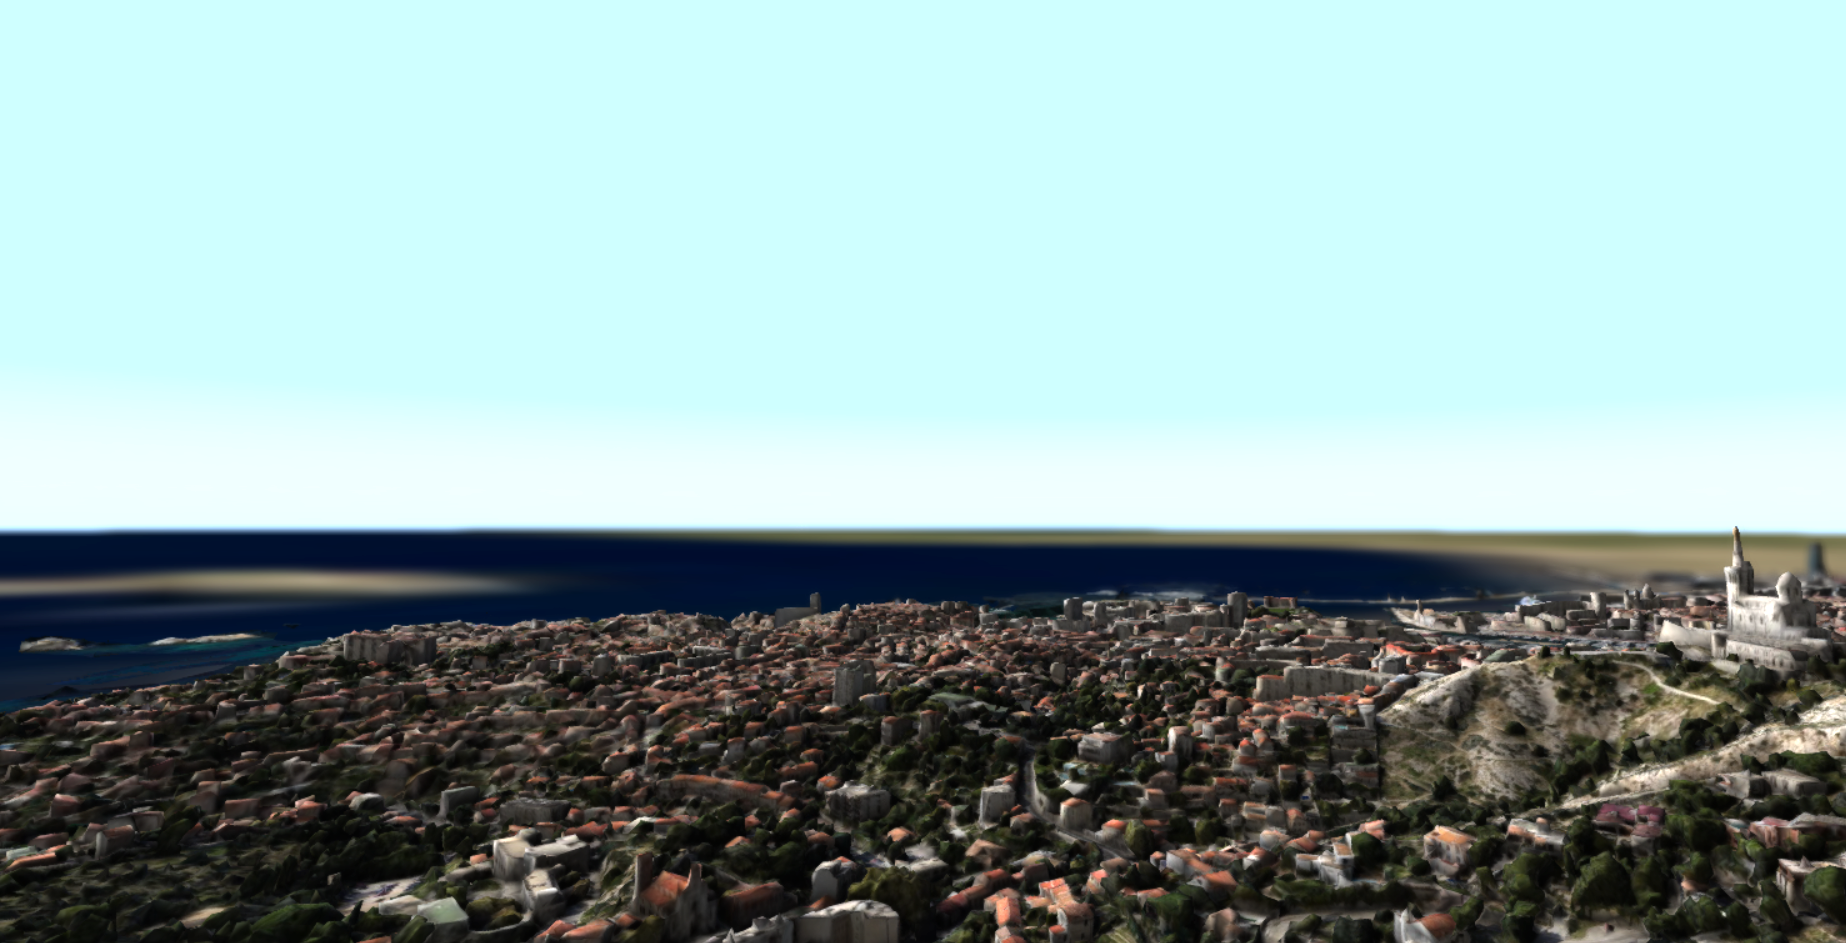
Atmosphere
Using the effects.atmosphere property of a WebGLMap, you can control how the sky looks. You can toggle this look with a boolean value.
By default, the effects.atmosphere property is set to true, and LuciadRIA displays a static atmosphere. The lighting effect doesn’t affect it.
You can also add a light scattering effect to the atmosphere to help make your scene look more natural, by setting the effects.atmosphere property to a LightScatteringAtmosphere. The lighting effects must be active on the map as well because its effects on the atmosphere are then simulated in the sky
on the map.
map.effects.atmosphere = new LightScatteringAtmosphere({
  brightness: 2.5,
  rayleighScatteringFactor: 2.0
});
You can control the light scattering atmosphere effect with these properties:
-
brightness: increase or decrease the intensity of the light. -
rayleighScatteringFactor: increase or decrease the amount of Rayleigh scattering. This is the scattering of sun light by air molecules. It is the reason for the blue color of the sky during the day, and its yellow-to-red color at dawn and dusk. -
mieScatteringFactor: increase or decrease the amount of Mie scattering. This is the scattering of light by aerosols, such as dust, pollen, smoke, and microscopic water droplets. On a hazy day, Mie scattering causes the sky to look a bit gray and produces a large white halo around the sun. -
affectsTerrain: indicate the presence or absence of an effect on the terrain. The terrain effect makes the terrain look brighter at higher altitudes:
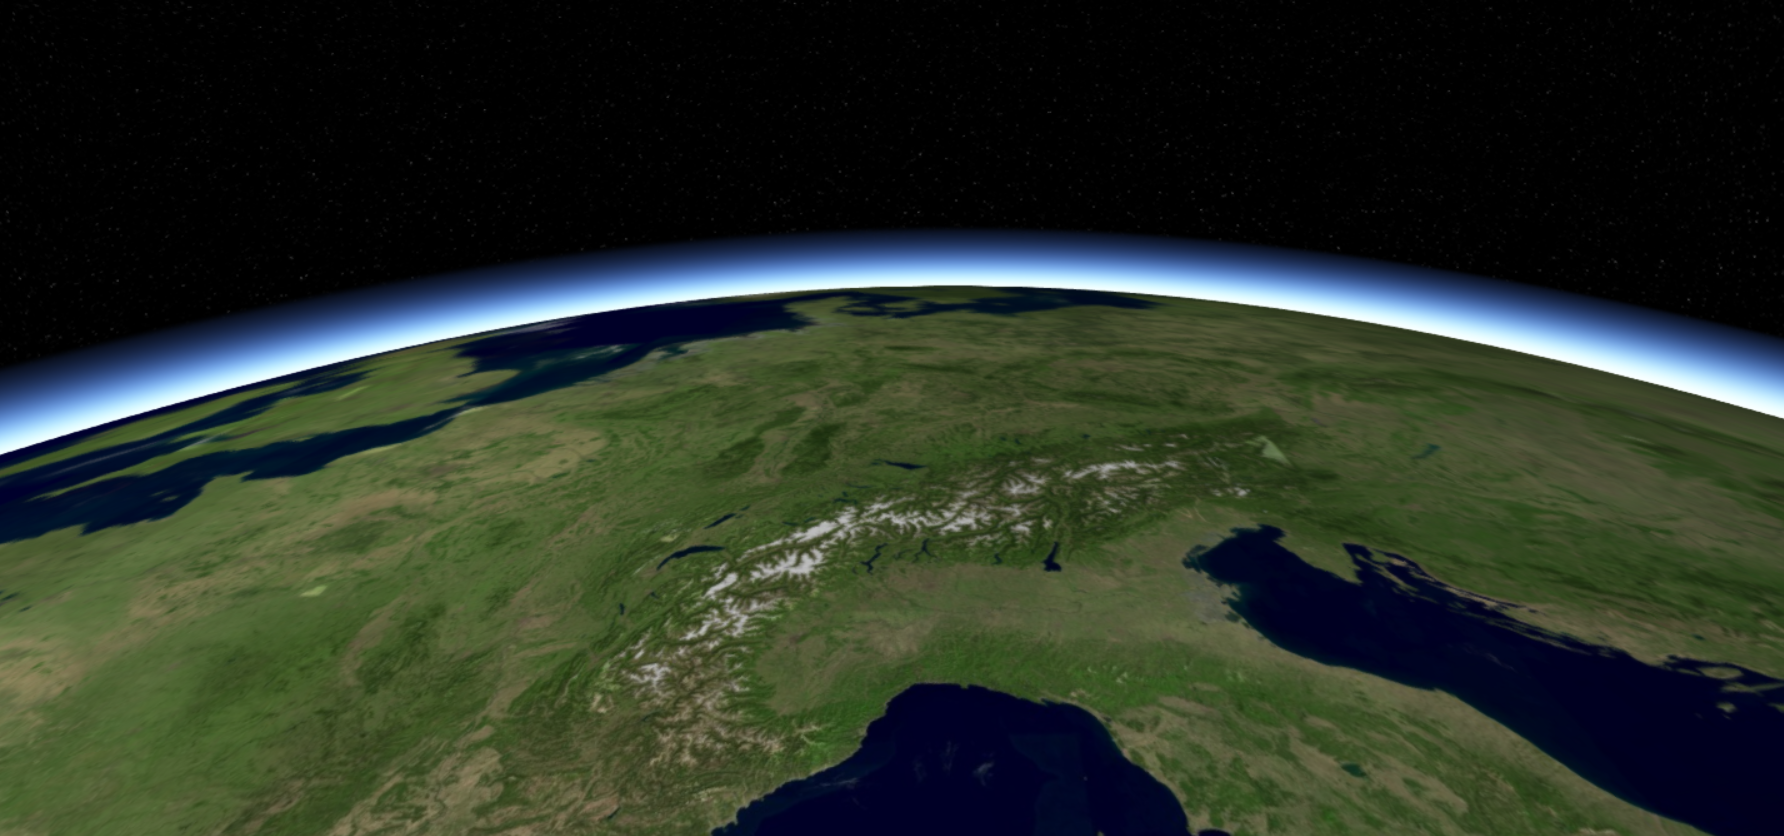
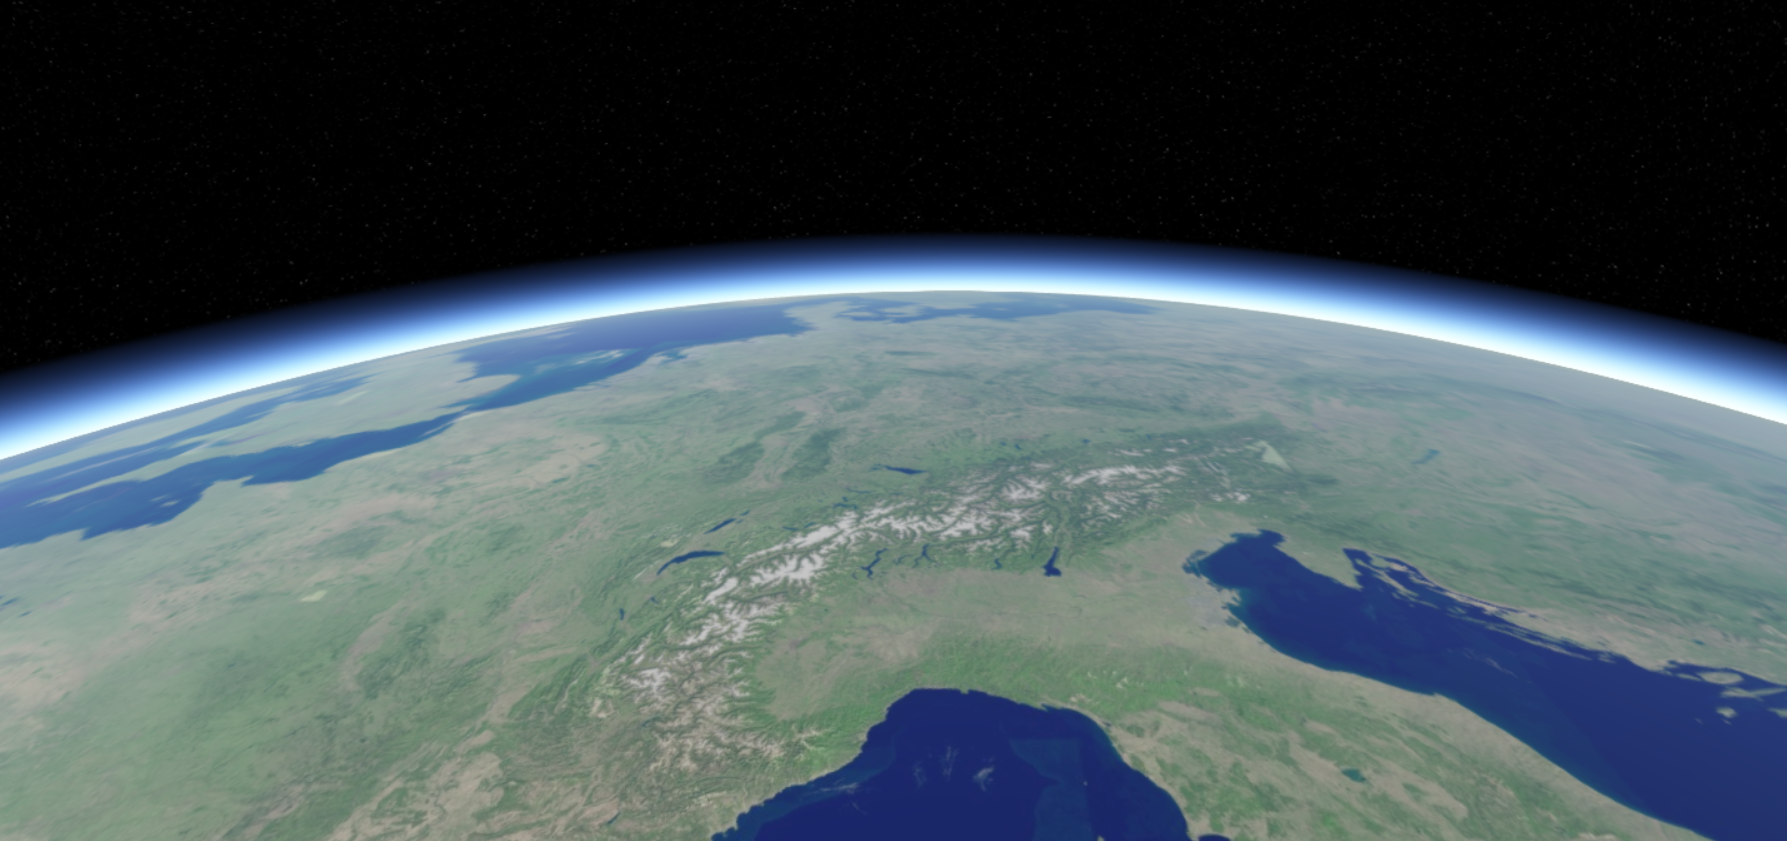
The atmosphere effect works on 3D maps only. It has no effect on 2D maps.
Environment map
Skybox
Using the effects.environmentMap.skybox property of a WebGLMap, you can control how the environment around the camera looks. You enrich the scene by providing appropriate detailed background
imagery. This skybox imagery can be a landscape or a city skyline or even the interior of a room. It supports cubemaps and
equirectangular images.
The skybox effect has priority over the atmosphere effect. Use null to turn the effect off.
You can control the skybox with these properties:
-
imagery: the imagery for the skybox. You can use a cubemap or an equirectangular image. -
orientation: an angle, in degrees, that lets you rotate the environment map to your liking.
See the API documentation of EnvironmentMap for more details.
Reflection map
Using the effects.environmentMap.reflectionMap property of a WebGLMap, you can control the environment map to use for reflections.
The environment map reflects on objects that support reflections only, so you won’t see this imagery around the scene, but only in the reflections on certain objects in the scene.
You can choose the same imagery for the skybox and the reflection map. In some scenarios, though, it’s useful to set distinct environment maps, one for the skybox and another for the reflection map. You can also set a reflection map only, and use for example the atmosphere instead of a skybox.
You can set a reflection map image with a lower resolution than that of the skybox, because it is used for the reflections
only.
HDR imagery is recommended, but not required. You can use .hdr files in the radiance rgbE format for this purpose.
map.effects.environmentMap = {
  skybox: {
    imagery: createEquirectangularImagery(skyboxURL)
  },
  reflectionMap: {
    imagery: createEquirectangularImagery(reflectionMapURL)
  }
};
Example
Let’s take a 3D model and use some default lighting.
Next, we place the model in an environment by adding a skybox.
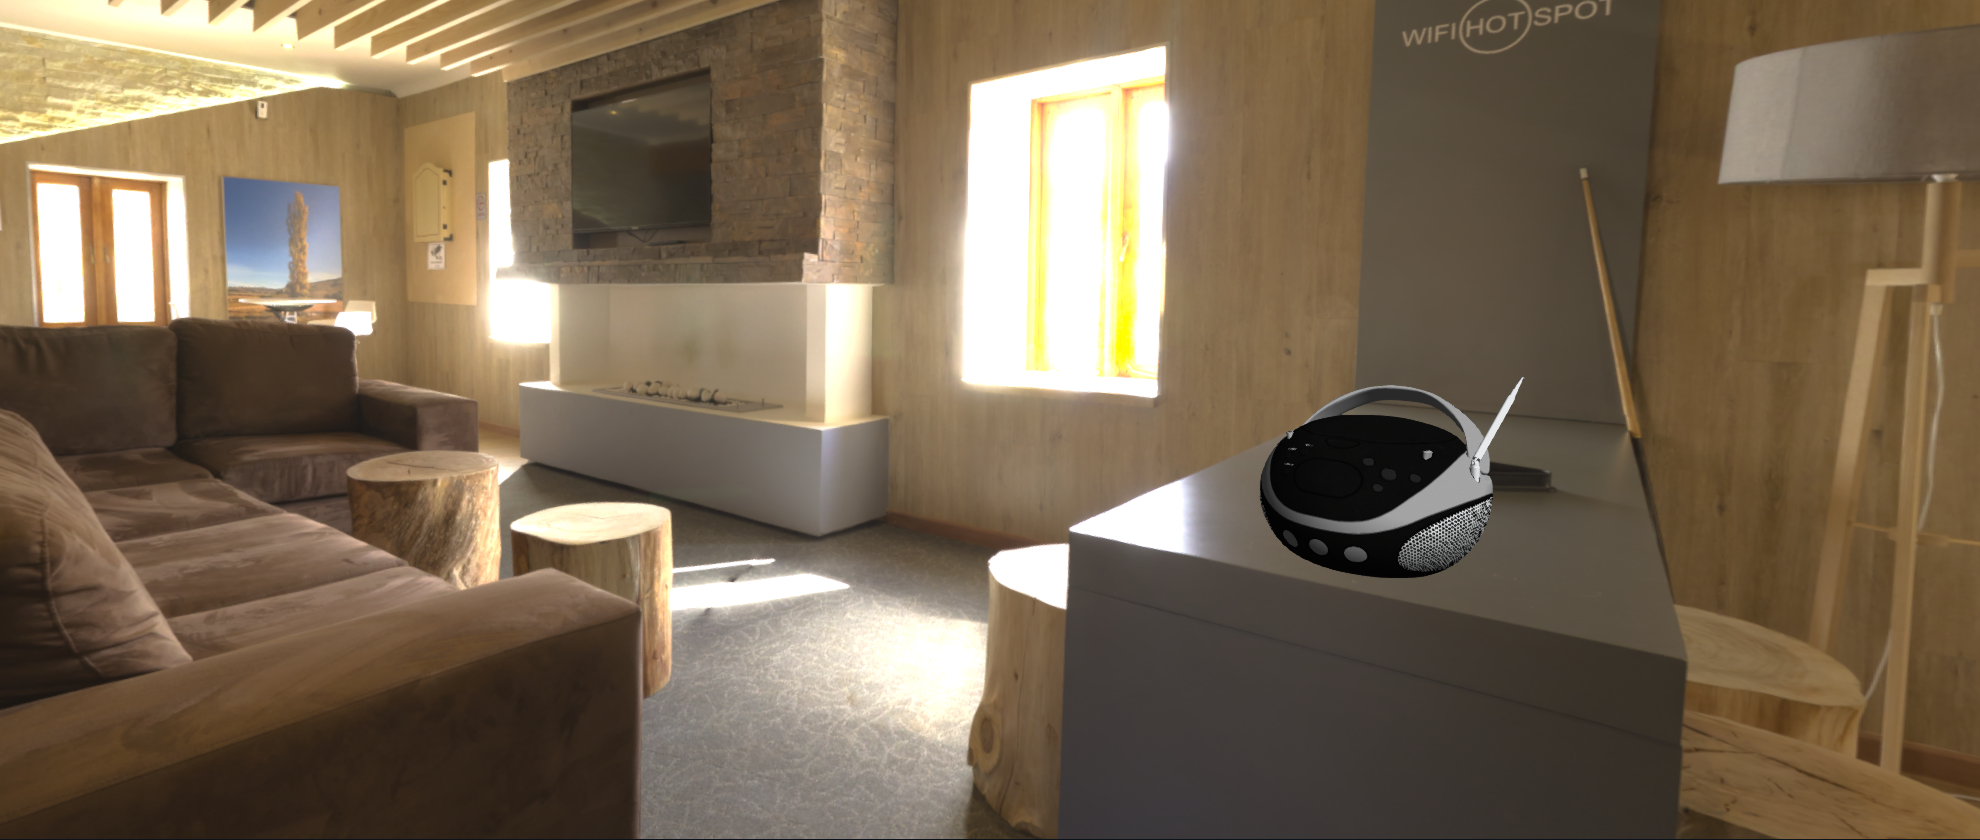
This lounge environment already makes the scene look more natural, but the lighting on the model makes it seem out of place.
To remedy this, let’s style it with PBRSettings, and add a reflection map.
See Take advantage of physically based materials for more information about physically based rendering (PBR).
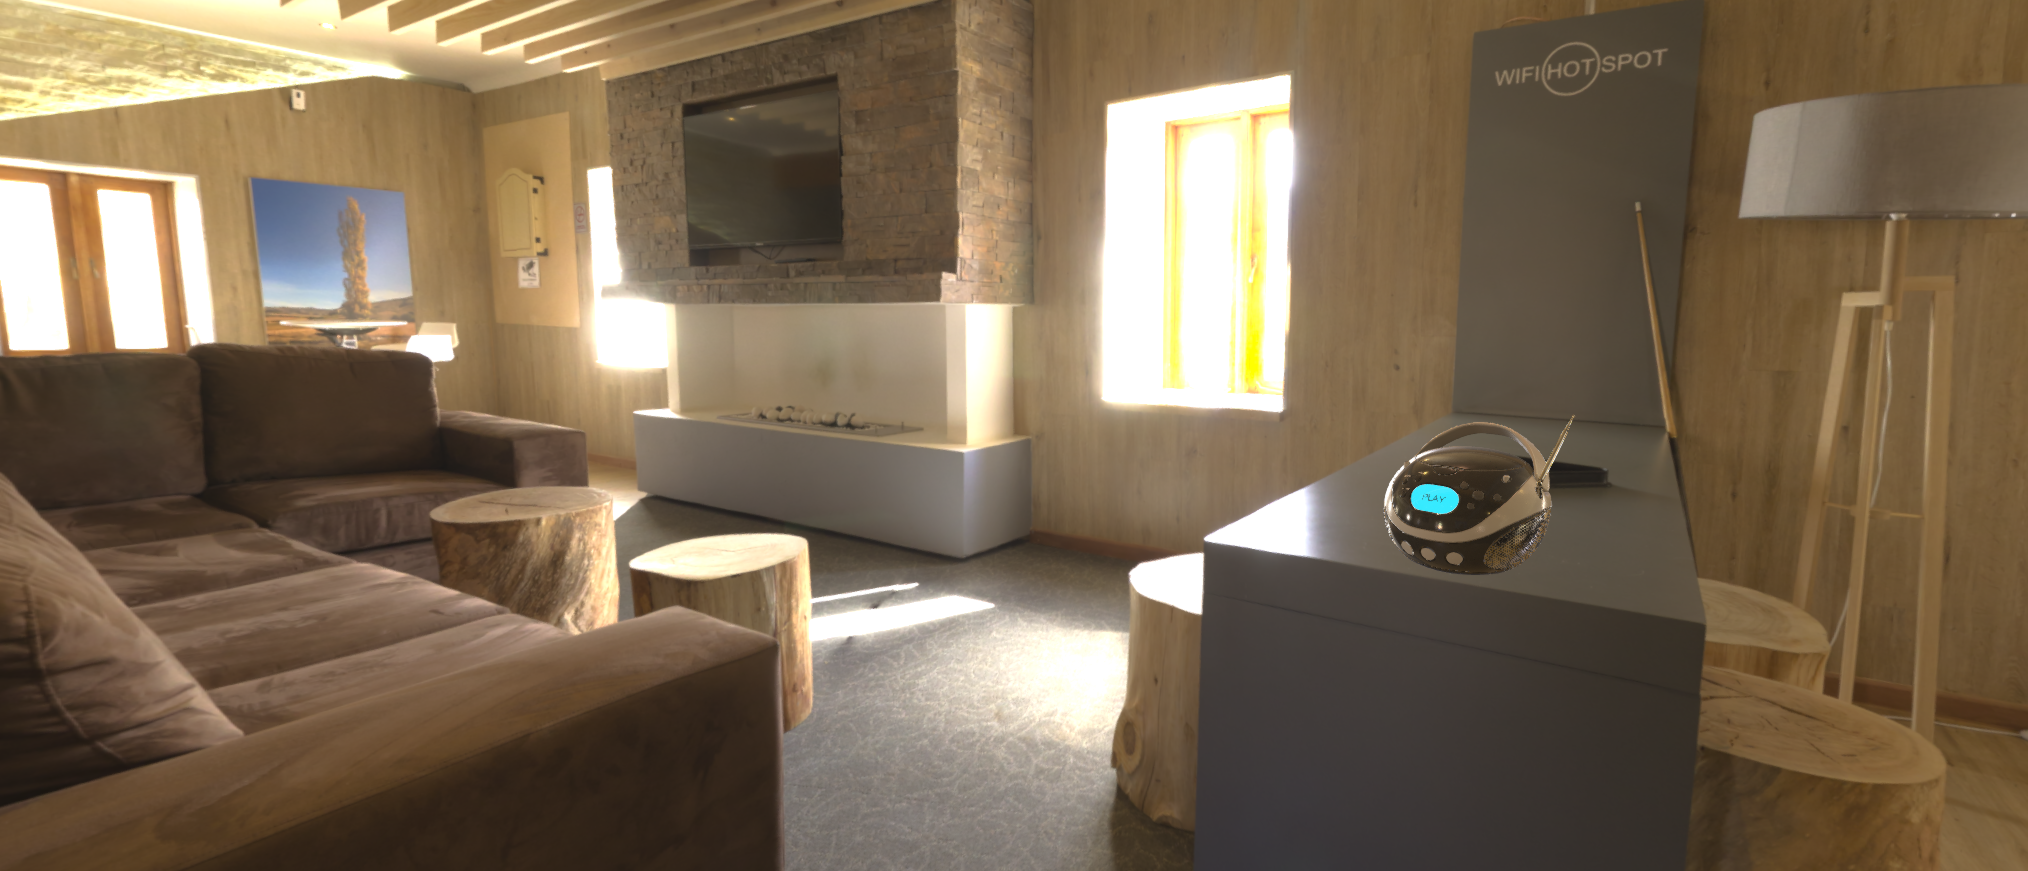
Now, the model looks more grounded in the scene. It’s also more detailed than before because, with the PBRSettings, more parts of the model material are used.
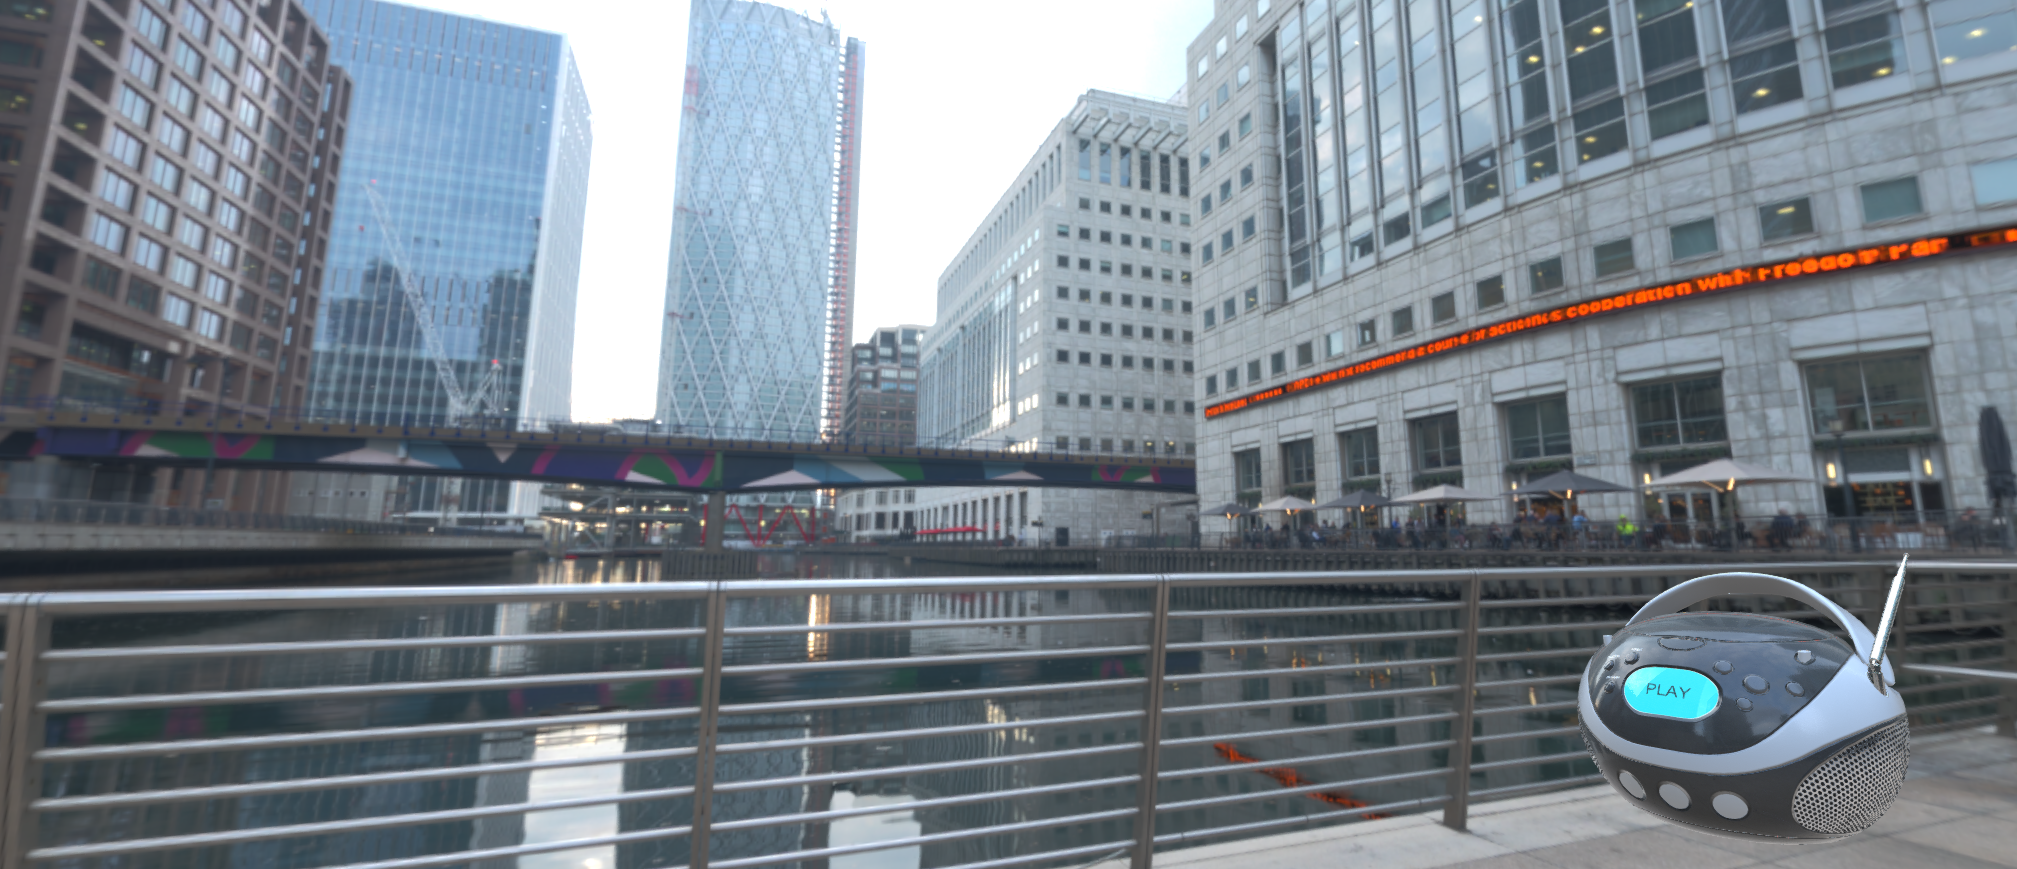
The model contains material information that LuciadRIA can use to visualize it reasonably realistically in any environment. For example, the Figure 15, “Model in urban environment” figure shows how the model looks in an urban environment.
The environment map effect works on 3D maps only. It has no effect on 2D maps.
See the API documentation of EnvironmentMapEffect, EnvironmentMap and PBRSettings for more details.