This tutorial shows you how to visualize panoramas in LuciadRIA.
|
The panorama capabilities discussed in this article are available in LuciadRIA Pro only. |
What is a panorama?
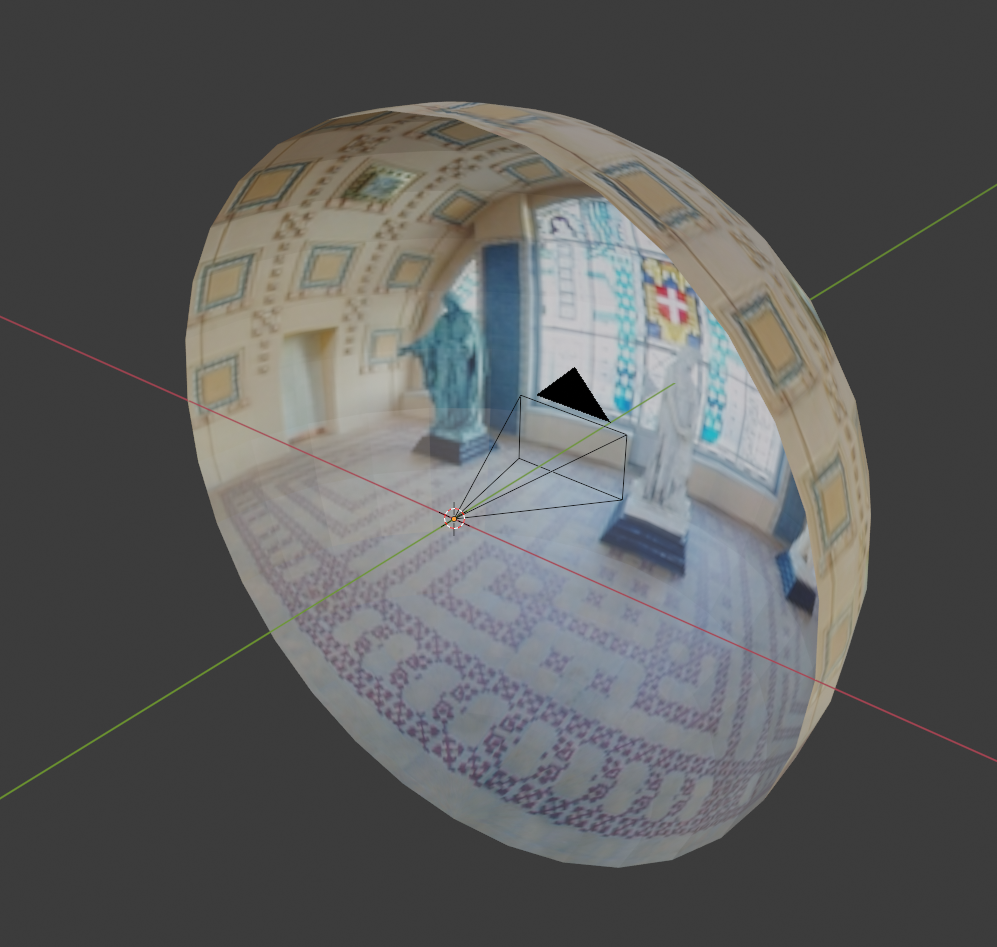
A panorama is a photo with a very wide field-of-view around a sensor. These photos often cover a full 3D sphere around the sensor location: 360 degrees along the horizon, 90 degrees up and 90 degrees down. The most well-known example of panoramas is Google Street View.
What kind of panoramas can you use in LuciadRIA?
Panoramas are often created by combining several photos. The process of combining photos into a panorama is called stitching. LuciadRIA doesn’t stitch panoramas together for you. If you only have 'raw', unstitched photos, you must first use other software to stitch a panorama together before you can visualize it in LuciadRIA.
LuciadRIA can visualize two types of panoramas:
-
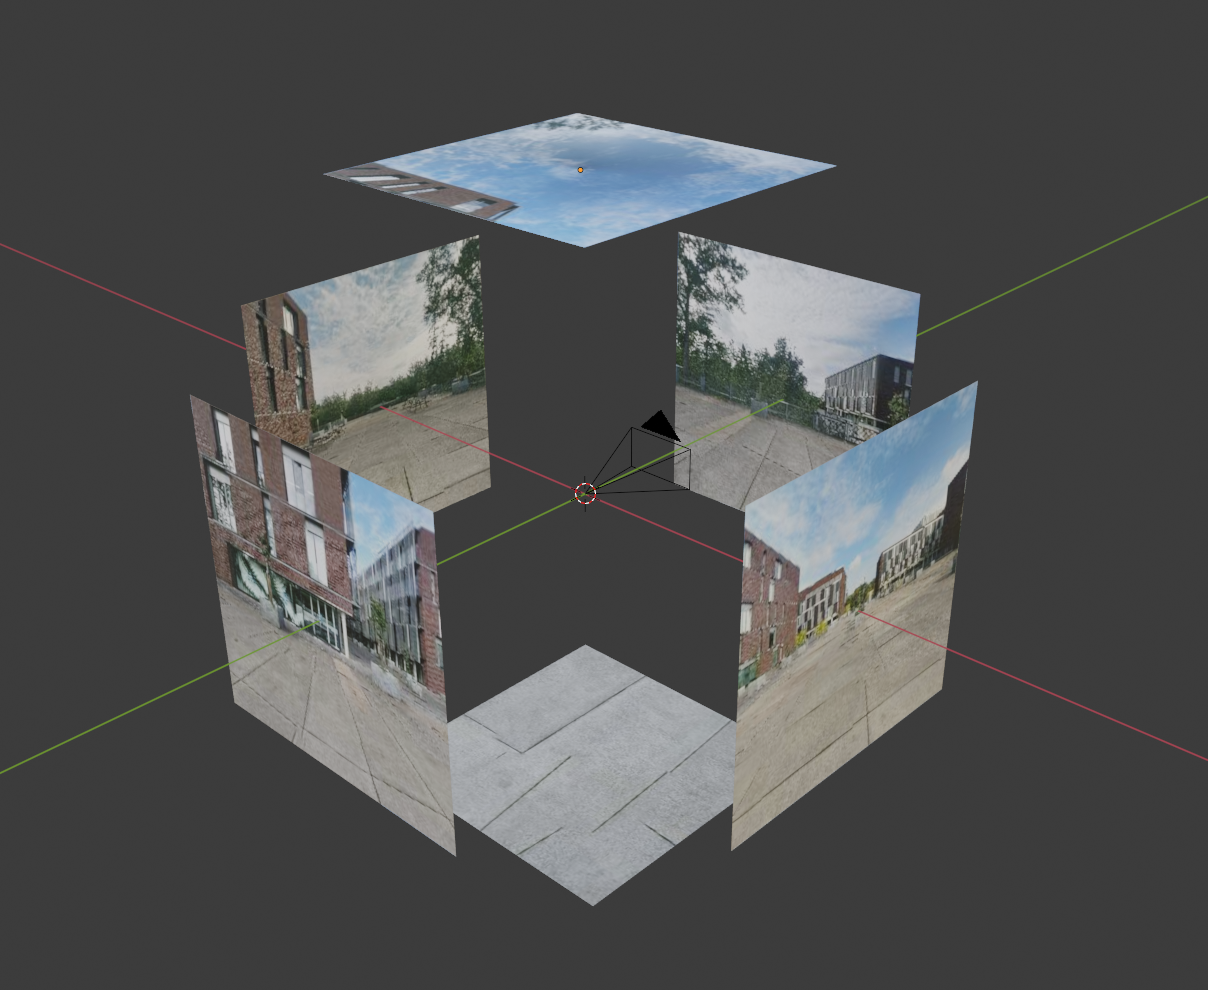
Cubemap panoramas: this kind of panorama consists of 6 separate images, called cubemap faces. There is one cubemap face for each cardinal direction: front, back, left, right, top, and bottom. The cubemap faces are connected seamlessly. The sensor location is at the center of the cube. The cubemap faces can be multi-leveled.
-
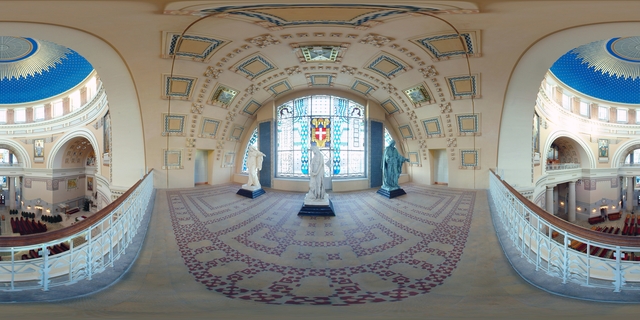
Equirectangular panoramas: this kind of panorama consists of a single, large image. In the image, the 3D sphere around the sensor is projected to a 2D plane using a equirectangular projection. The equirectangular image can be multi-leveled.
What other information do you need to visualize panoramas in LuciadRIA?
If your data was processed with LuciadFusion, you’re good to go. LuciadFusion has set up the feature model and images correctly for use in LuciadRIA.
If your data was not processed with LuciadFusion, you need this metadata for each panorama:
-
A georeferenced location
-
An orientation
-
The URL to the imagery
If your panoramas are multi-leveled, you also need some details on the tile structure of the imagery:
-
The number of rows and columns at level 0
-
The number of levels
-
The width and height of a tile, in pixels
You must make the metadata for panoramas in a format that the LuciadRIA Store API can decode.
Common formats are GeoJSON — for use with UrlStore — or WFS features — for use with WFSFeatureStore.
You can also implement your own custom store.
You can look at RestStore in the LuciadRIA samples for an example of how to do this.
How can you visualize your panoramas in LuciadRIA?
This section explains how to visualize panoramas in LuciadRIA.
Panorama data consists of:
-
Panorama feature information such as positions, image tiling information, and data properties like a timestamp, and a filename. This is standard vector feature information. You can find it stored in formats such as GeoJson, ShapeFile, a spatial database, or a custom format.
-
Panorama imagery. These can be embedded with the feature information in a custom format. They can also be stored as separate files.
We start by showing you how to visualize data that was processed by LuciadFusion. If you’re not using data processed by LuciadFusion, keep on reading. We explain how to plug in your own imagery later.
Visualizing the features
LuciadFusion encodes panorama features into a cubemap.json. You can decode these features with a UrlStore,
put them in FeatureModel, and visualize them with a FeatureLayer. You can already visualize these features on a map,
to verify that they’re in the correct location. We add visualization of panoramas in the next step.
const cubemapJsonUrl = "https://sampledata.luciad.com/data/panoramics/LucernePegasus/cubemap.json";
const store = new UrlStore({target: cubemapJsonUrl});
const model = new FeatureModel(store, {reference: getReference("CRS:84")});
const panoramaLayer = new FeatureLayer(model, {
  label: "Fusion panoramas"
});
map.layerTree.addChild(panoramaLayer);|
To verify that your feature locations are correct, you can also load the |
Adding panoramas
To visualize the panoramas processed by LuciadFusion, create a FusionPanoramaModel and assign it to
the layer’s panoramaModel. The panorama model is responsible for retrieving the panorama image tiles.
const fusionPanoramaModel = new FusionPanoramaModel(cubemapJsonUrl);
const panoramaLayer = new FeatureLayer(model, {
  panoramaModel: fusionPanoramaModel,
  ...
});
You must use a FeaturePainter to draw the panoramas, through GeoCanvas.drawPanorama.
We recommend starting with the PanoramaFeaturePainter class, which is part of the LuciadRIA sample codebase.
This painter:
-
Paints 3D icons at the panorama locations.
-
Can fade-in and fade-out of panoramas, as controlled by the sample
PanoActions. -
Supports mouse hover styling of panorama icons, as controlled by the sample
HoverController. -
Paints 2D icons at panorama locations on overview maps, as shown in the panorama sample
OverviewMapof the panorama sample.
const panoramaFeaturePainter = new PanoramaFeaturePainter({overview: false, iconHeightOffset: 2.5});  // found in the Panorama sample
const panoramaLayer = new FeatureLayer(model, {
  painter: panoramaFeaturePainter,
  ...
});
Next, we add the ability to move into and out of panoramas. This is controlled by the sample PanoramaActions and the sample
controllers set up by createPanoramaControllers.
const panoActions = new PanoramaActions(map);
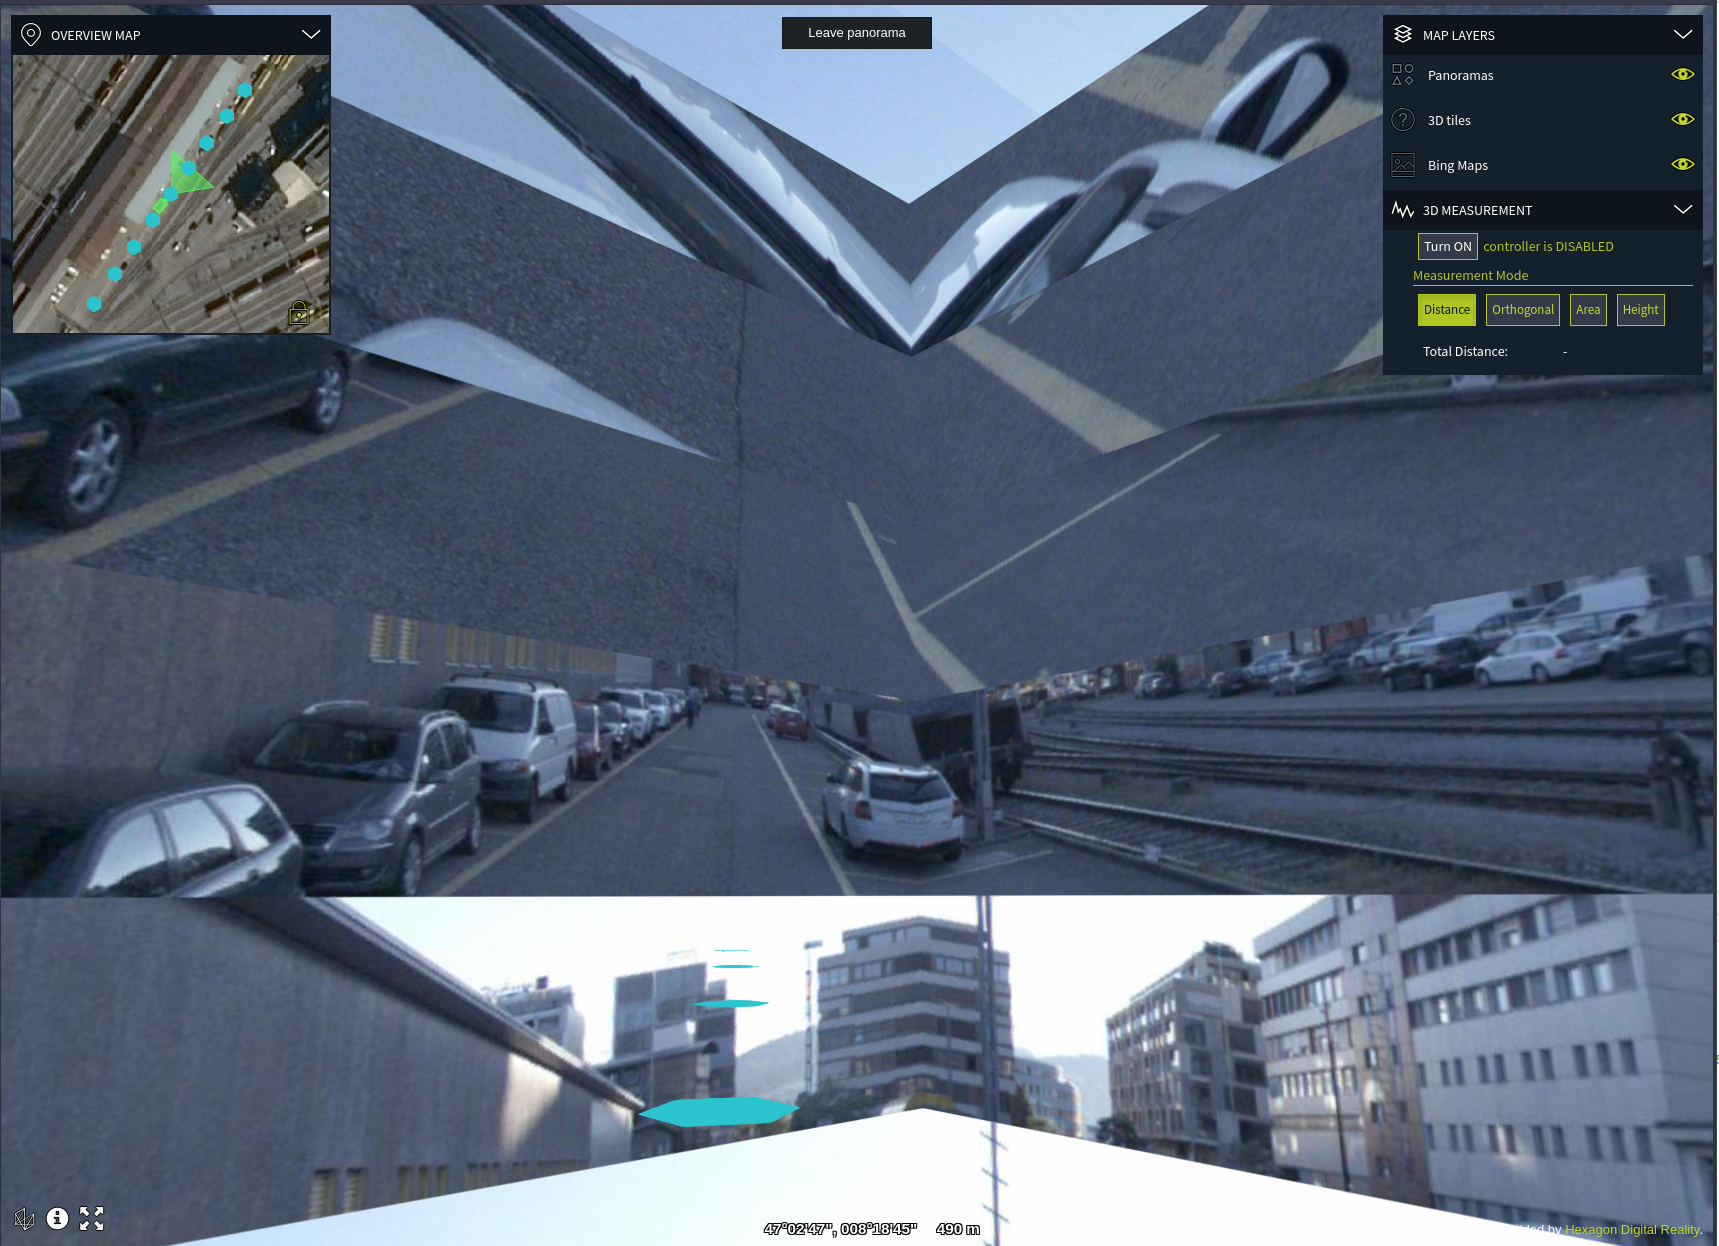
createPanoramaControllers(panoActions, map, panoramaLayer);Now, when you click a panorama feature, the camera moves into that panorama and you see the panorama. The navigation mode is also different while you’re inside a panorama. To leave the panorama, press the Escape key.
When we bring all code snippets so far together, we have:
const cubemapJsonUrl = "https://sampledata.luciad.com/data/panoramics/LucernePegasus/cubemap.json";
const store = new UrlStore({target: cubemapJsonUrl});
const model = new FeatureModel(store, {reference: getReference("CRS:84")});
const fusionPanoramaModel = new FusionPanoramaModel(cubemapJsonUrl);
const panoramaFeaturePainter = new PanoramaFeaturePainter({overview: false, iconHeightOffset: 2.5});  // found in the Panorama sample
const panoramaLayer = new FeatureLayer(model, {
  label: "Fusion panoramas",
  panoramaModel: fusionPanoramaModel,
  painter: panoramaFeaturePainter
});
map.layerTree.addChild(panoramaLayer);

const panoActions = new PanoramaActions(map); // found in the Panorama sample
createPanoramaControllers(panoActions, map, panoramaLayer); // found in the Panorama sample
Adding an overview map
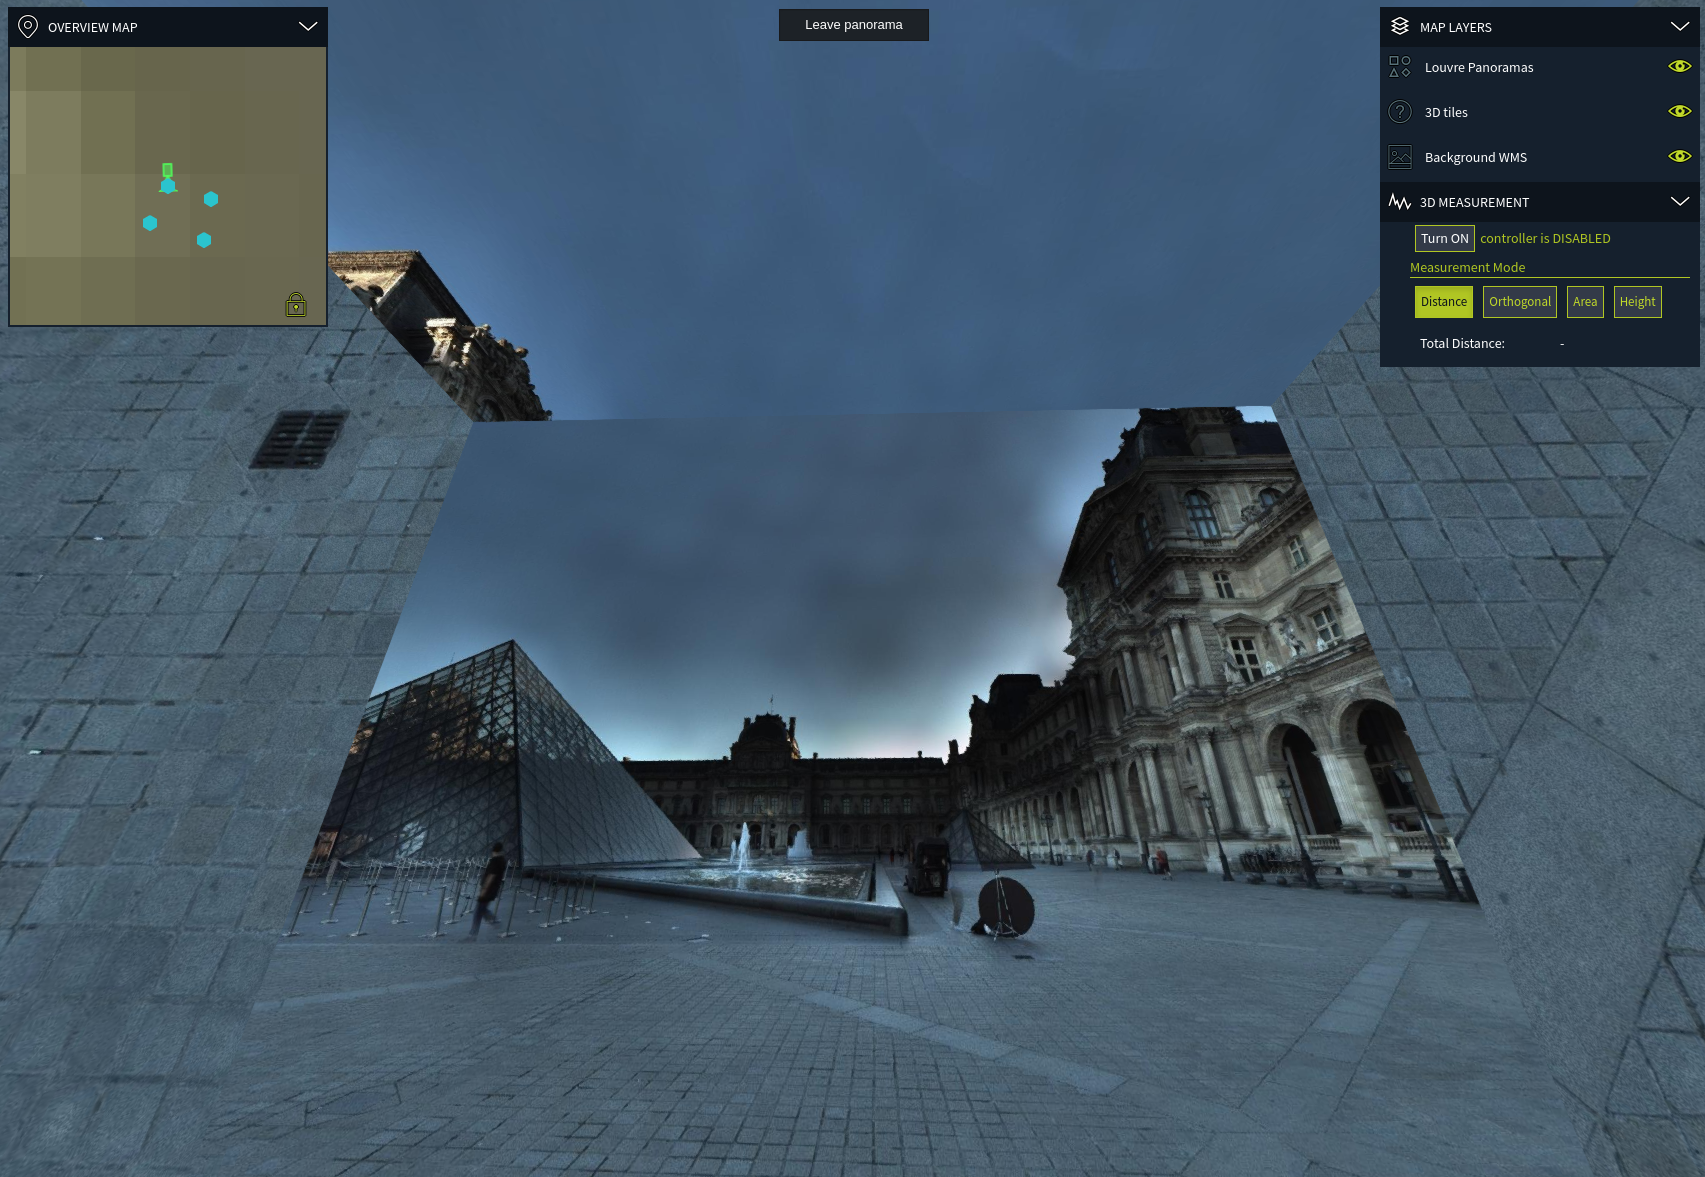
In the Panorama sample, you also see an example of an overview map. An overview map can help your application users navigate panoramas. It has the following layers:
-
A background layer, like Bing Maps
-
Icons for the panoramas, with hover styling and active styling
-
A visualization of the field-of-view of the 3D map. Users can consult it to find out in what direction they’re looking on the map.
If you click a panorama in the overview map, it moves the camera of the 3D map to that panorama location.
Using custom data
If you want to use data that wasn’t processed with LuciadFusion, you must replace FusionPanoramaModel
with your own implementation of PanoramaModel.
Customizing the visualization
If you want to customize the visualization, have a look at PanoramaFeaturePainter. It’s sample code, so you’re free
to tweak this painter to your liking.
Customizing the animations and navigation behavior
The sample code has implementations of the camera navigation behavior and all animations. The animations are managed in
PanoramaActions, and the navigation behavior is implemented through a chain of sample controllers in createPanoramaControllers.
Because this is all sample code, you can tweak and change the code as you please.
Troubleshooting
Cubemap faces
When you are visualizing cubemap panoramas, double-check that:
-
Your cubemap face names match those of LuciadRIA: front, back, left, right, top, and bottom. If the names for the cubemap faces in LuciadRIA don’t match the ones of your data, you can use
PanoramaModelConstructorOptions.facePatternMapto convert these names. -
The rotation of a single face matches that of LuciadRIA. You may have to rotate some faces, often the top and bottom ones, 90 degrees clockwise or counterclockwise.
-
The faces don’t appear "inside-out": the panorama might look fine at first glance, but left and right are swapped.
You can use the images in the documentation of CubeMapPanoramaDescriptor as a reference for what LuciadRIA expects.
It shows you how the cubemap faces connect with each other.
Panorama orientation
Make sure that your panorama is oriented in the right direction. By default, LuciadRIA uses an orientation
— PanoramaStyle.orientation-- of 0. This makes the "front" face point to the north.
If you processed your panoramas with LuciadFusion, you don’t need to worry about orientation.
LuciadFusion bakes the orientation into the imagery, so that you can always visualize it with orientation=0.