In this tutorial, you will learn how to successfully run the LuciadLightspeed samples from IntelliJ IDEA.
Prerequisites for the IDE integration
In the project configuration procedure, it is assumed that you already installed the following software:
-
Java Development Kit (JDK) 17 or higher.
-
JavaFX. In this tutorial, we use an OpenJDK 17 build that includes OpenJFX.
If you choose to install JavaFX separately from your JDK, you may need additional project configuration depending on your setup. See https://openjfx.io/openjfx-docs/#IDE-Intellij for more information.
-
LuciadLightspeed. In this tutorial, we use LuciadLightspeed 2024.0.
-
IntelliJ IDEA. You can download the IntelliJ IDEA IDE from https://www.jetbrains.com/idea/download/. In this tutorial, we use the IntelliJ IDEA Ultimate Edition.
|
Using the Maven sample project to run the LuciadLightspeed samples
If you prefer to use Maven and have it installed, you can run the LuciadLightspeed sample code from a Maven sample project, with minimal setup. First, you run a setup script to generate the sample project with the correct project settings. If you open that sample project in IntelliJ, you can immediately compile and run the samples with Maven. For more information, see Setting up the sample project. |
Creating a LuciadLightspeed development project in IntelliJ
-
Start IntelliJ and create a new project: either click New Project on the Welcome screen, or go to File > New > Project from the main menu. The New Project screen opens.
-
Enter the main project information:
-
Select the directory that holds the LuciadLightspeed installation directory in the Location: field, and enter the installation directory name in the Name: field.
-
Select Language Java and select the installed JDK from the JDK drop-down menu.
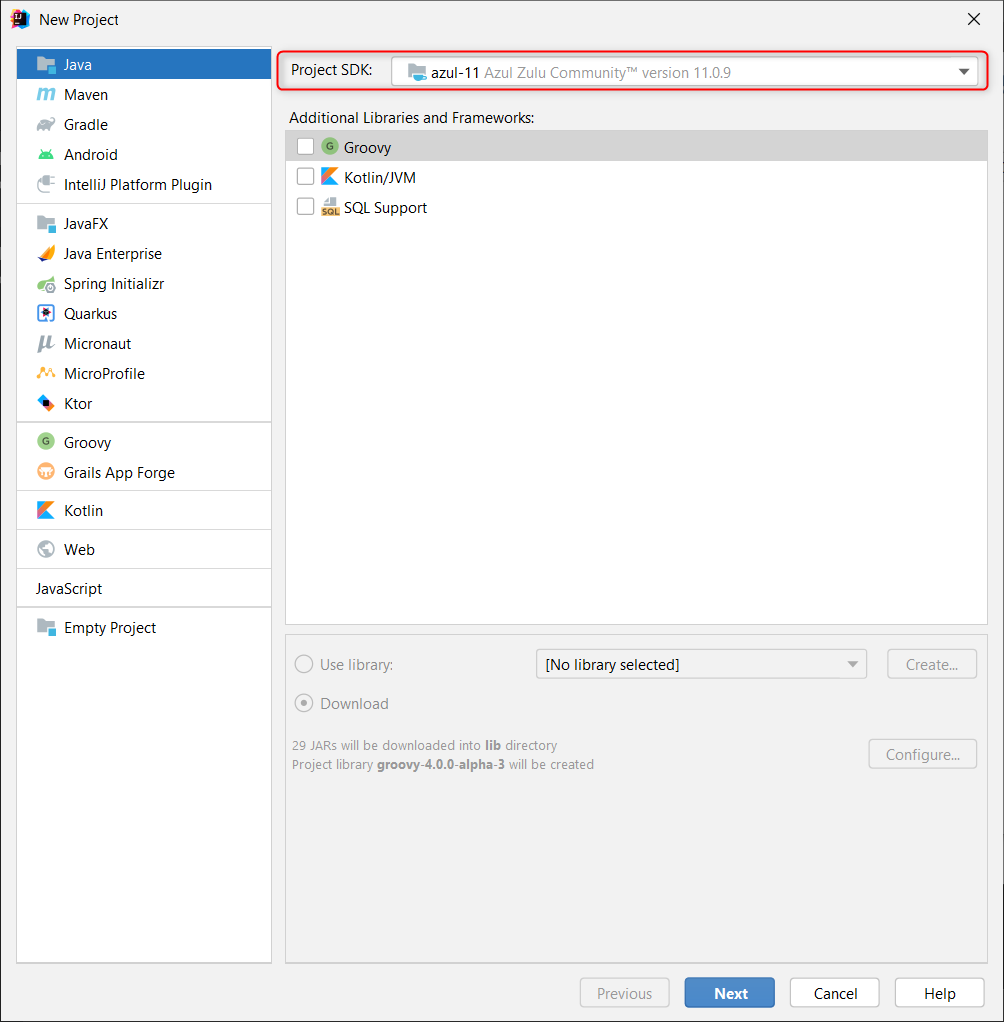
If your JDK is not in the JDK dropdown menu, you can add it. Click Add JDK… from the dropdown menu, locate the JDK in your file system, and click OK.
-
-
Click Create to close the project creation wizard.
IntelliJ sets up your project, and starts indexing all the project files. This may take a few minutes but there is no need to wait. You can continue with the configuration of your project while IntelliJ continues indexing. You can look at the structure of your new project in the project navigation pane on the left.
At some point, IntelliJ may notify you that it detected OSGi and Web frameworks, and offer you the option to configure those frameworks. Click the Configure link, and de-select both frameworks in the Setup Frameworks dialog. Configuring the framework setup to include the frameworks may result in a broken project.
Completing the project configuration
Before you can run the samples, you need to make sure that all project dependencies are in place, such as the LuciadLightspeed license file and the project resources. It is also strongly recommended to enable annotation processing in your project. LuciadLightspeed uses annotations to register services with a registry, and provide instant application services.
-
In the project navigation pane on the left, right-click the
LuciadLightspeed_<version>\srcdirectory, and select Mark directory as > Unmark as Sources Root.IntelliJ creates the
srcdirectory by default. We have no use for it as a source root directory, so we unmark it as such. You can also choose to just delete the directory.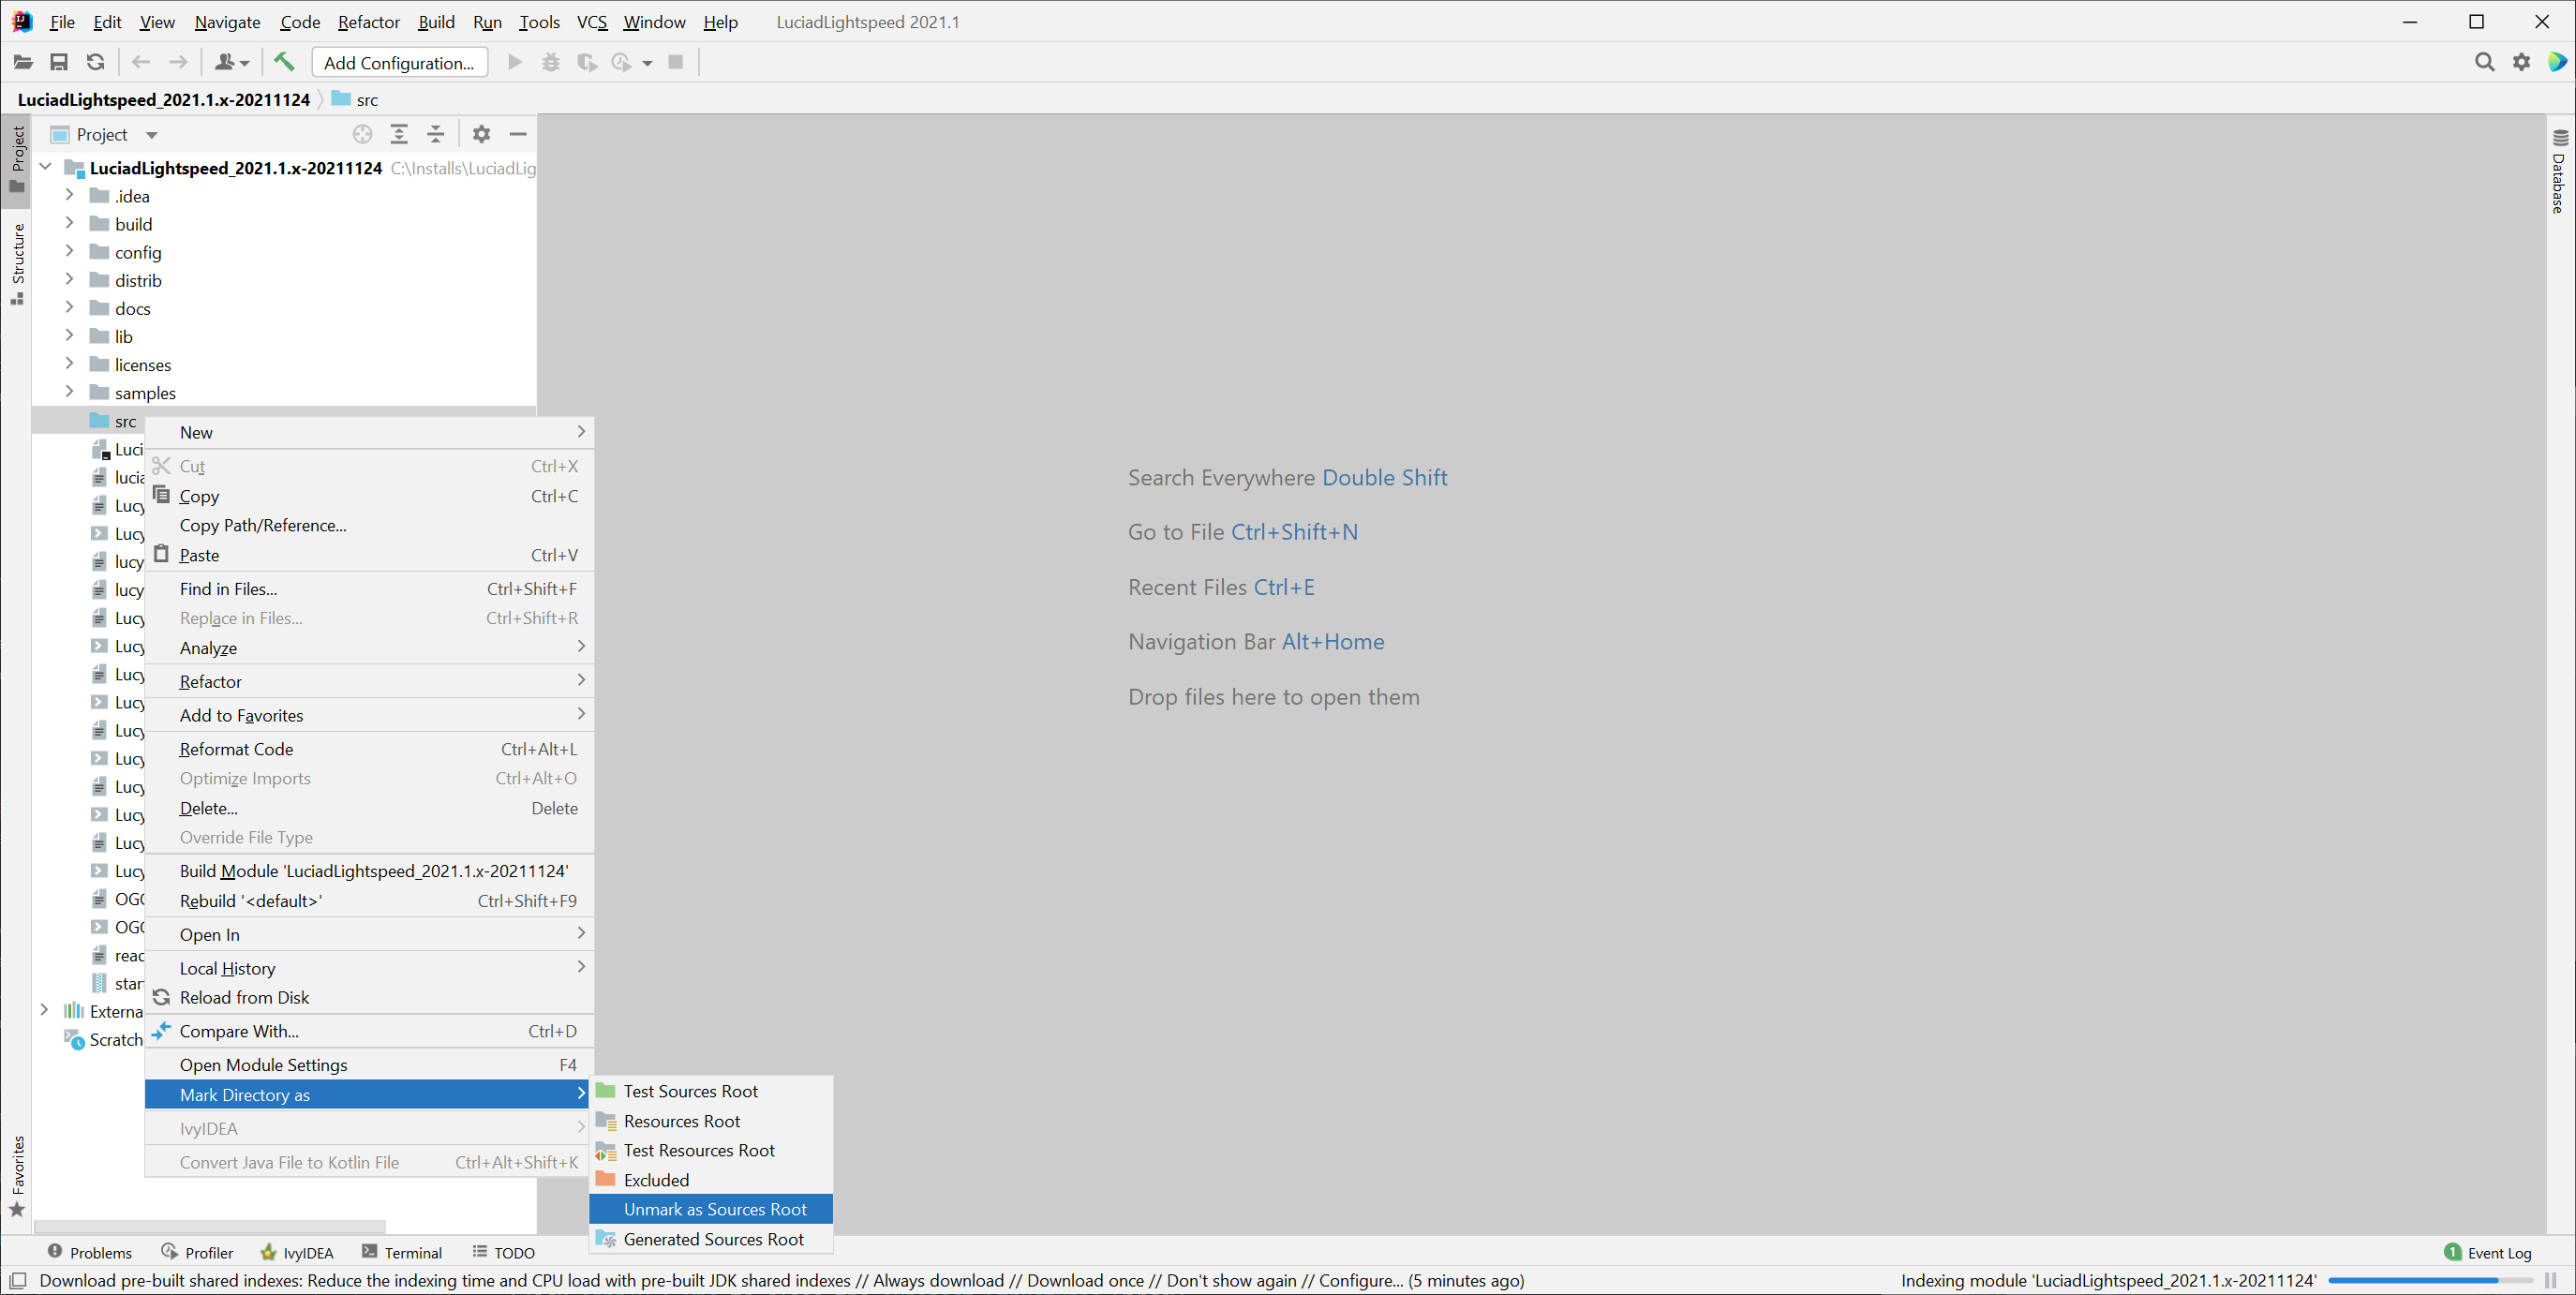
-
Right-click the
LuciadLightspeed_<version>\samples\srcdirectory, and select Mark directory as > Sources Root.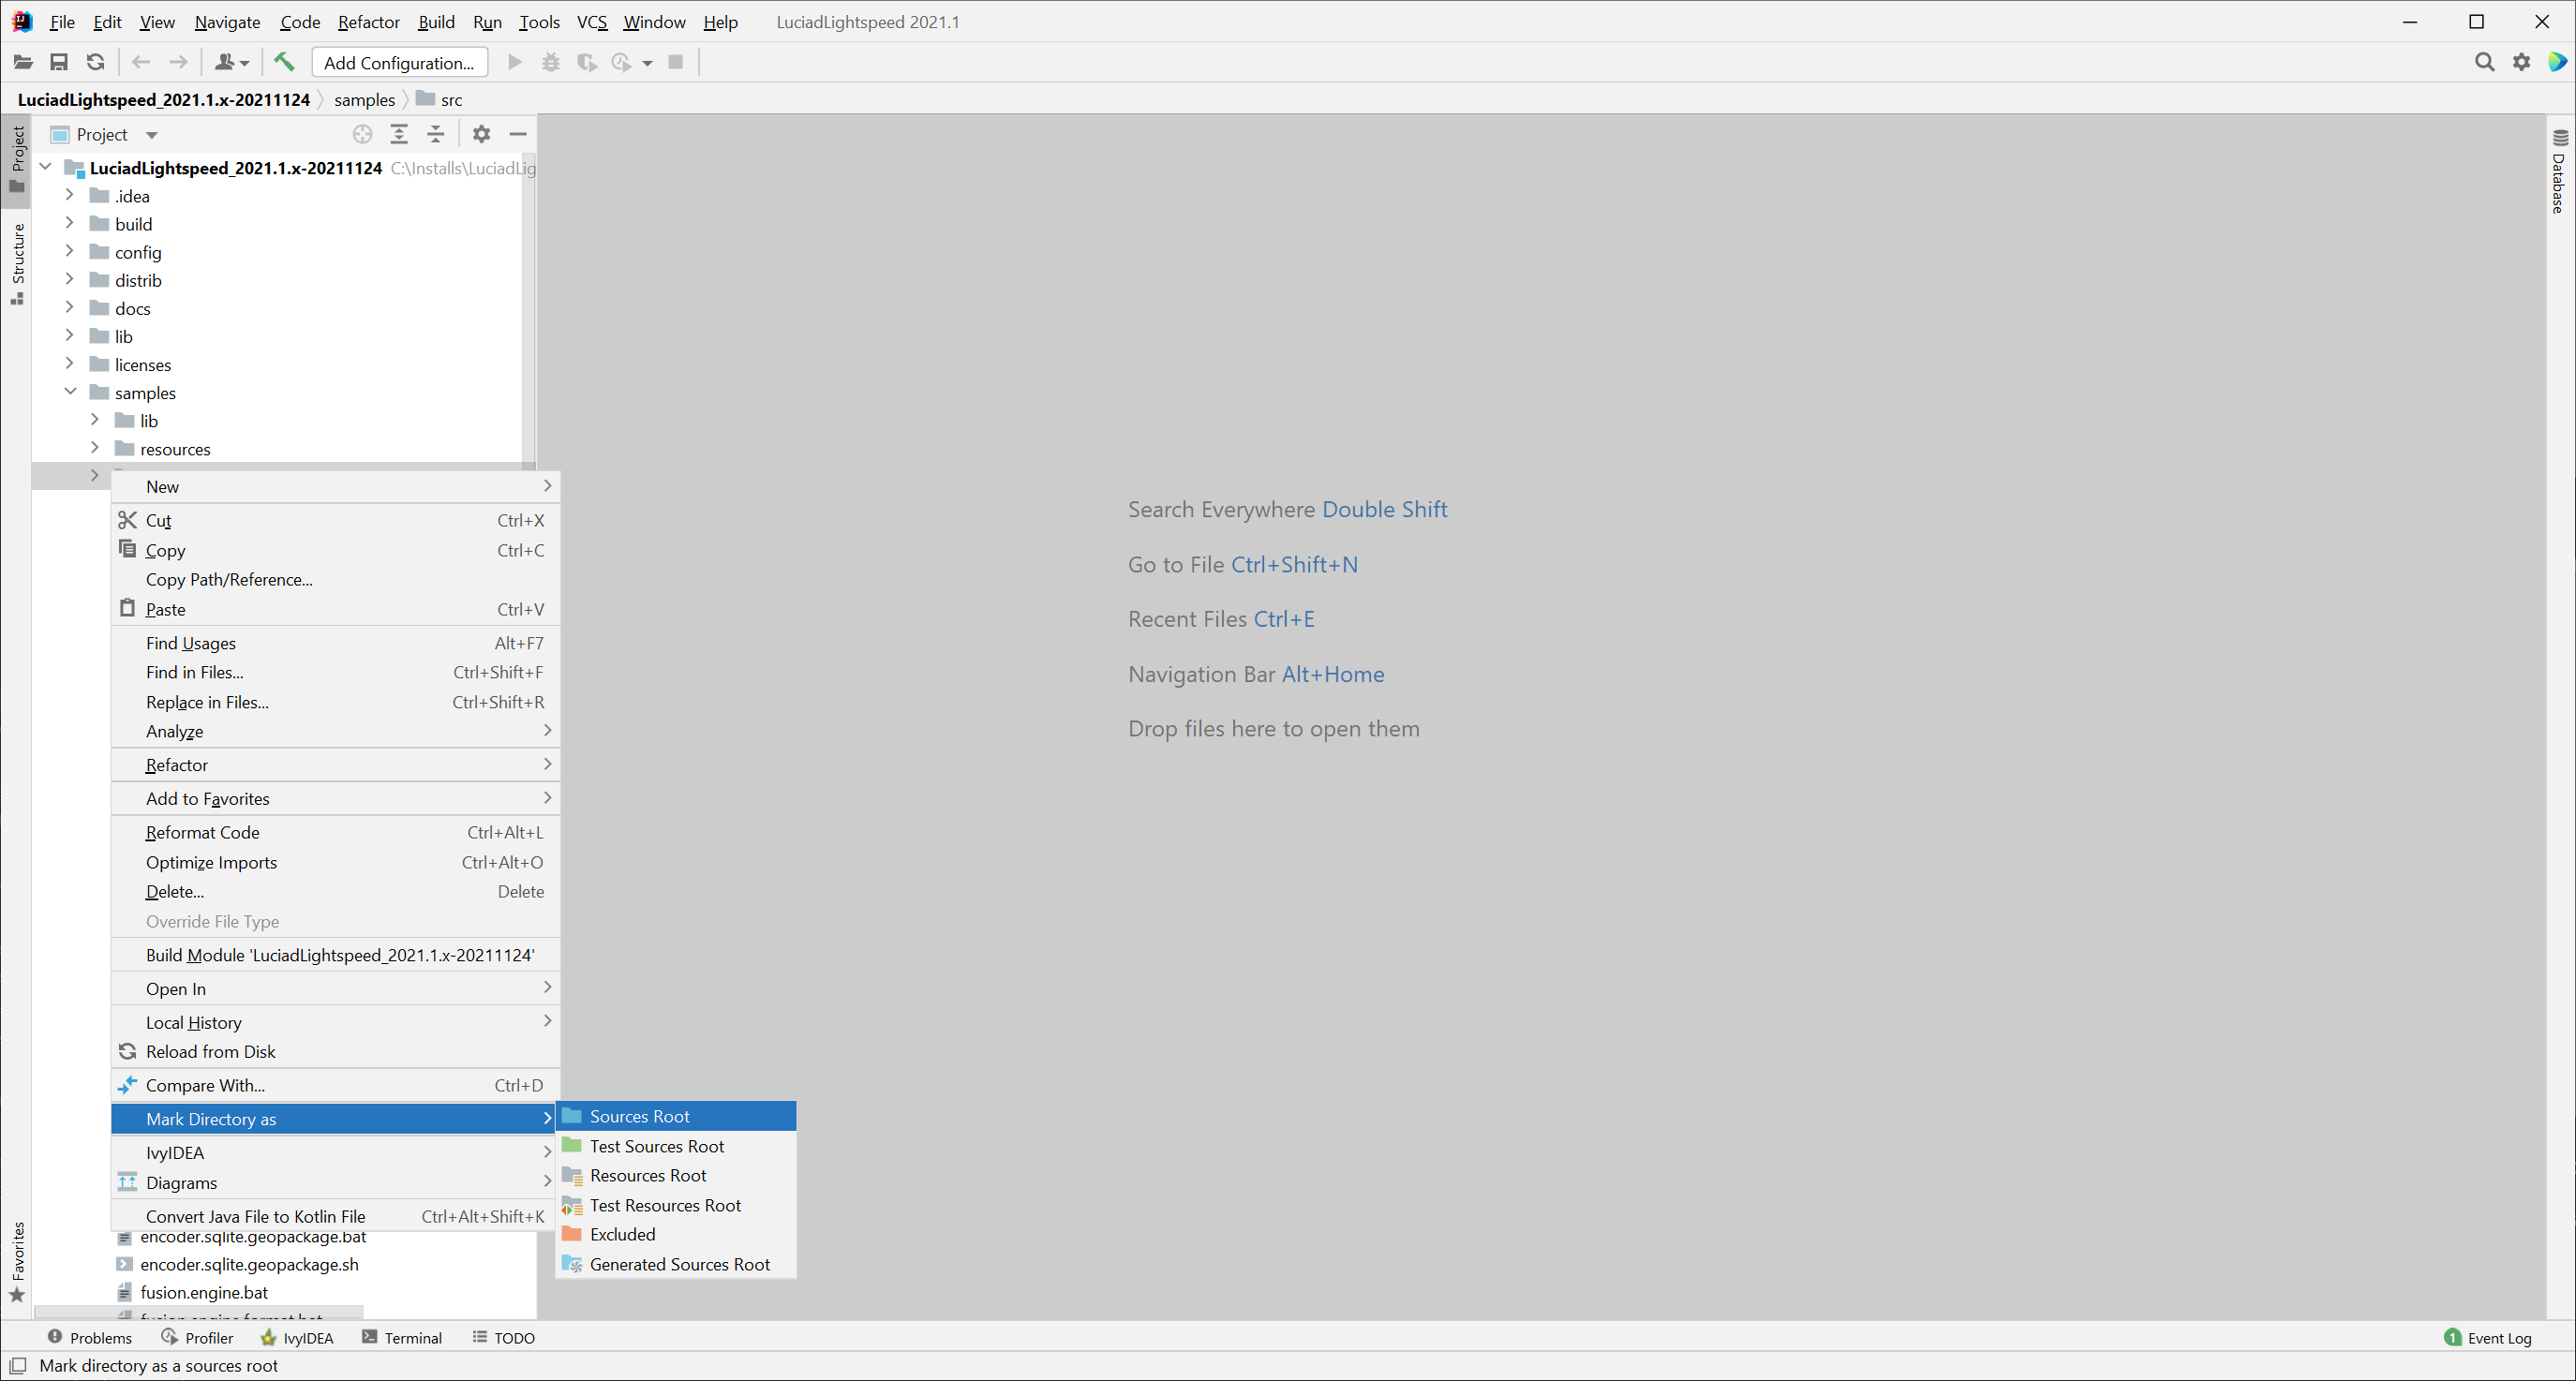
-
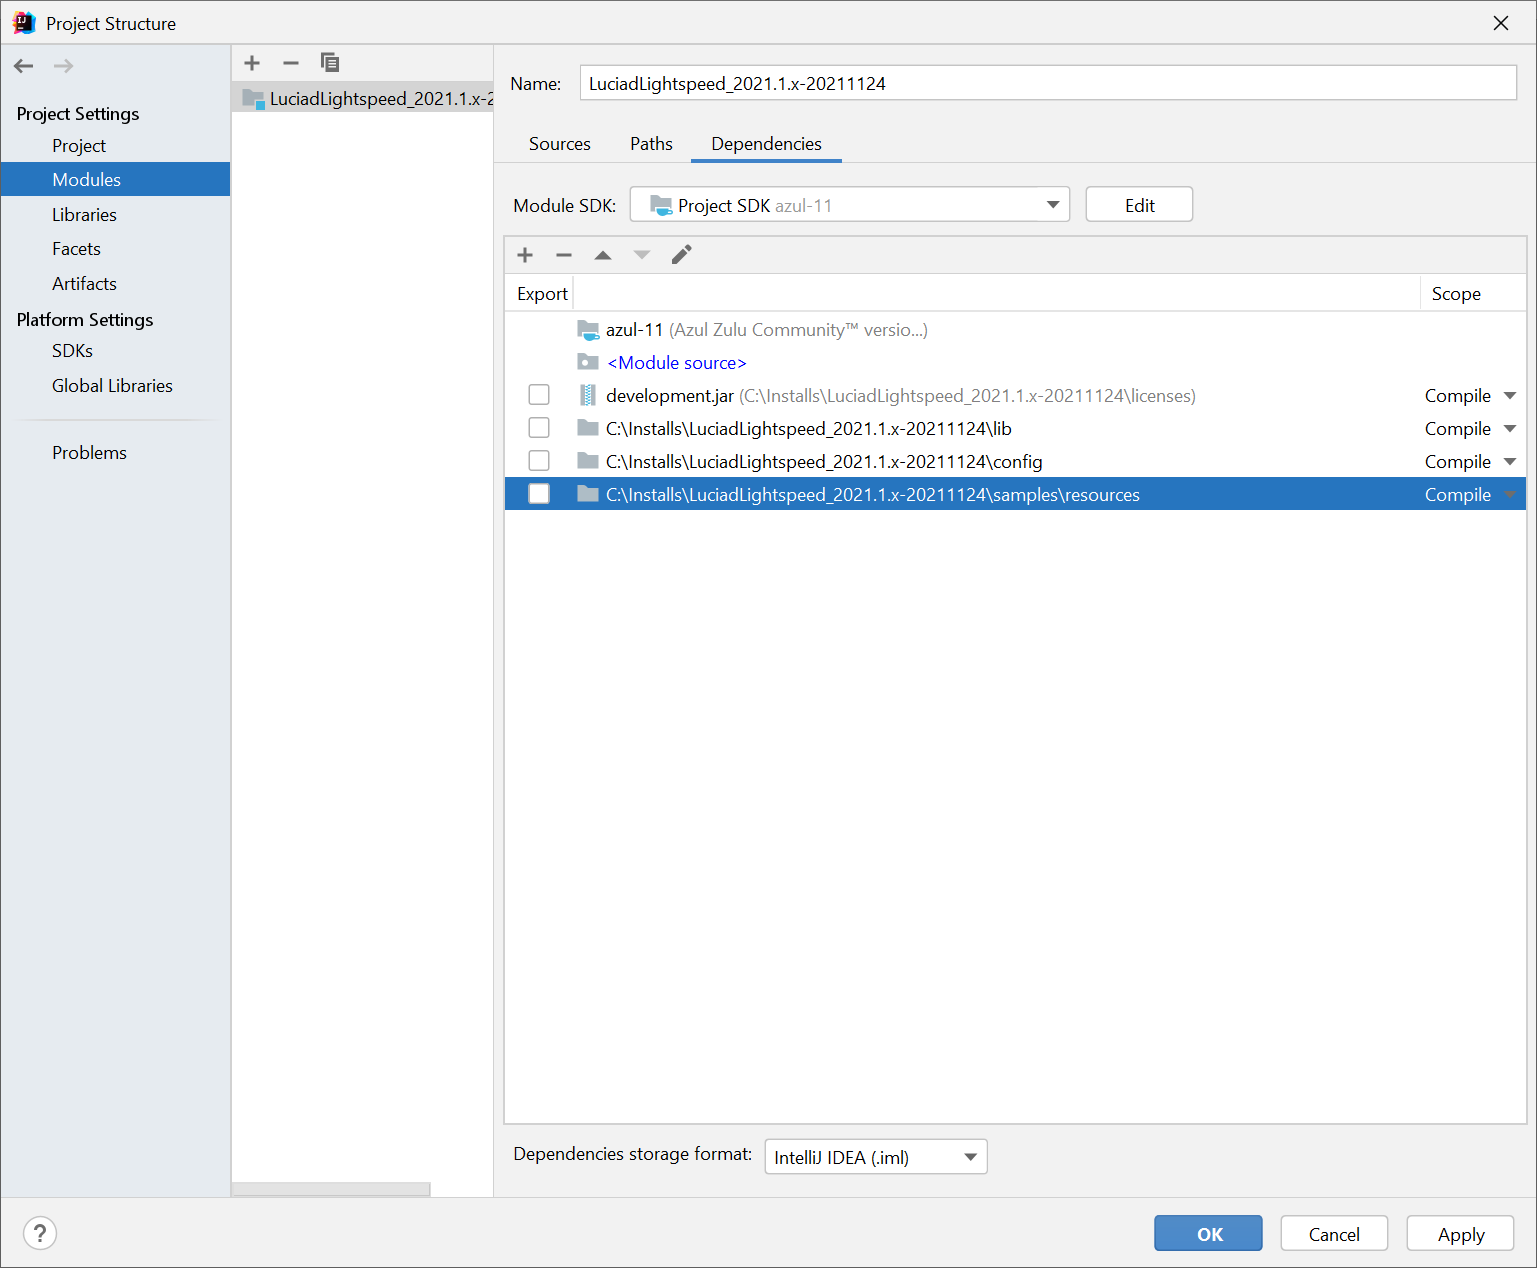
From the main menu, go to File > Project Structure > Modules > Dependencies to add required files and directories.
-
Click the
+icon, and select the JARs or directories… option. In the next dialog, select the files and directories in this list one by one, and click OK:-
development license file
development.jar. This file typically resides in the licenses folder. -
libdirectory -
samples/lib/thirdpartydirectory. This directory contains all the third-party libraries used in the samples. See the prerequisites page for a full list. -
configdirectory -
samples/resourcesdirectoryIn the Choose Categories of Selected Files dialog, select Classes, and click OK. Repeat this step until you have added each file and directory in the list.

-
-
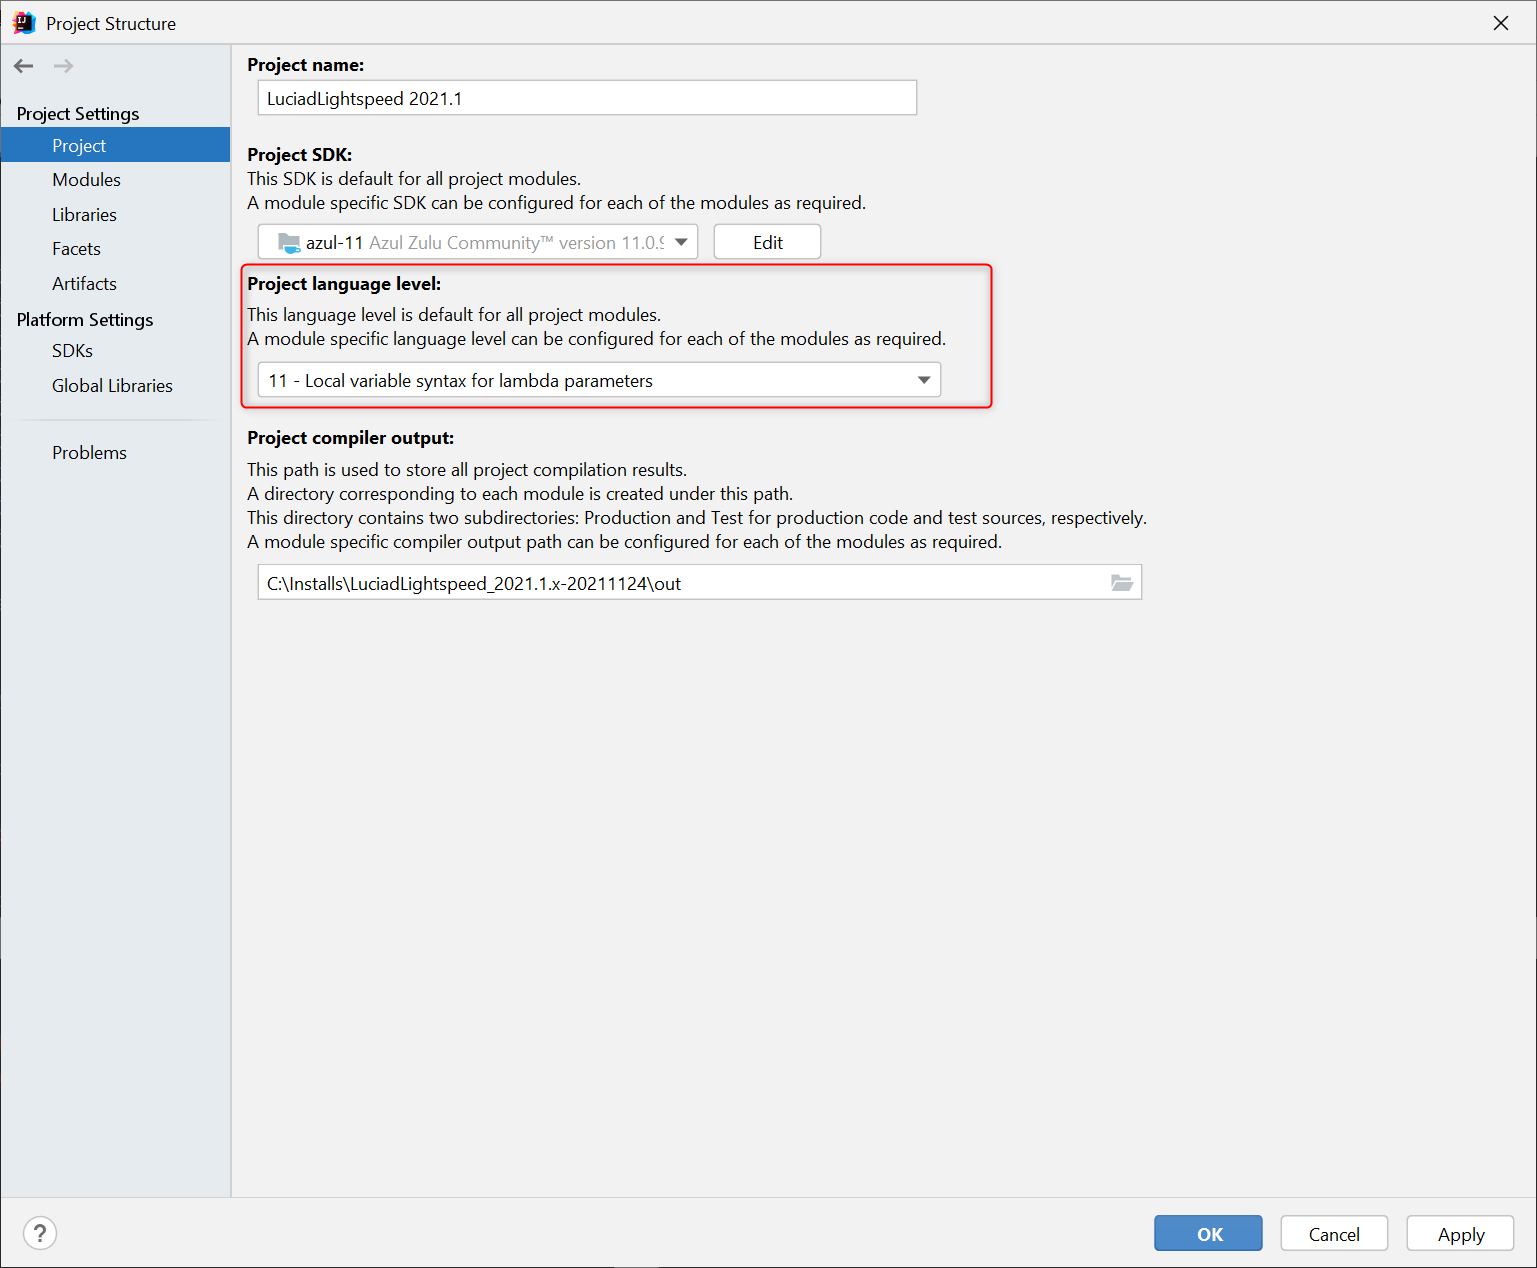
Still in the Project Structure window, go to Project, and change your project language level to Java 17 at least. This setting defines the minimum Java version that your applications require to run.
-
Click Apply > OK to close the Project Structure window.
-
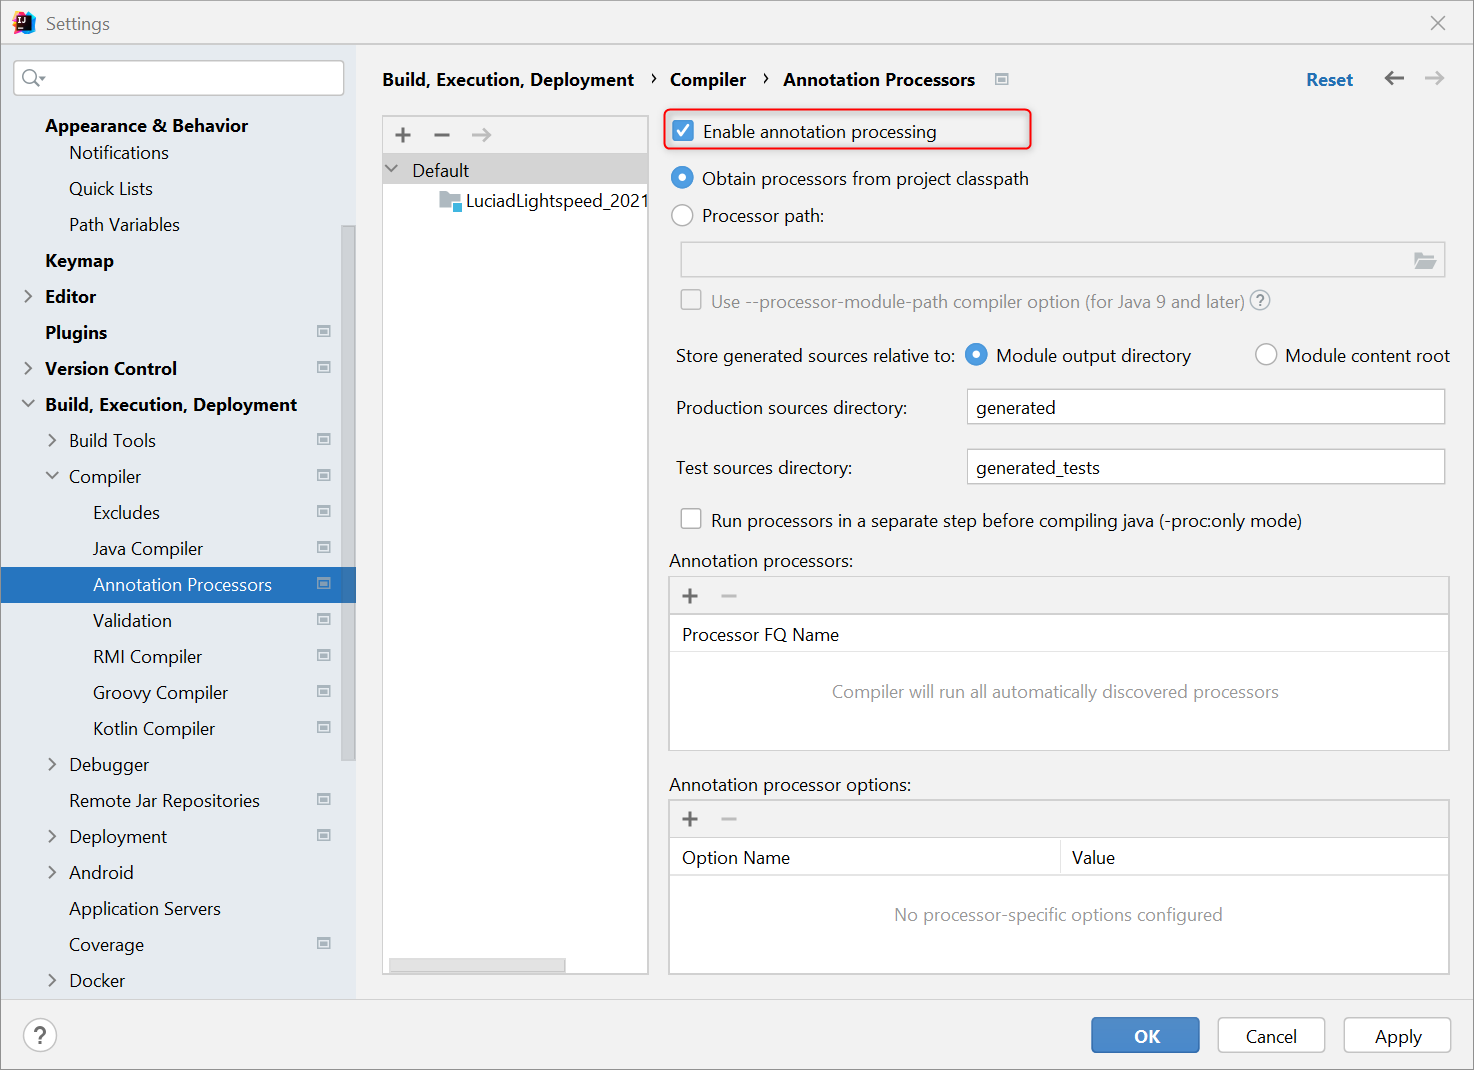
Go to File > Settings > Build, Execution, Deployment > Compiler > Annotation Processors, and select the Enable Annotation processing check box.
Click OK to finish the project configuration.
If you are running IntelliJ on MacOS, you need to go to IntelliJ IDEA > Settings > Build, Execution, Deployment > Compiler > Annotation Processors.
Defining a run configuration for the LuciadLightspeed samples
Luciad strongly recommends specifying a number of Virtual Machine (VM) options before running your samples. They will ensure that your samples run smoothly, and perform well. You can specify the VM options in the run configuration for your LuciadLightspeed project.
-
Go to Run > Edit Configurations…
-
In the Run/Debug Configurations window, click Edit configuration templates… in the left-hand pane.
-
In the Run/Debug Configuration Templates window, select Application from the left-hand pane.
-
In the Build and run section, select the appropriate JDK.
-
In the Modify options drop-down menu, select Add VM options.
-
Copy the VM options below into the VM options field, and click OK.
-Xmx1500m
-Djava.net.useSystemProxies=true
-Djava.util.logging.config.file=samples/resources/samples/logging.properties
-Dsun.awt.noerasebackground=true
-Dsun.java2d.opengl=false
-Dswing.aatext=true
-Dsun.java2d.d3d=false
-Djava.library.path=
--add-exports java.desktop/sun.awt.image=ALL-UNNAMED
--add-exports java.desktop/com.sun.java.swing.plaf.windows=ALL-UNNAMED
--add-exports java.desktop/com.apple.eawt=ALL-UNNAMED
--add-opens java.base/java.lang=ALL-UNNAMED
If you installed a JavaFX SDK separately from your project JDK, also specify these VM options:
--add-modules javafx.controls,javafx.web,javafx.swing,javafx.fxml
--module-path /path/to/your/javafx-sdk/lib

-
Click Apply > OK, and click OK again to close the Run/Debug Configurations window.
From now on, your samples will use the specified VM options when you run them.
Integrating the LuciadLightspeed Javadoc into your project
IntelliJ can show you the Javadoc for a LuciadLightspeed API code element when you select the code element and press Ctrl+Q. To activate this Quick Documentation feature for the LuciadLightspeed Javadoc:
-
From the main menu, go to File > Project Structure > Modules > Dependencies.
-
Right-click the
LuciadLightspeed_<version>\libentry, and select Edit… from the context menu.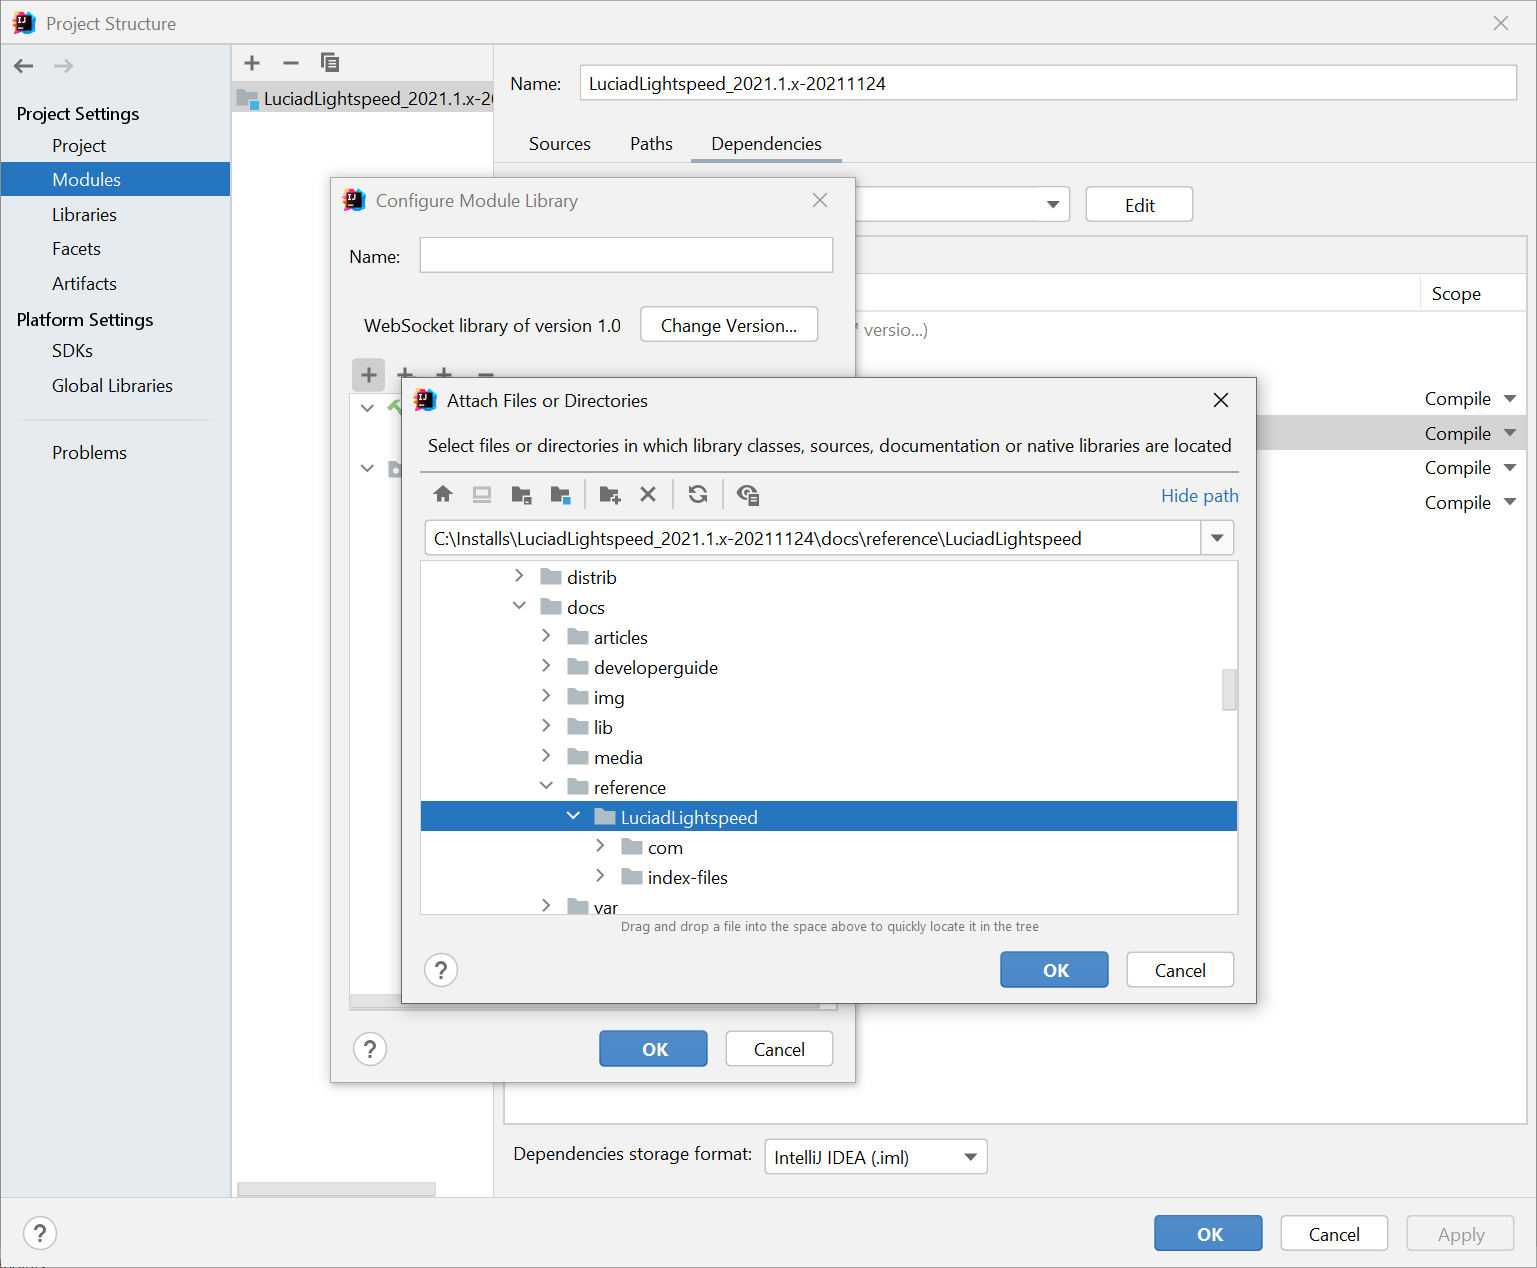
-
In the Configure Module Library window, click the + Add button.
-
Navigate to the
docs/reference/LuciadLightspeedfolder, select it, and click OK. -
In the Choose Categories of Selected Files dialog, select JavaDocs, and click OK.
-
Click OK twice more to close the Configure Module library window, and the Project Structure window.
You are done! Now you can run the sample of your choice and start developing.
Test running a sample
In the samples/src directory, you can run the sample executable files with the ![]() icon.
Note the green "Play" symbol in the icon.
icon.
Note the green "Play" symbol in the icon.
You can test your IDE setup by running the shapes example:
-
Expand the
samples\src\samples\lightspeed\shapesfolder in the project navigation pane on the left. -
Right-click on
MainPaneland select Run MainPanel.main() from the context menu. The sample starts in this window.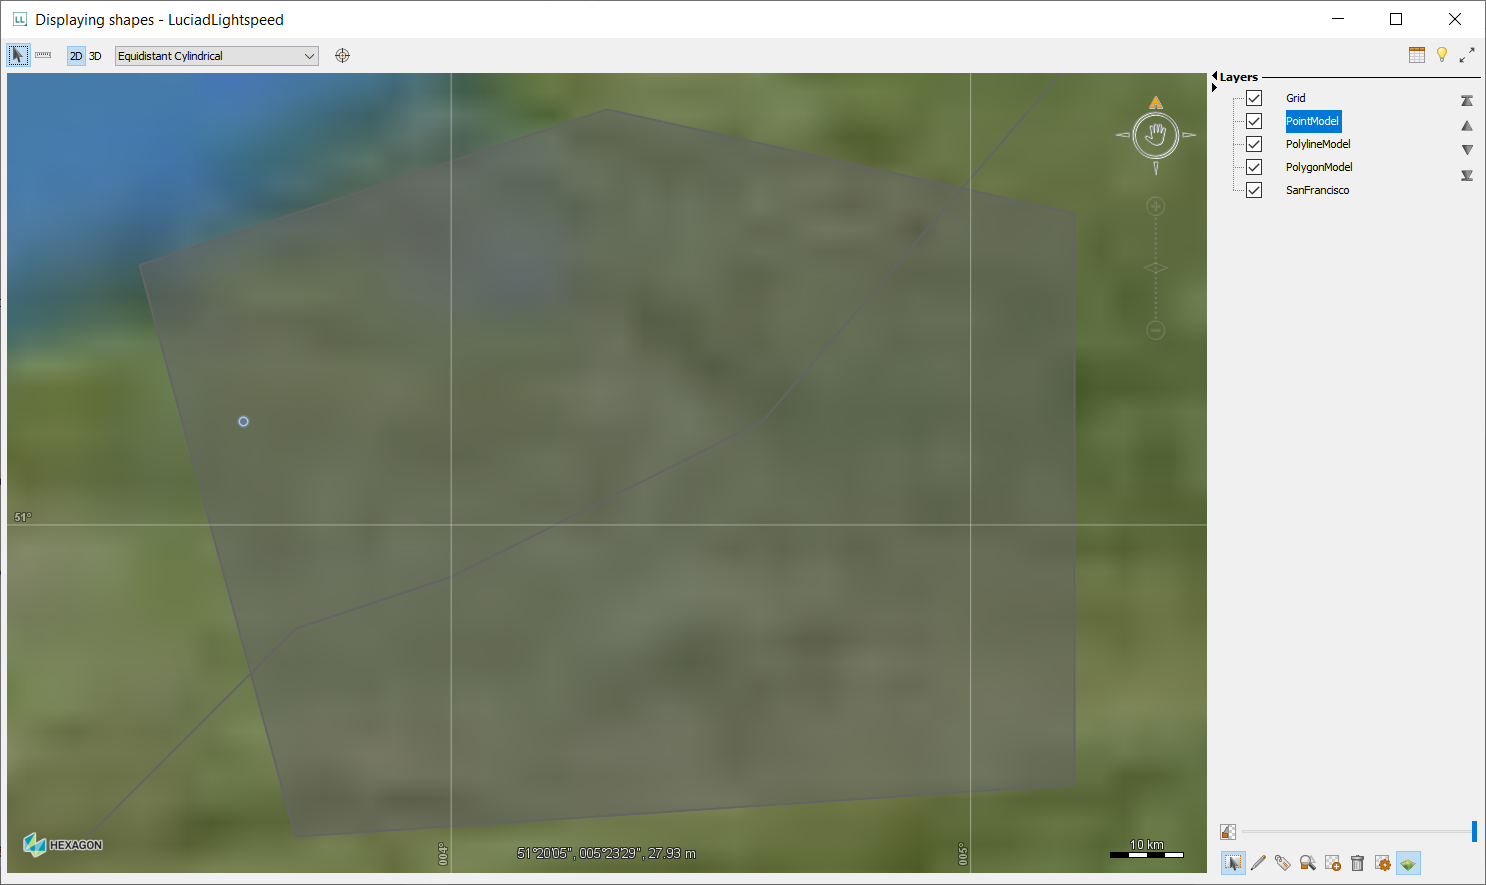
You can now look at the code, modify it, or start developing your own application.
|
If IntelliJ is still busy indexing the project files you will have to wait until it finishes before you are able to run the samples. |