|
In this tutorial, you will learn how to successfully run the LuciadLightspeed samples from Eclipse. |
Prerequisites for the IDE integration
In the project configuration procedure, it is assumed that you already installed the following software:
-
Java Development Kit (JDK) 17 or higher.
In this tutorial, we use an OpenJDK 17 build that includes OpenJFX. -
LuciadLightspeed. In this tutorial, we use LuciadLightspeed 2024.0.
-
Eclipse. You can download an Eclipse IDE for Java developers from http://eclipse.org/downloads/. In this tutorial, we use Eclipse 2024-06.
Creating a Luciadlightspeed development project in Eclipse
-
Start Eclipse, and accept the suggested workspace location in the Eclipse Launcher by clicking OK.
You won’t need the default Eclipse workspace to set up a LuciadLightspeed development project.
-
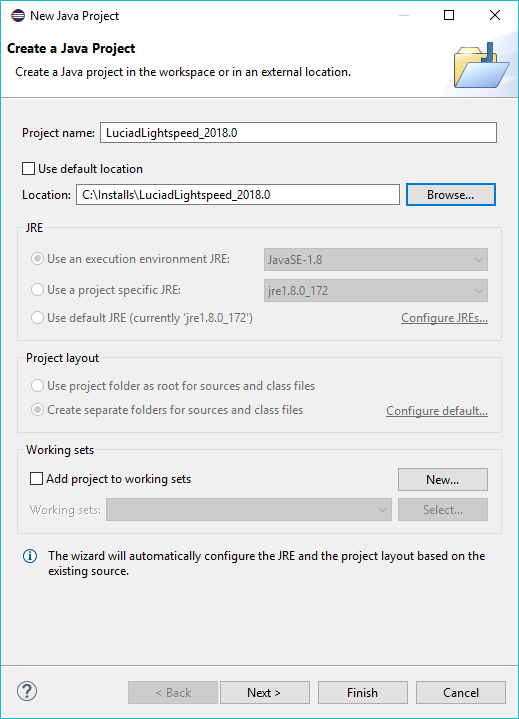
From the main menu, select File > New > Java Project. The New Java Project screen opens.
-
De-select the Use default location check box, and in the Location field, browse to the root directory of your LuciadLightspeed installation. Once you select that location, Eclipse automatically fills in the Project name field.
-
De-select the check boxes in the Module section.
-
Click Finish. Eclipse sets up your project.
Completing the project configuration
Before you can run the samples, you need to make sure that all project dependencies are in place, such as the LuciadLightspeed libraries, license file, and project resources. It is also strongly recommended to enable annotation processing in your project. LuciadLightspeed uses annotations to register services with a registry, so that it can provide instant application services.
Defining the project libraries
-
In the Package Explorer pane on the left, right-click the project you just created, and select Properties from the context menu.
-
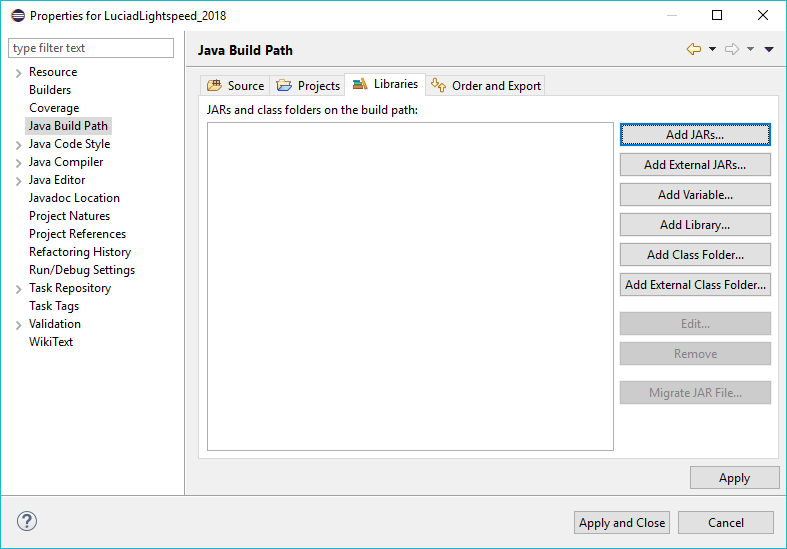
In the project Properties window, go to Java Build Path > Libraries, and remove all the JARs and class folders in the overview.
-
Set the project build path up from scratch. Select Classpath on the Libraries tab, and add all required libraries manually:
-
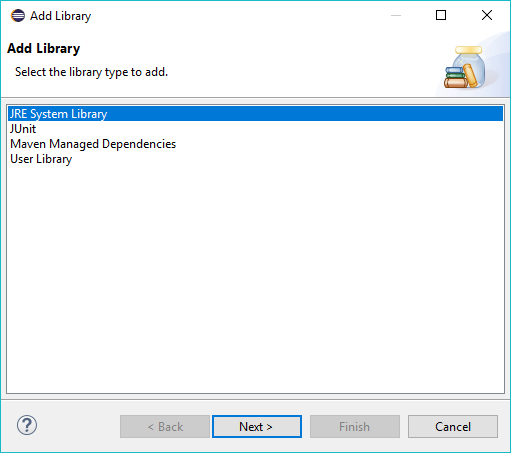
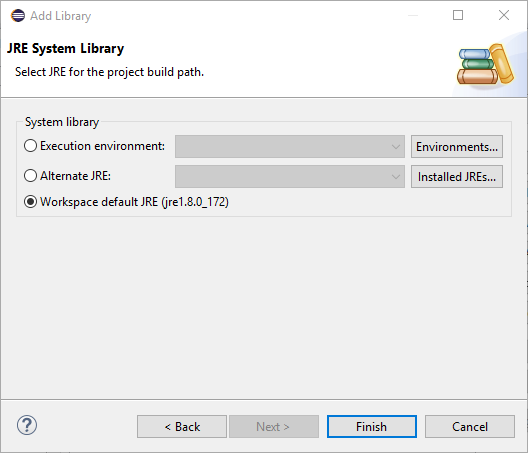
To add the Java JRE you want to use, click Add Library…, select JRE System Library from the library types, and click Next. You can select the default workspace JRE or browse for an alternate JRE. Make sure that you select a version 17 JRE, for example the JRE that you installed with the prerequisite JDK. Click Finish to add the selected JRE.
-
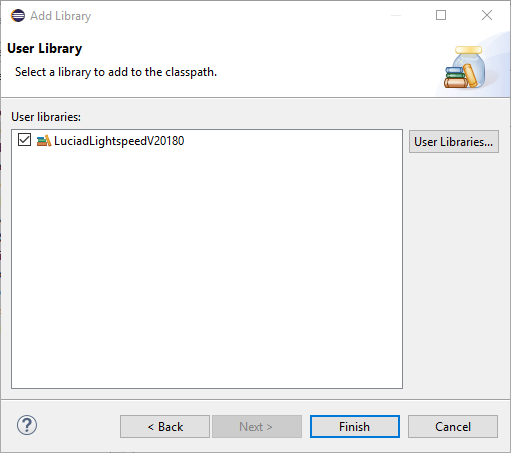
To add the LuciadLightspeed library, click Add Library…. Then select User Library from the library types, and click Next.
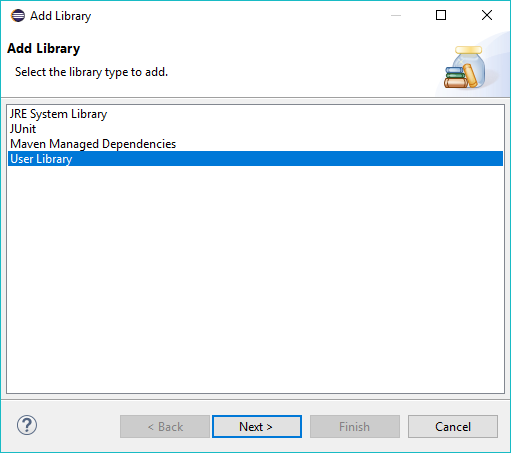
-
In the Add Library window, click the User Libraries… button to start the defining the contents of the LuciadLightspeed library
-
In the Preferences window, click New, and enter a library name that includes
LuciadLightspeedand the version number, and click OK.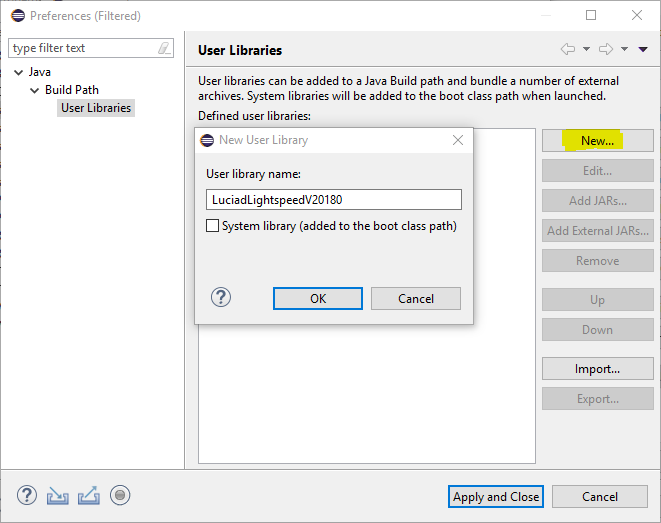
-
Still in the Preferences window, click Add JARs…. In the JAR selection window, select all JAR files in the
lib,lib/thirdpartyandsamples/lib/thirdpartydirectories of your LuciadLightspeed installation, and click OK.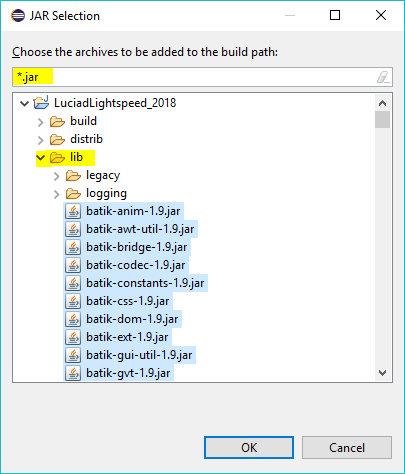
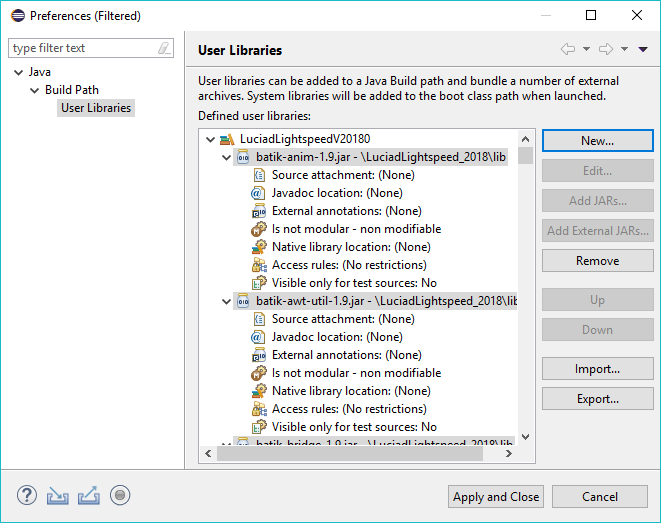
Your LuciadLightspeed library is now visible in the Preferences | User Libraries pane.
-
Click Apply and Close. Make sure the library is selected in the Add Library window, and click Finish.
-
In the Java Build Path | Libraries pane, select Classpath, and click the Add Class Folder… button.
-
In the Class Folder Selection window, select the
configandsamples/resourcesfolders, and click OK.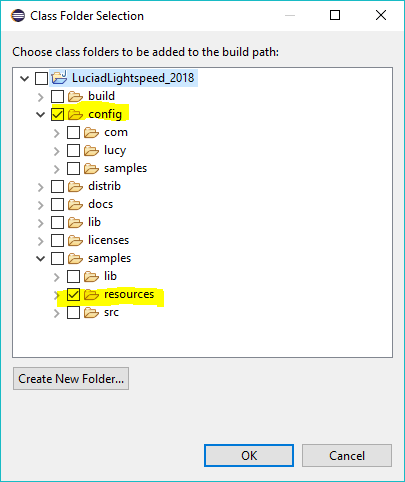
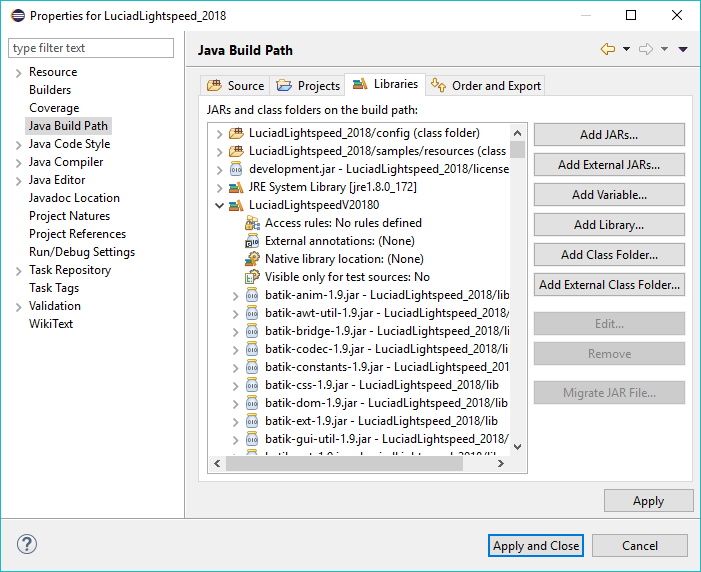
-
Back on the Libraries tab of the project Properties window, select Classpath, and click Add JARs…. In the JAR selection window, select the LuciadLightspeed license file (
development.jar), and click OK. The license file typically resides in thelicensesfolder. After the addition of the license file, the Libraries tab looks like this: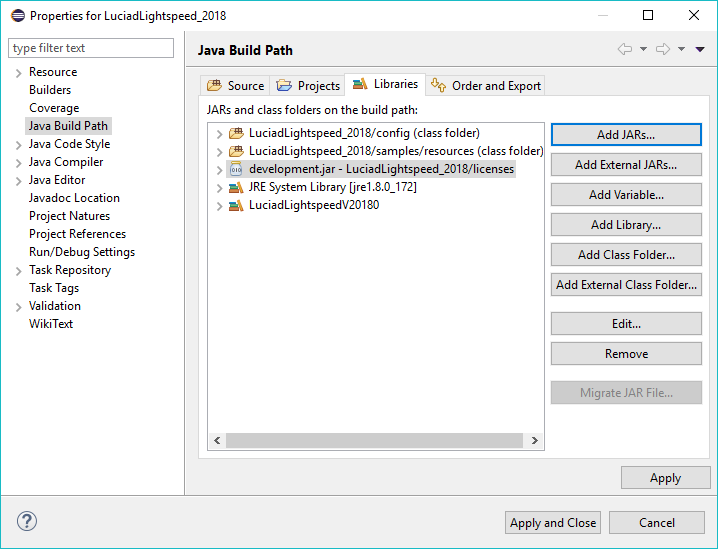
-
-
Click the Apply button to commit all changes. Eclipse now knows which files and folders to use to configure the project.
Defining the location of the sources
-
In the project Properties window, go to Java Build Path > Source.
-
Select every source folder in the list, except the
samples/srcfolder, and click the Remove button.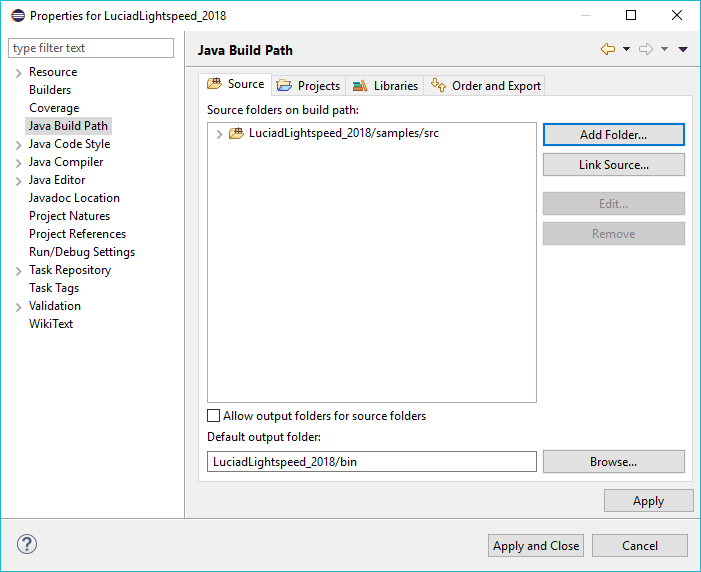
-
Click the Apply button to apply your changes to the project. This may take a couple of minutes.
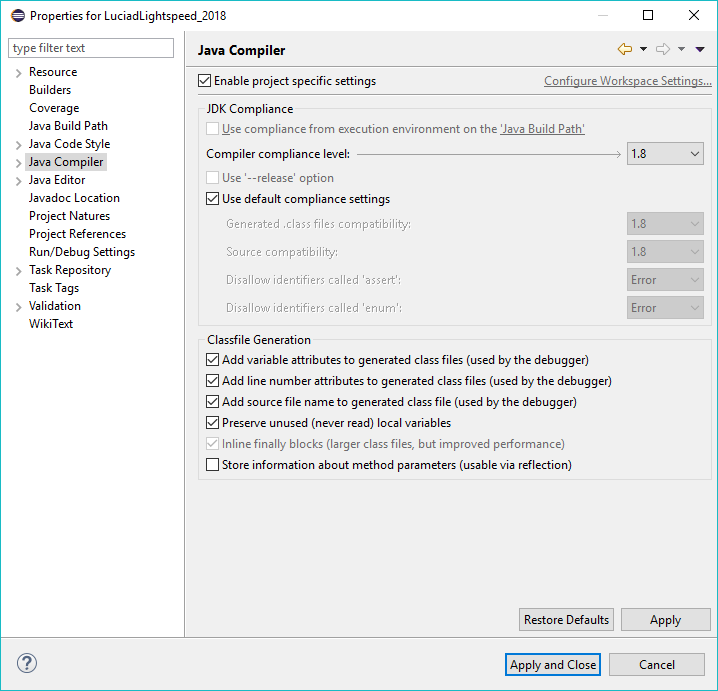
Configuring the Java compiler for Java compliance and annotation processing
-
In the project Properties window, go to Java Compiler, and select the Enable project specific settings check box.
-
In the Compiler compliance level drop-down menu, select 17. Make sure that the selected compliance level matches the JDK/JRE you are using.
-
Still in the Properties window, go to Java Compiler > Annotation Processing, and select the Enable project specific settings check box.
-
Select the Enable annotation processing check box.
-
Expand Annotation Processing in the property navigation pane on the left, and select Factory Path. In the Factory Path pane, select the Enable project specific settings check box.
-
Click Add JARs, and select
lcd_annotations.jarfrom thelibfolder in the JAR Selection window, and click OK. The selected file contains the annotations definition.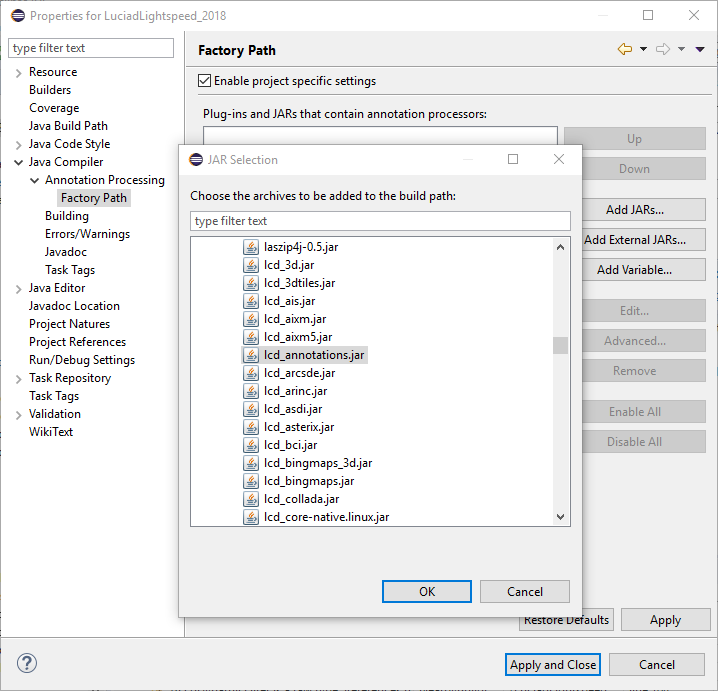
-
Click Apply and Close, and confirm that you want to rebuild the project by clicking Yes in the Settings Changed dialog box. Eclipse re-builds your project. This may take a couple of minutes.
Defining a run configuration for the LuciadLightspeed samples
Luciad strongly recommends specifying a number of Virtual Machine (VM) options before running your samples. They will ensure that your samples run smoothly, and perform well. You can specify the VM options in the run configuration for a sample in your LuciadLightspeed project.
-
Select the main class of the sample in the
samples/srcfolder, and go to Run > Run Configurations. -
In the Run Configurations window, select Java Application in the navigation pane on the left, and click the New launch configuration icon.
-
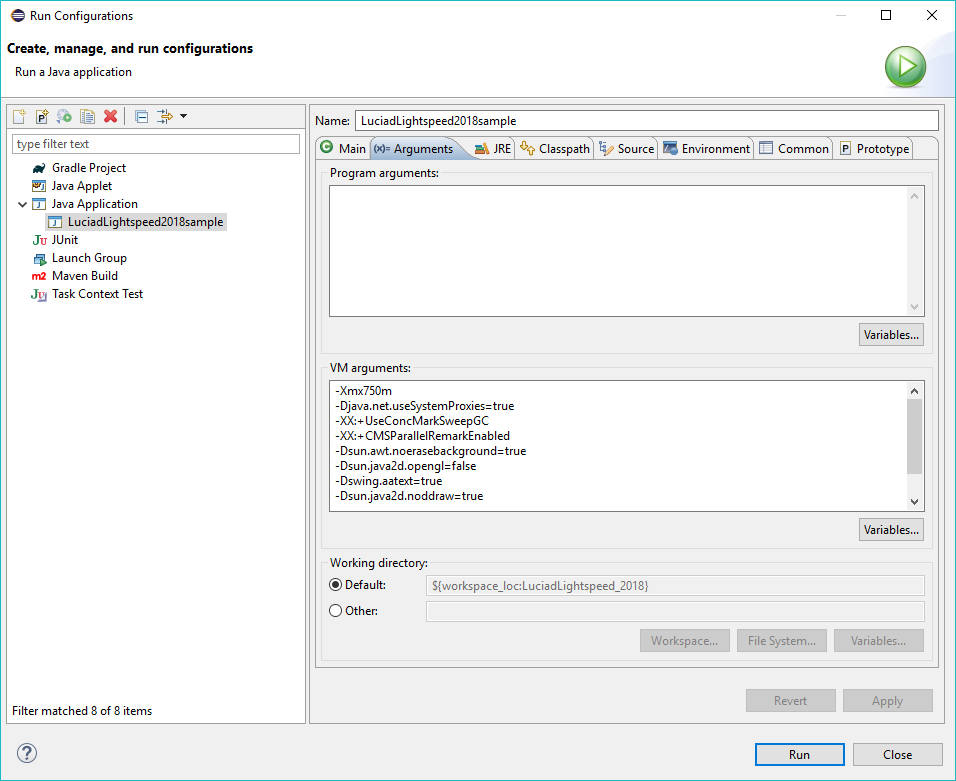
Specify an appropriate name for the run configuration.
-
Go to the Arguments tab, and copy the VM options below into the VM arguments field, and click Run.
-Xmx1500m
-Djava.net.useSystemProxies=true
-Dlogback.configurationFile=samples/luciadlightspeed.logback.xml
-Dsun.awt.noerasebackground=true
-Dsun.java2d.opengl=false
-Dswing.aatext=true
-Dsun.java2d.d3d=false
-Djava.library.path=
--add-exports java.desktop/sun.awt.image=ALL-UNNAMED
--add-exports java.desktop/com.sun.java.swing.plaf.windows=ALL-UNNAMED
--add-opens java.desktop/javax.swing=ALL-UNNAMED
--add-exports java.desktop/com.apple.eawt=ALL-UNNAMED
--add-opens java.base/java.lang=ALL-UNNAMED
--enable-native-access=ALL-UNNAMED
To run JavaFX samples, you should also specify these options:
--add-modules javafx.controls,javafx.web,javafx.swing,javafx.fxml
--enable-native-access=javafx.graphics,javafx.web
--module-path /path/to/your/javafx-sdk/lib
The module path argument is only necessary if your Java SDK does not include JavaFX.
If you are using a 64-bit Java VM, you can increase the XMX option to even higher values.
Your sample now runs with the recommended VM options. Go to the Run
 button in the main toolbar.
Select the run configuration you just defined from the drop-down menu.
button in the main toolbar.
Select the run configuration you just defined from the drop-down menu.
You can specify a generic VM parameter configuration for all project applications by going to Window > Preferences > Java > Installed JREs. Select the appropriate JRE, click Edit and add all the VM arguments to the Default VM arguments text box. As a result, you can simply select Java application as your run configuration for each sample.
You are done! You can now run samples and start developing.
Integrating the LuciadLightspeed Javadoc into your project
Eclipse can show you the Javadoc for a LuciadLightspeed API code element when you select and hover over the element. To activate the hover feature for the LuciadLightspeed Javadoc:
-
In the Package Explorer pane on the left, right-click the project, and select Properties from the context menu.
-
In the project Properties window, go to Java Build Path > Libraries, and expand the LuciadLightspeed user library you created earlier.
-
Expand the entry of each of the
lcd_*.jarfiles for which you want to see Javadoc.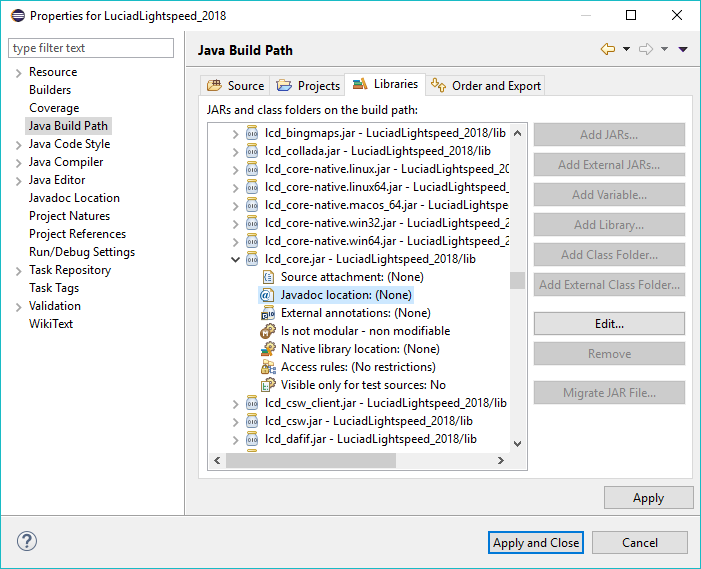
-
Select
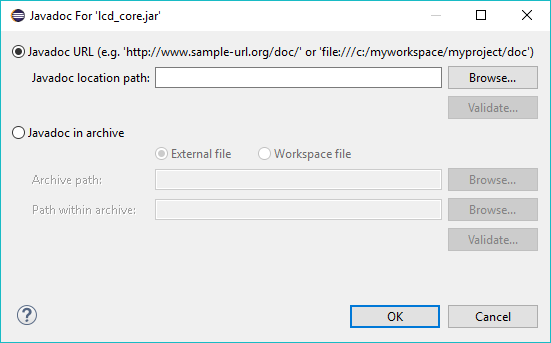
Javadoc location:and click Edit. -
In the Javadoc For window, click the Browse button next to the Javadoc location path: text field.
-
Navigate to the
docs/reference/LuciadLightspeeddirectory in the LuciadLightspeed installation directory, select it, and click OK.Click OK to close the window, and then Apply and Close to finish the Javadoc setup in the project Properties window. The LuciadLightspeed library Javadoc is now visible when you hover over a code element.
Test running a sample
You can test your IDE setup by running the shapes example in the samples/src directory:
-
Select
samples.lightspeed.shapesin thesamples/srcfolder in the Package Explorer pane on the left. -
Go to the Run
button in the main toolbar, and select the run configuration you set up.
The sample starts in this window.
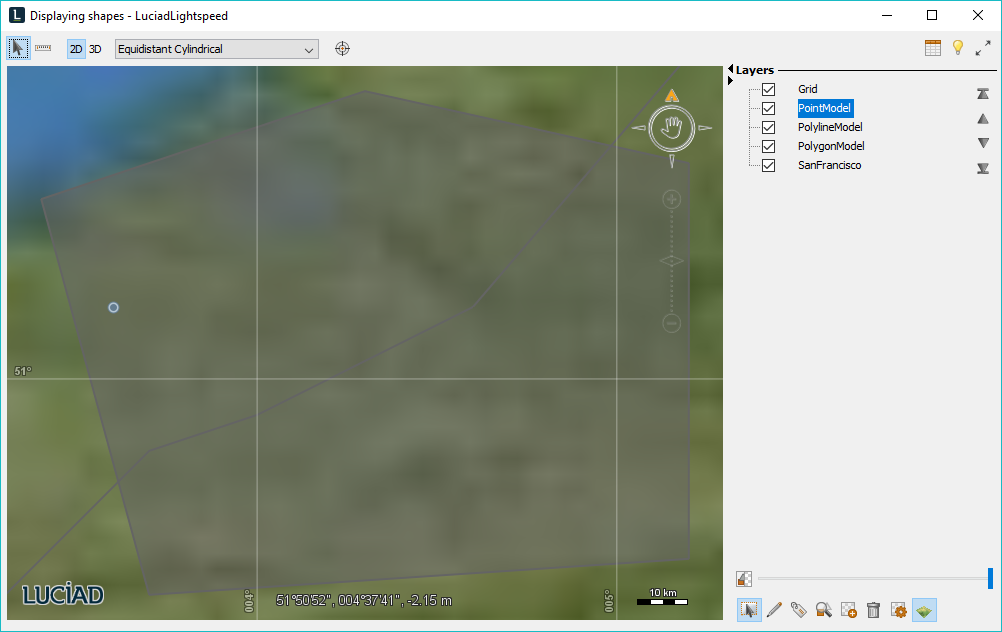
You can now look at the code, modify it, or start developing your own application.