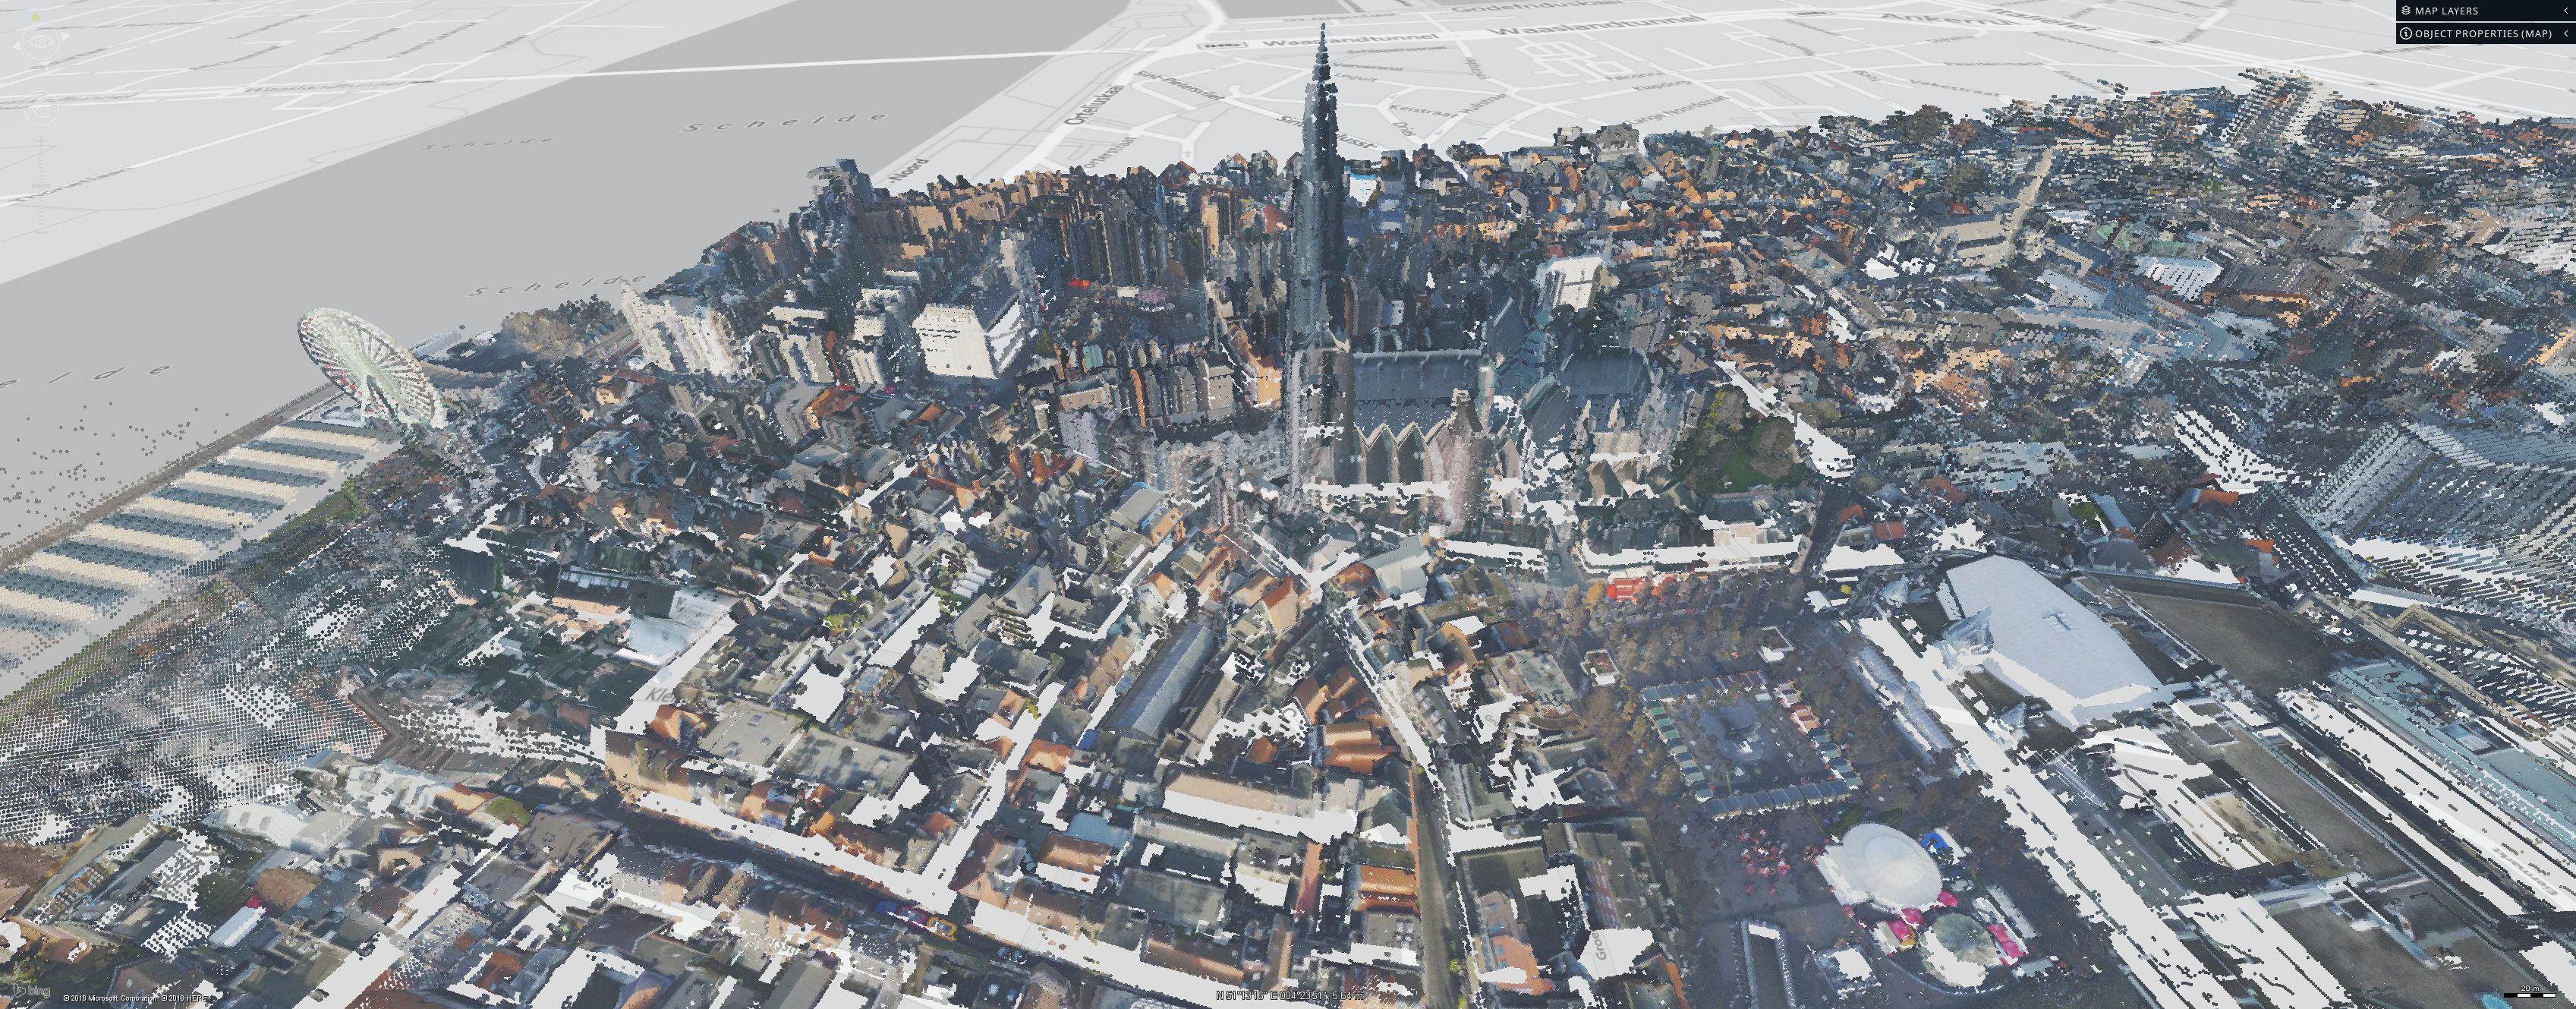
This scenario demonstrates how you can crawl a collection of point clouds, and serve it to clients as OGC 3D Tiles in an OGC 3D Tiles service.
OGC 3D Tiles is the optimal format for the distribution and visualization of big 3D mesh and point cloud data sets because they tile and multi-level the data.The tiling and multi-leveling process makes the data more usable in visualization clients, because the client can select a suitable level-of-detail in the data, and reduce the amount of data that needs to be loaded. Web services can also cache the tiles for fast retrieval.
In this scenario, you will use point cloud data or mesh data which you have locally stored in a folder. We are going to set up that folder as a data root for LuciadFusion Studio, which can serve the points as OGC 3D Tiles to clients such as applications based on LuciadLightspeed and LuciadRIA.
Add georeference information
To prepare the point cloud data for visualization by LuciadFusion Studio, and later on by visualization clients, you need to make sure that georeference information is available for the data. If LuciadFusion can’t detect georeference information, it won’t make the data available in Studio for serving.
|
Adding georeference information
Georeference information is usually provided in a |
Setting up the data root
Once georeference information is available for all the LAZ data in the folder, go to SETTINGS > DATA ROOTS > ADD DATA ROOT, and select the folder with the LAZ files and the georeference files.
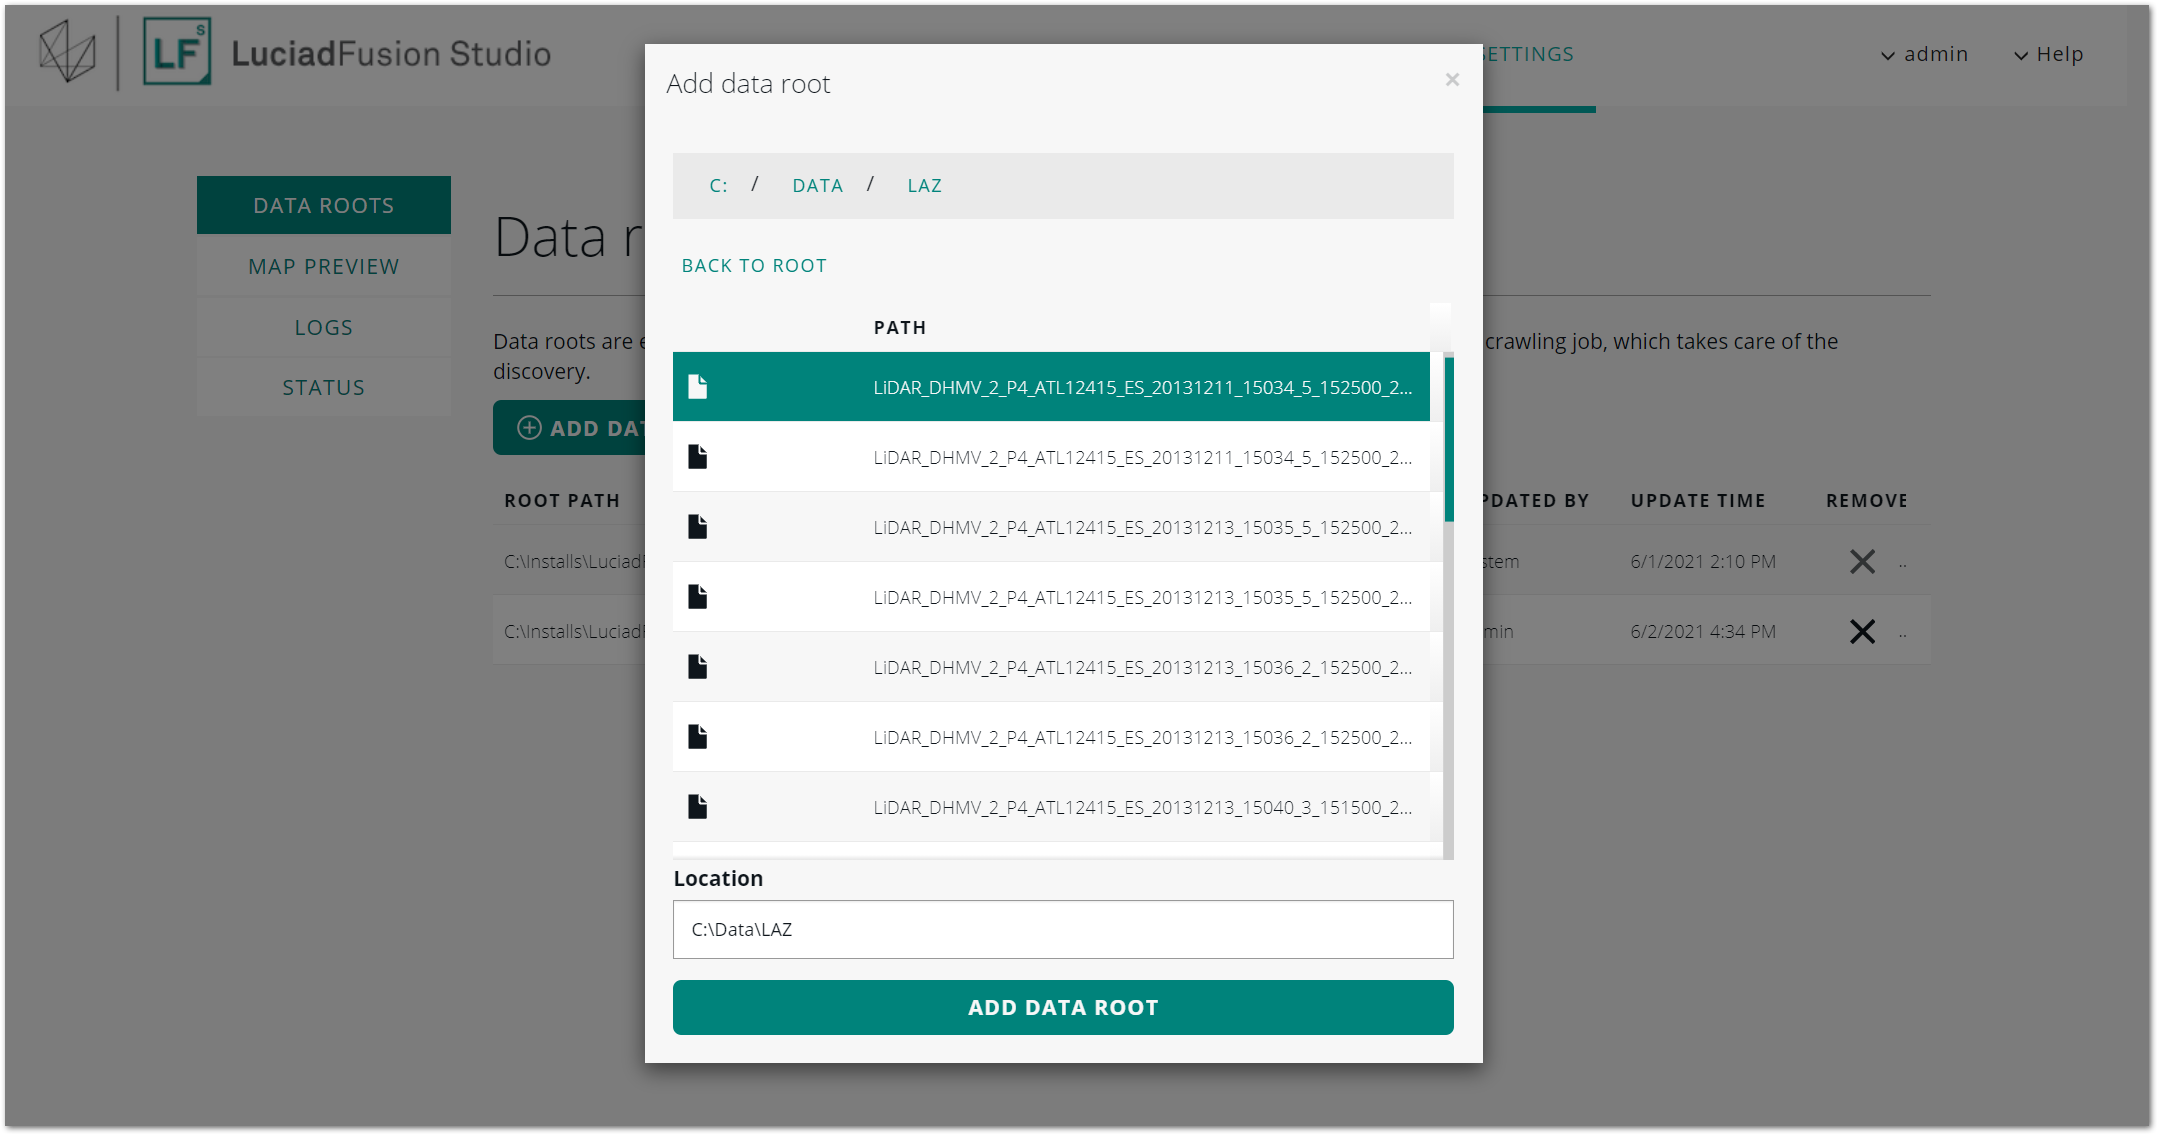
LuciadFusion starts the crawling process, and adds all the LAZ files to the DATA tab.
You can set up LuciadFusion so that it regularly re-crawls the data root folder for new data, and adds that data to LuciadFusion Studio. For more information, see Scheduling and monitoring automatic crawling.
|
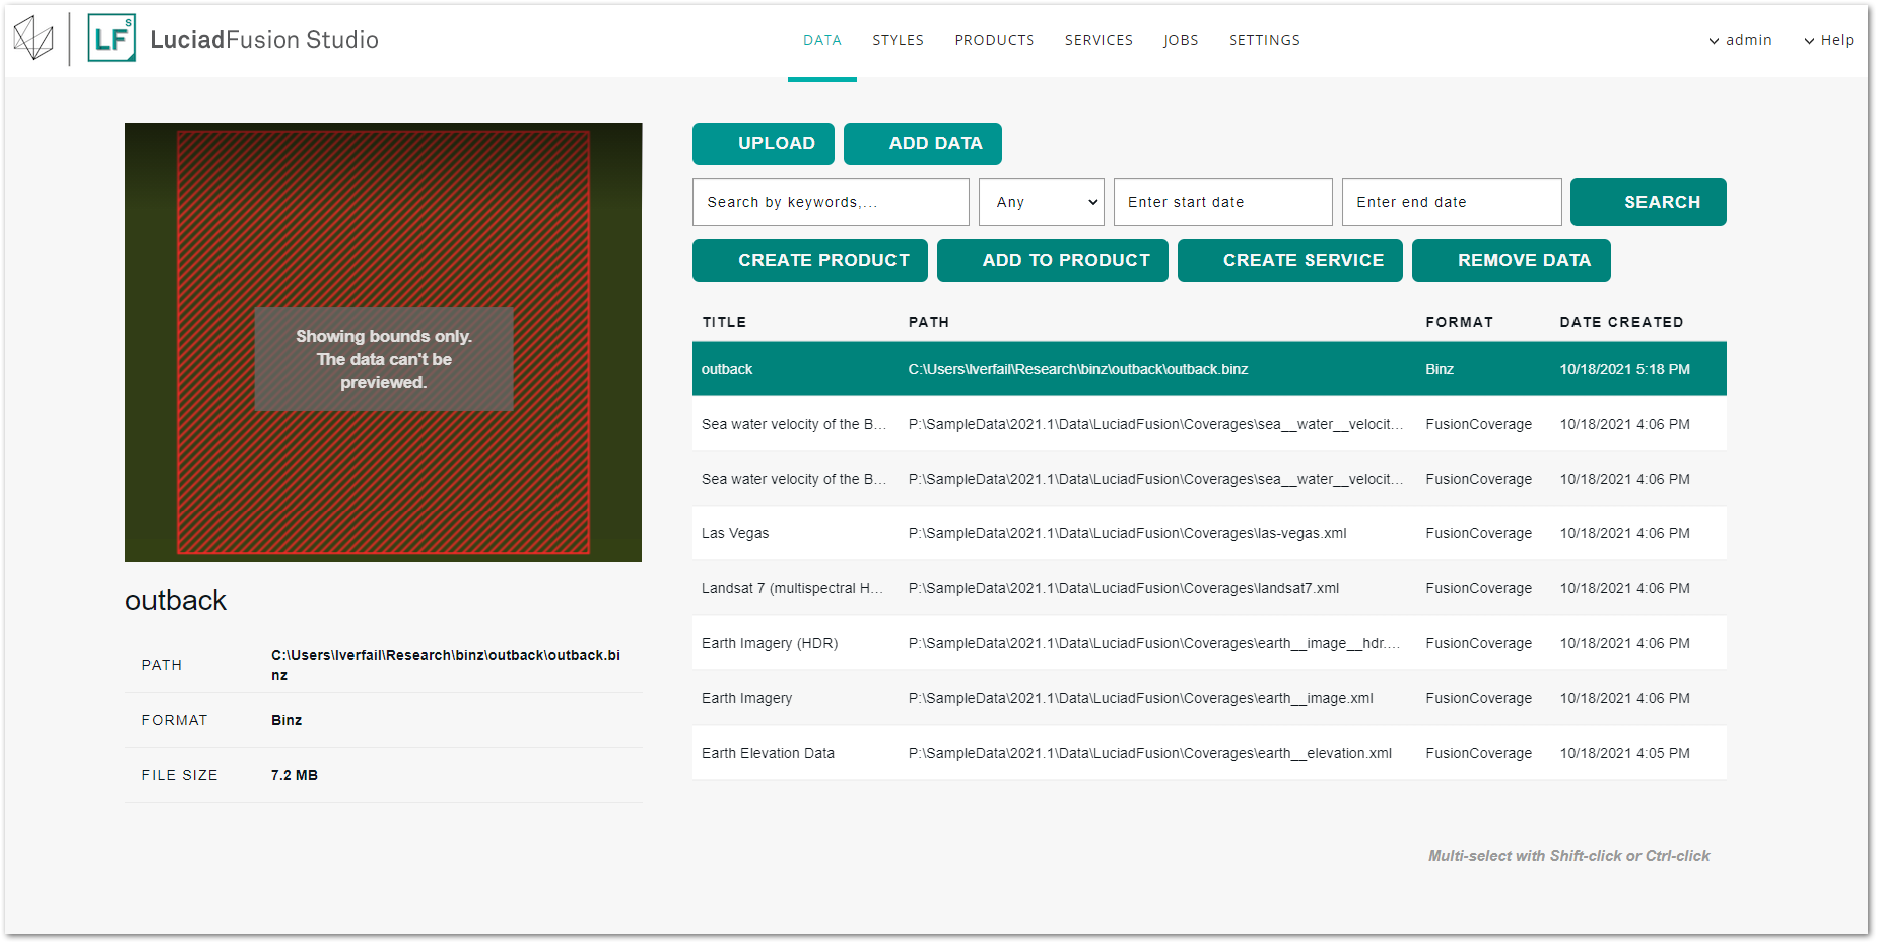
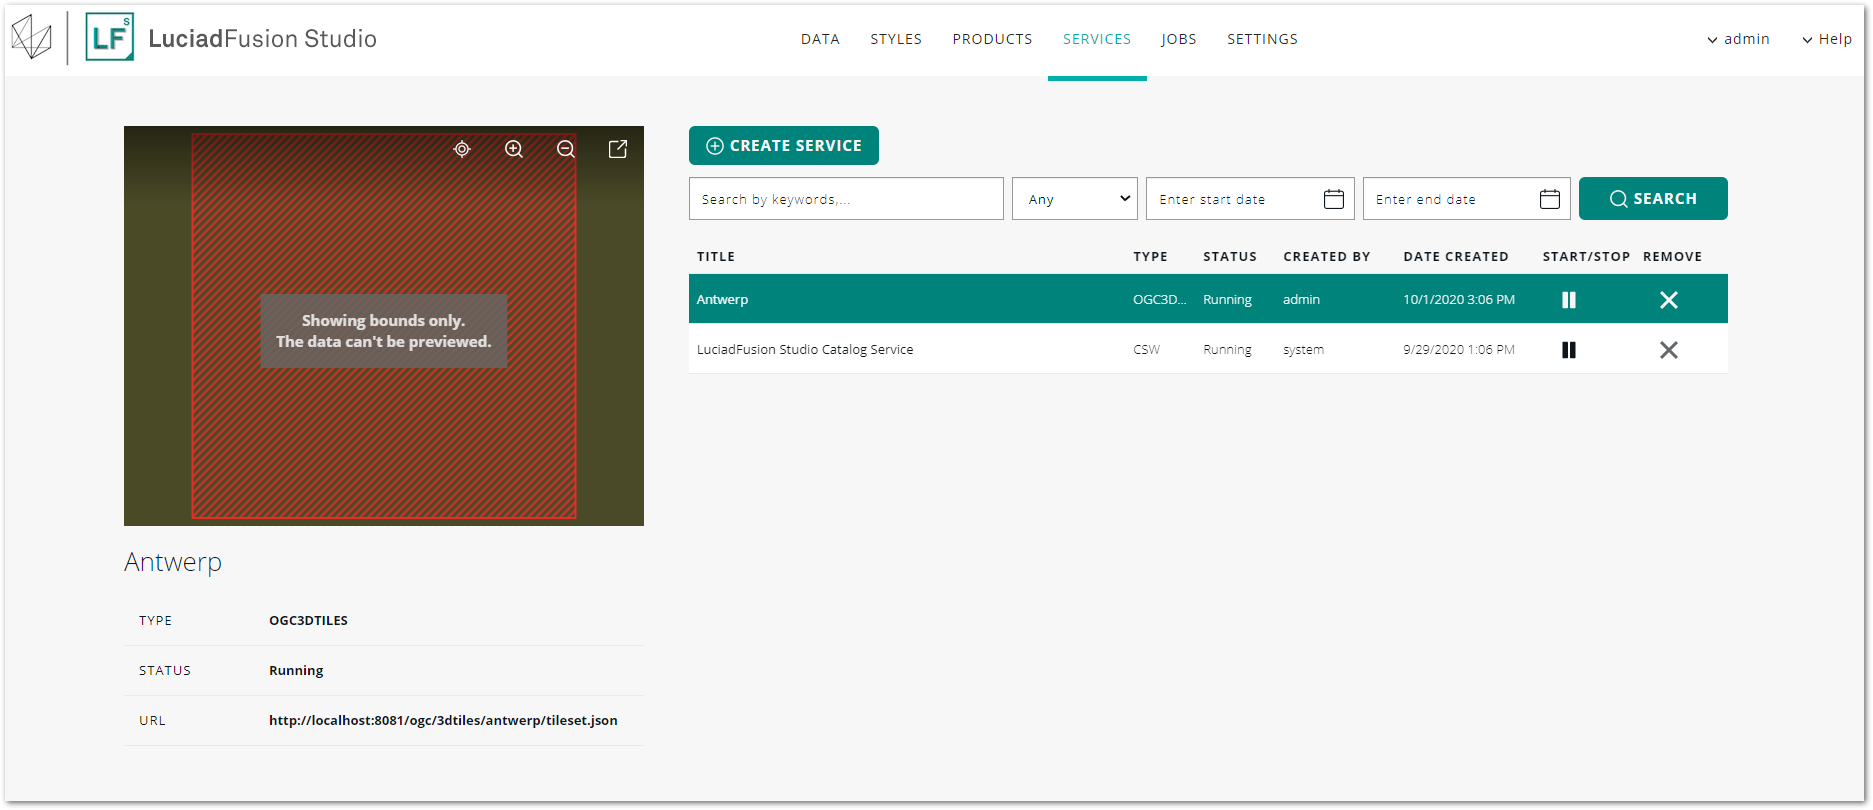
Data visible as a red hatched shape in the Studio map preview
The map preview in LuciadFusion only shows a red hatched rectangle at the location of the data set. A client with full 3D visualization capabilities is required to show the point cloud data. |
Setting up an OGC3DTiles service for point cloud data
We want to publish our point cloud data as an OGC 3D Tiles service. This is the designated service type for point cloud data and 3D mesh data. It preserves all point property information for full styling and filtering flexibility at the client side. Therefore, there is no need to combine the point cloud data with other, less suitable data types, nor do we need to add styling information at the product level. We can go straight to the creation of the service, and add all the LAZ files at once. LuciadFusion will create a product containing all the data in the background.
-
Select all the LAZ files of your data set by holding SHIFT and clicking each LAZ file on the DATA screen.
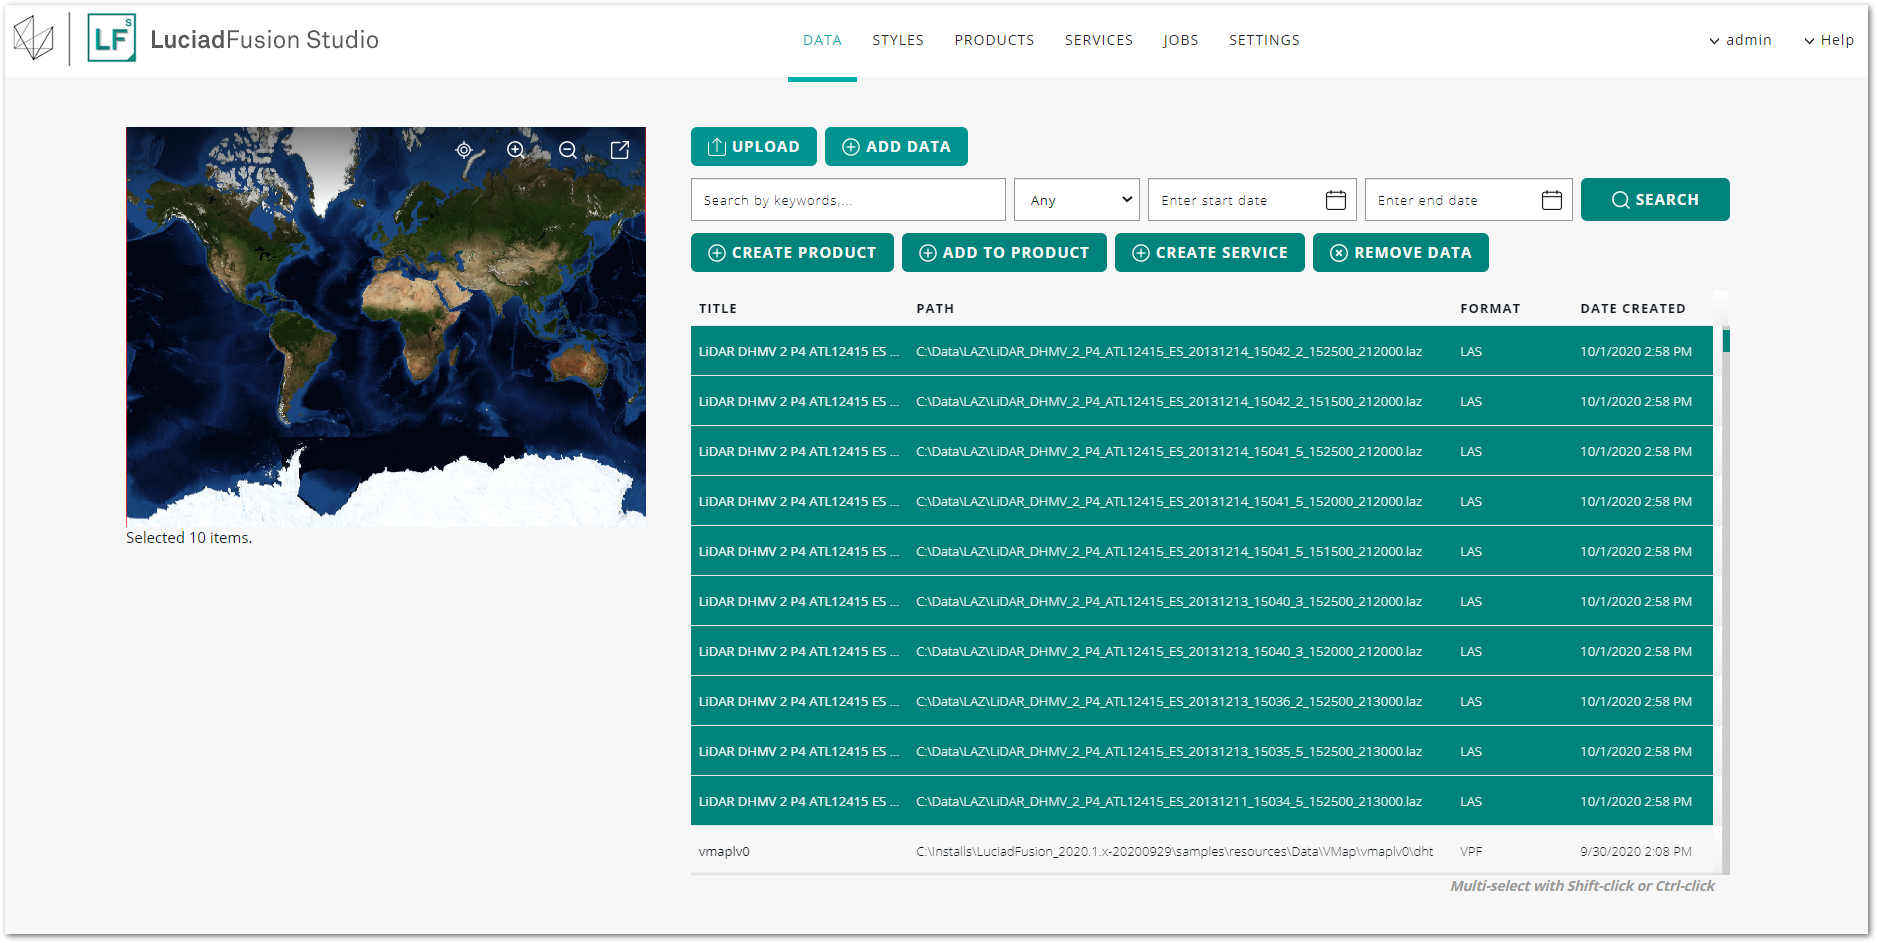
-
Click CREATE SERVICE.
-
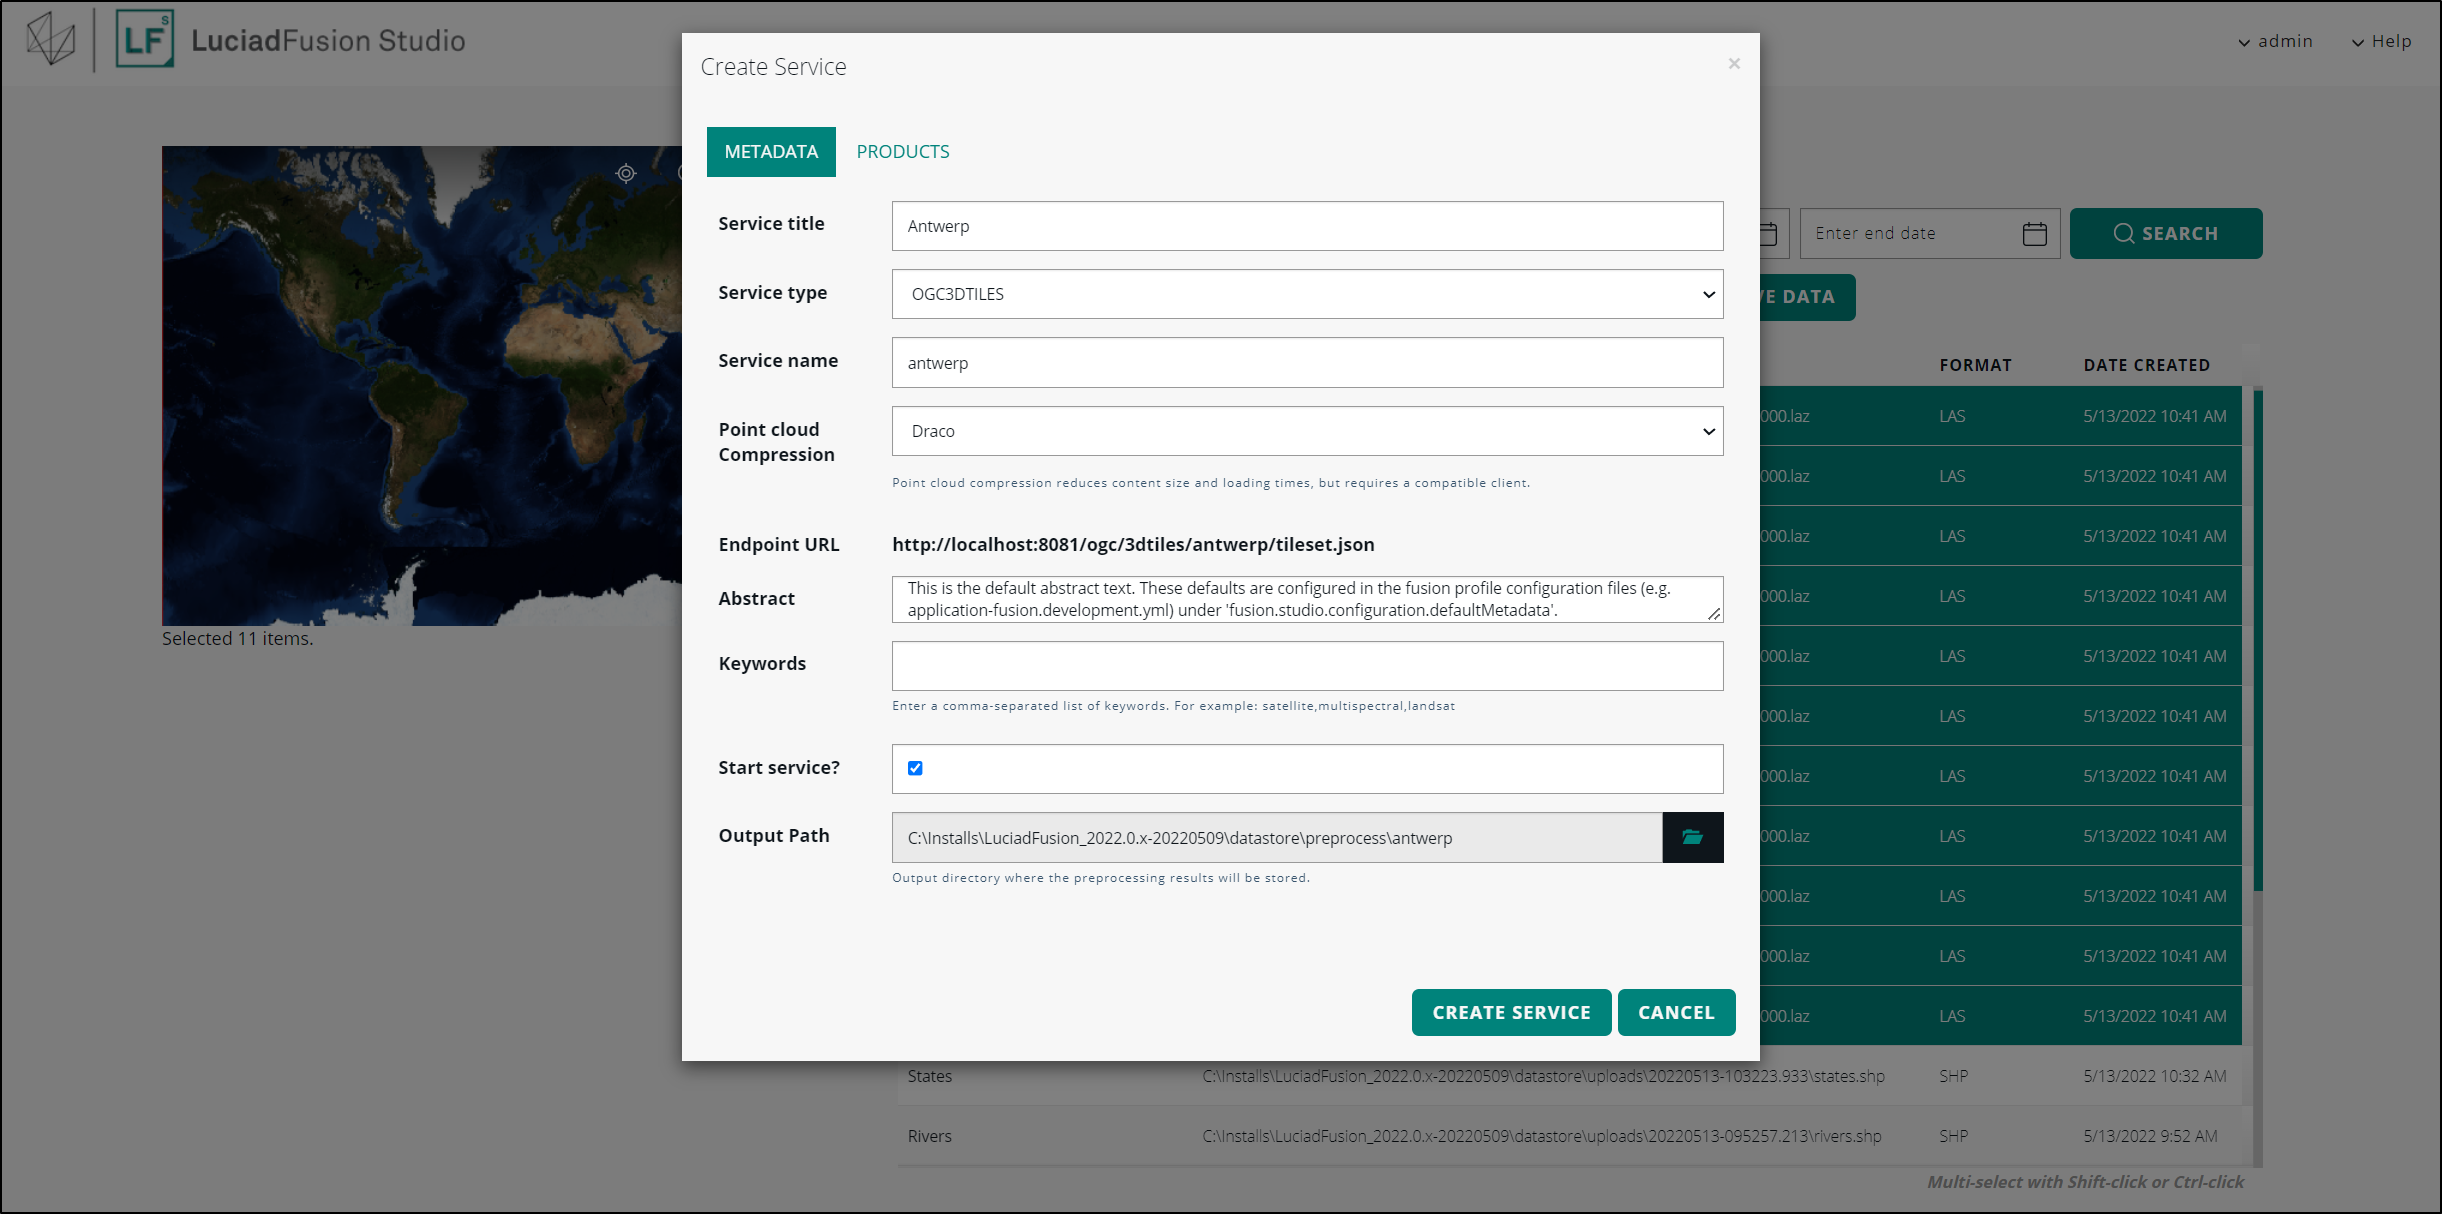
Enter a service title and name in the Create service dialog, and select the OGC3DTILES service type.
-
Indicate which Point cloud Compression algorithm you want to apply: None or Draco.
-
Leave the Start service? check box selected, and click CREATE SERVICE.
At this point, LuciadFusion Studio starts tiling and multi-leveling the point cloud data. While it is taking care of this pre-processing job, your new service will have the PENDING status.
Setting up an OGC3DTiles service for mesh data
OGC 3D Tiles is also the designated service type for 3D mesh data. In this scenario, we set up a service for Binz mesh data.
-
Select the Binz file that you want to serve.
-
Click CREATE SERVICE.
-
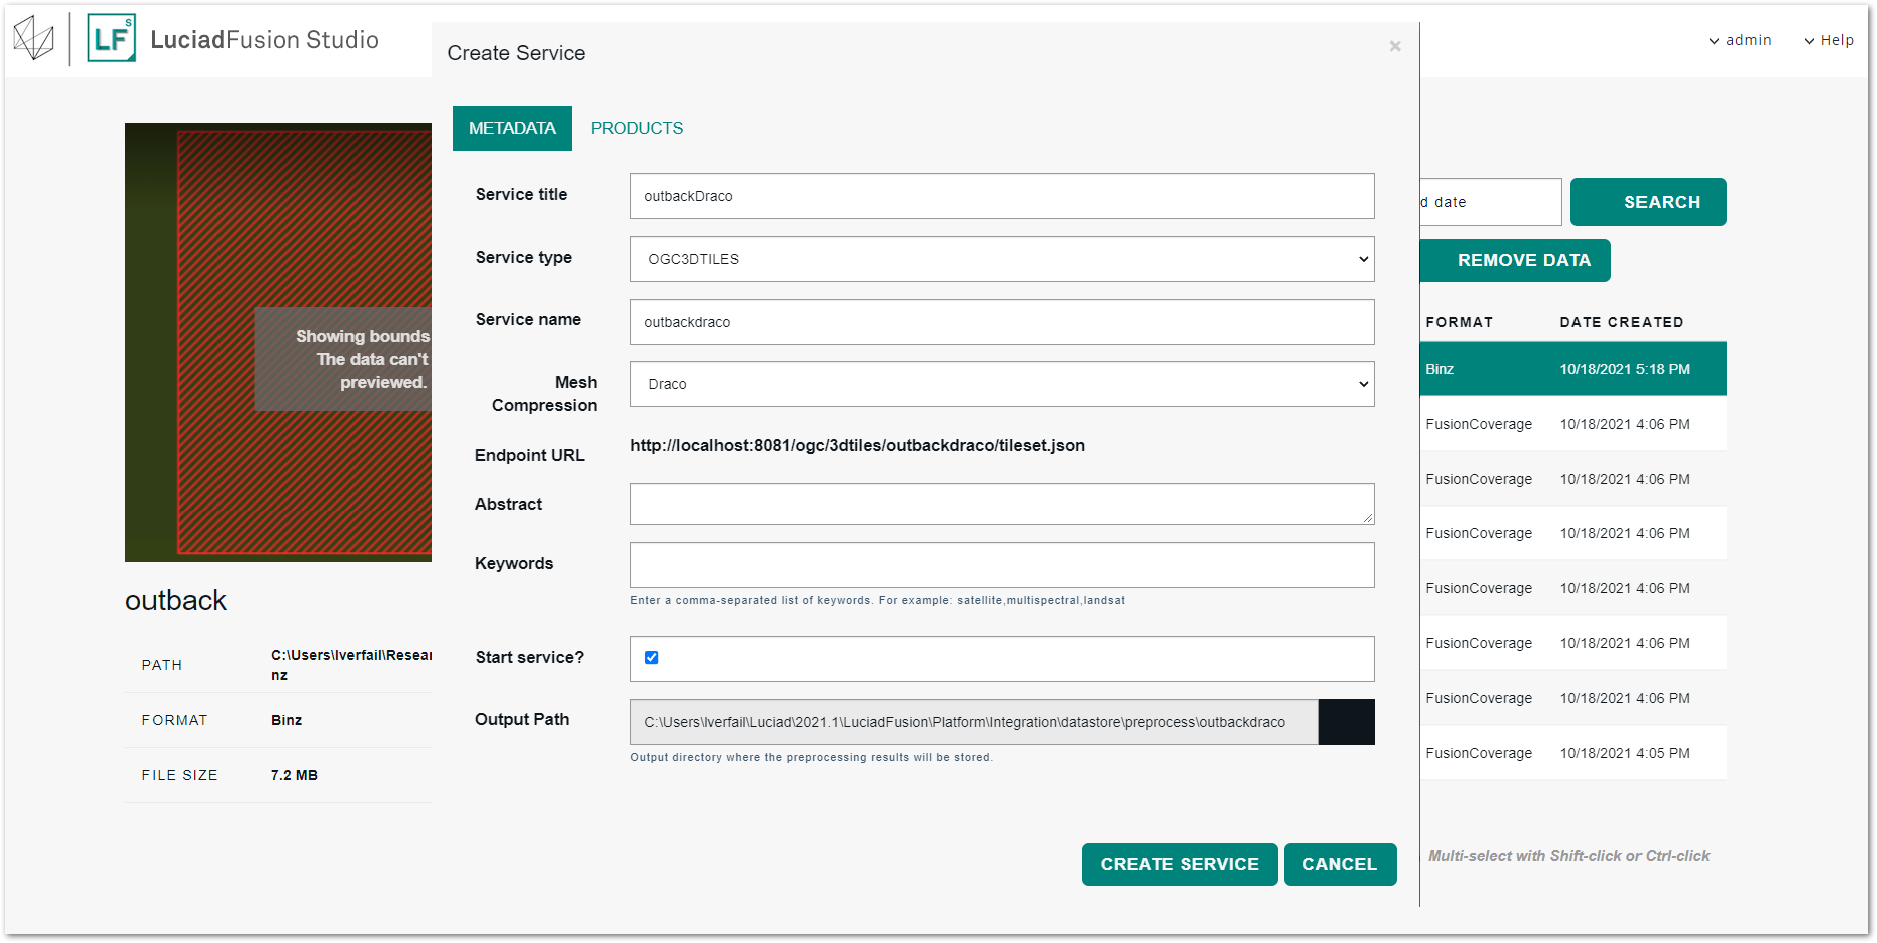
Enter a service title and name in the Create service dialog, and select the OGC3DTILES service type.
-
Indicate which Mesh Compression algorithm you want to apply: None or Draco.
-
Leave the Start service? check box selected, and click CREATE SERVICE.
At this point, LuciadFusion Studio starts tiling and multi-leveling the Binz data. While it is taking care of this pre-processing job, your new service will have the PENDING status.
Follow up on your pre-processing job
The pre-processing may take a while if you loaded a large data set. To track the status of the pre-processing job, you can go to the JOBS screen. It shows the running pre-processing job in the lower half of the screen. You can click the job entry for more details.
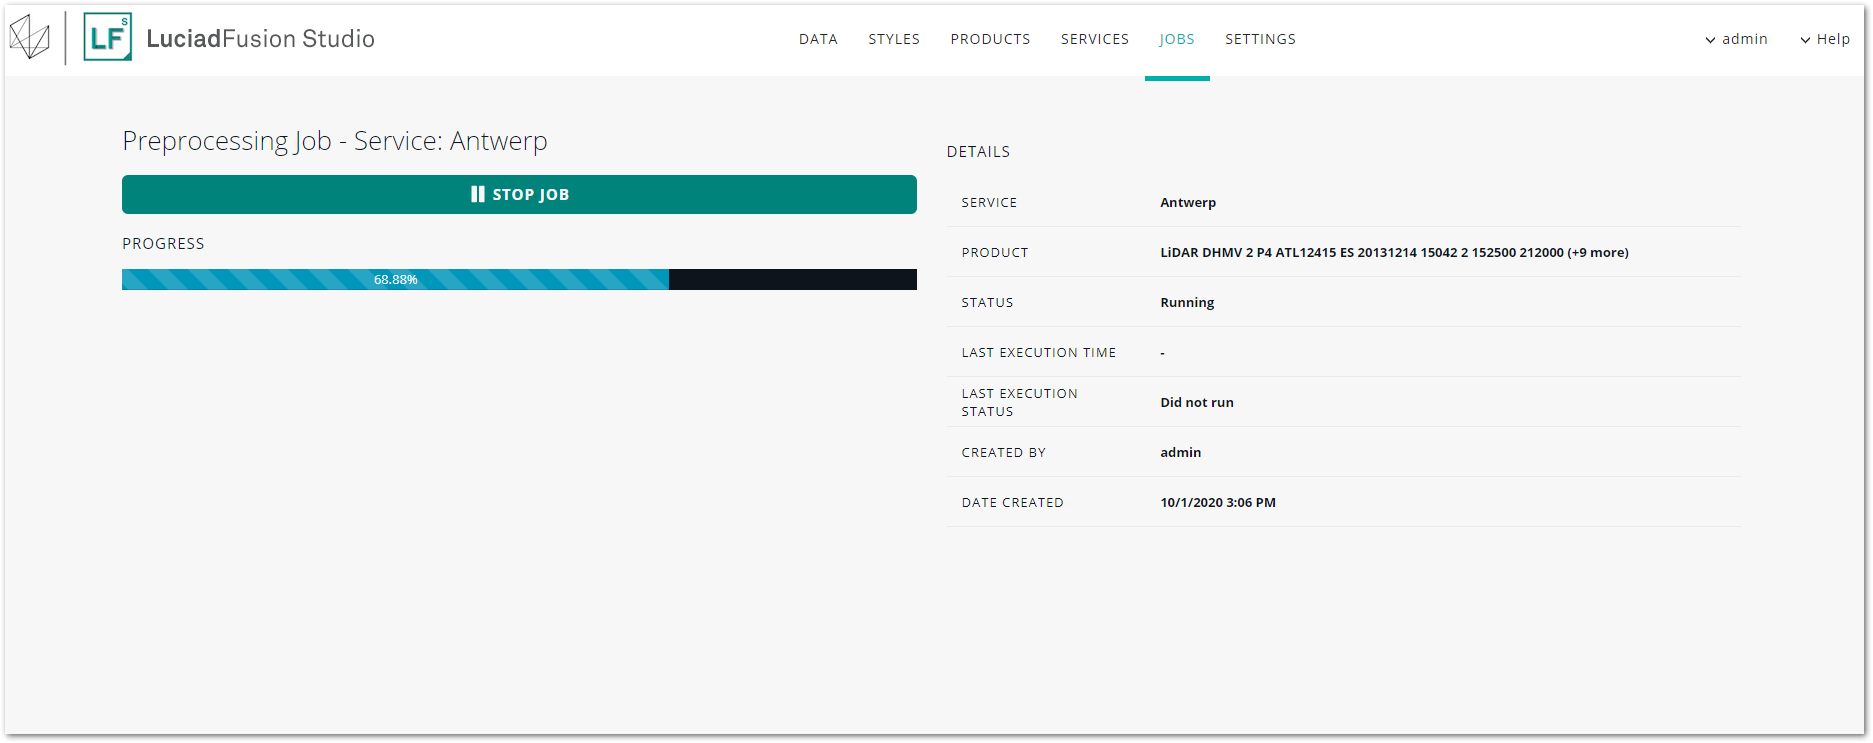
As soon as the pre-processing job is done, the OGC3DTiles service status switches from PENDING to RUNNING.
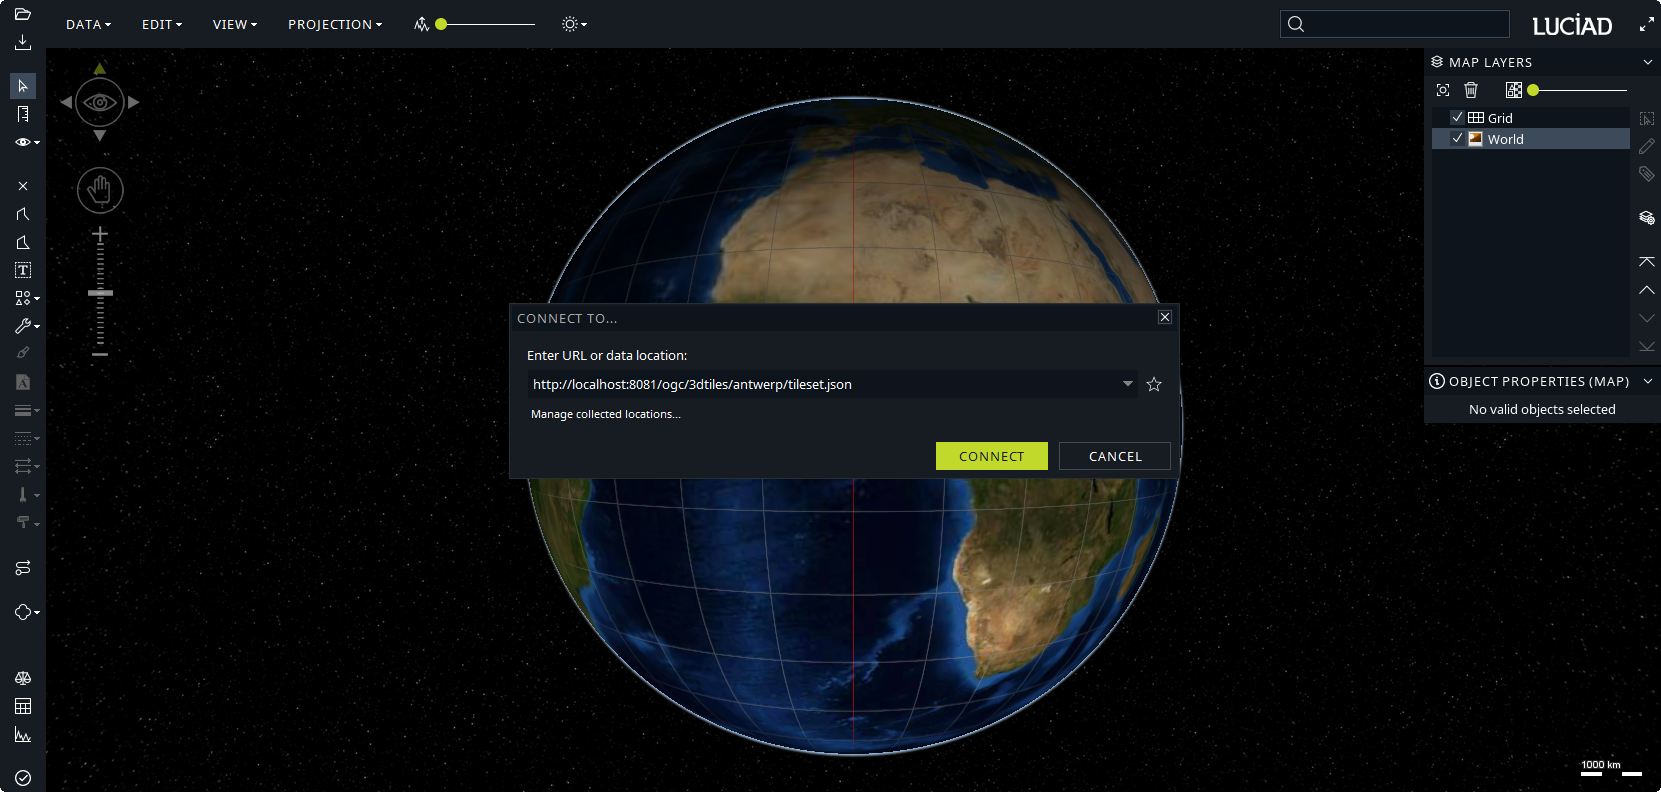
Connecting to the OGC3DTiles service from a client
You are now ready to use the data in client applications, such as LuciadLightspeed and LuciadRIA applications.
To connect to an OGC3D Tiles service and visualize the data, you need to know the endpoint URL of the service.
To find out what the endpoint URL is, go to SERVICES and click the title of the OGC 3D Tiles service in the list to open the details screen. Find the ENDPOINT URL entry.

You can copy that URL to the data loading code for your application, or fill it in the Connect to dialog in Lucy, for instance.